Chatlogs lets you review every conversation your chatbot has had with visitors. You can browse message history, inspect client details, filter and search conversations, export data, and add corrections to improve future responses. This data is kept safe and protected -- it is collected solely to help you identify and diagnose potential issues with your chatbot and to gain deeper insights into your customer base for better strategic planning.
Where to find Chatlogs
Select your chatbot from the dashboard and click the Chatlogs tab.
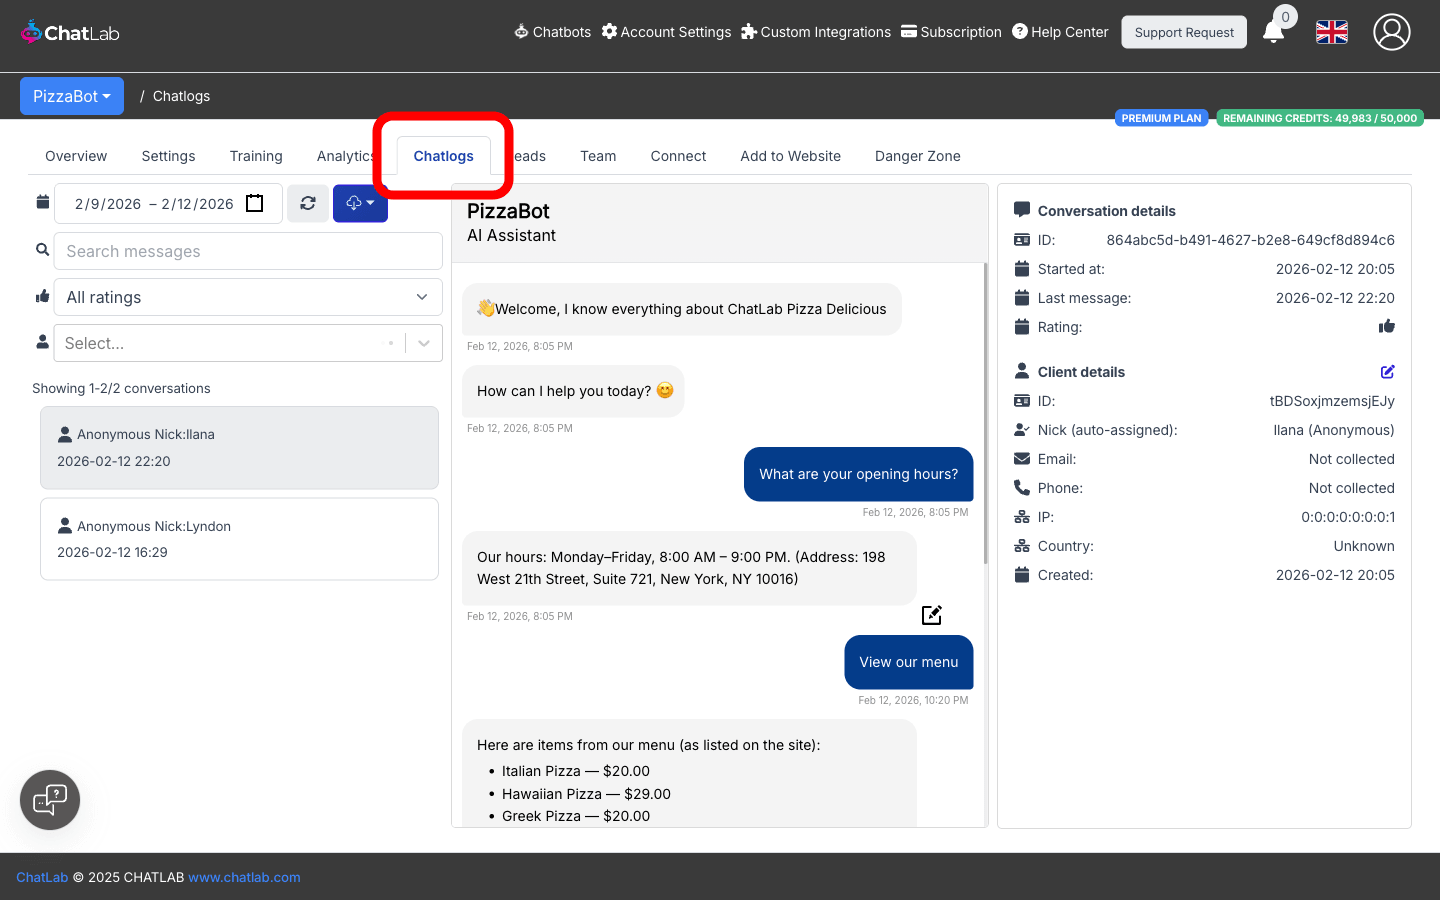
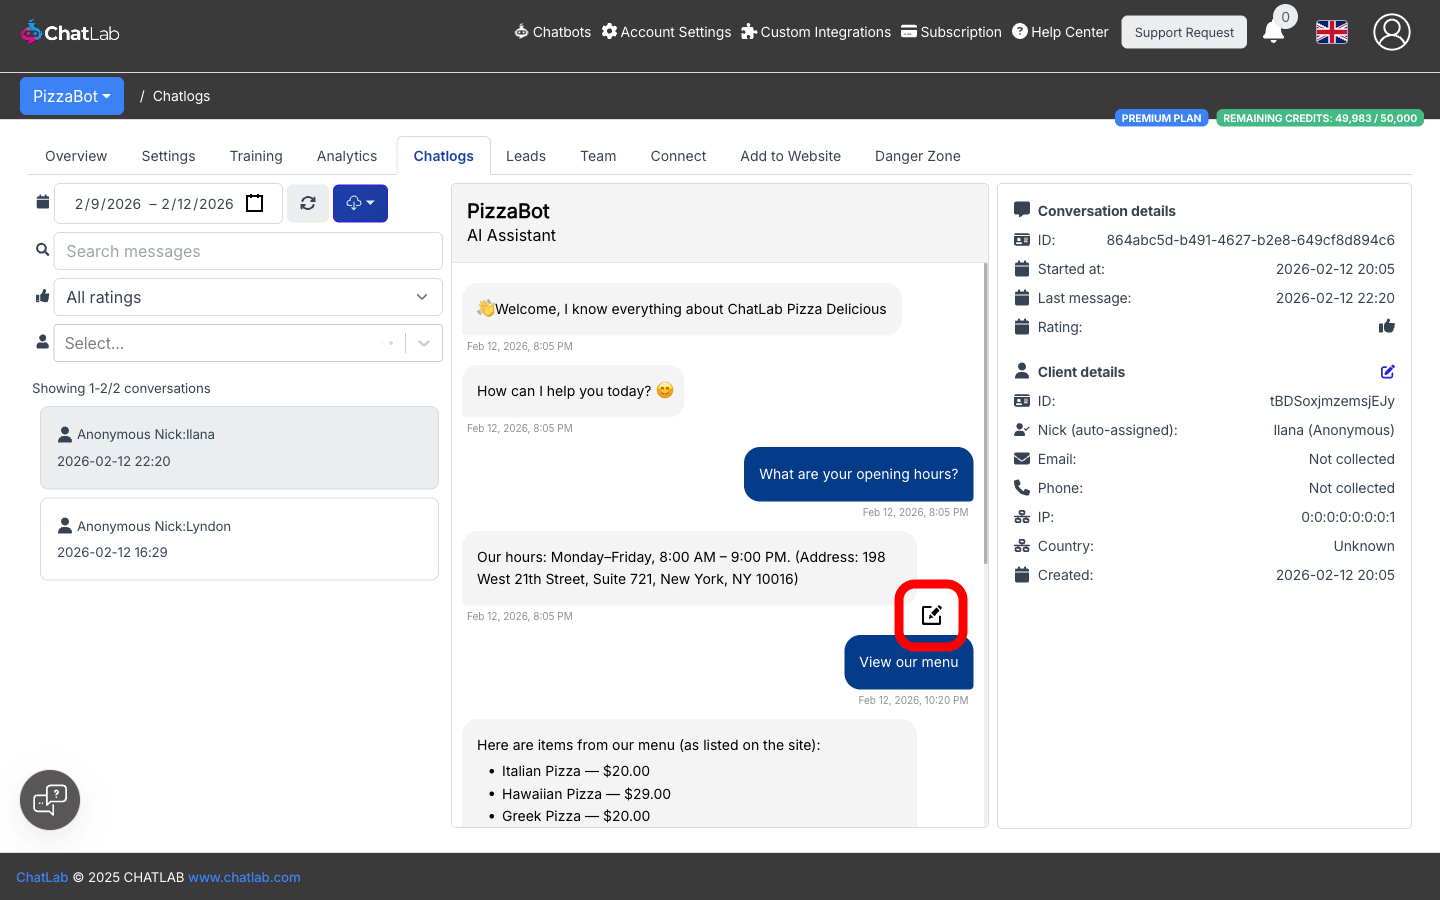
The Chatlogs screen is divided into three columns:
- Left -- filter controls and the conversation list
- Center -- the full message history for the selected conversation
- Right -- conversation details and client details
Filtering conversations
The filter panel at the top of the left column provides several ways to narrow down the conversation list.
- Date range -- set the start and end date to limit which conversations appear. By default, Chatlogs shows the last three days.
- Search messages -- type a keyword to find conversations containing specific text.
- Rating filter -- choose All ratings, Positive, or Negative to show only conversations with a matching user rating.
- Client filter -- start typing a name, email, or phone number to filter conversations from a specific visitor.
Results update automatically as you change the filters. The conversation count is shown below the filters (for example, "Showing 1-10/42 conversations").
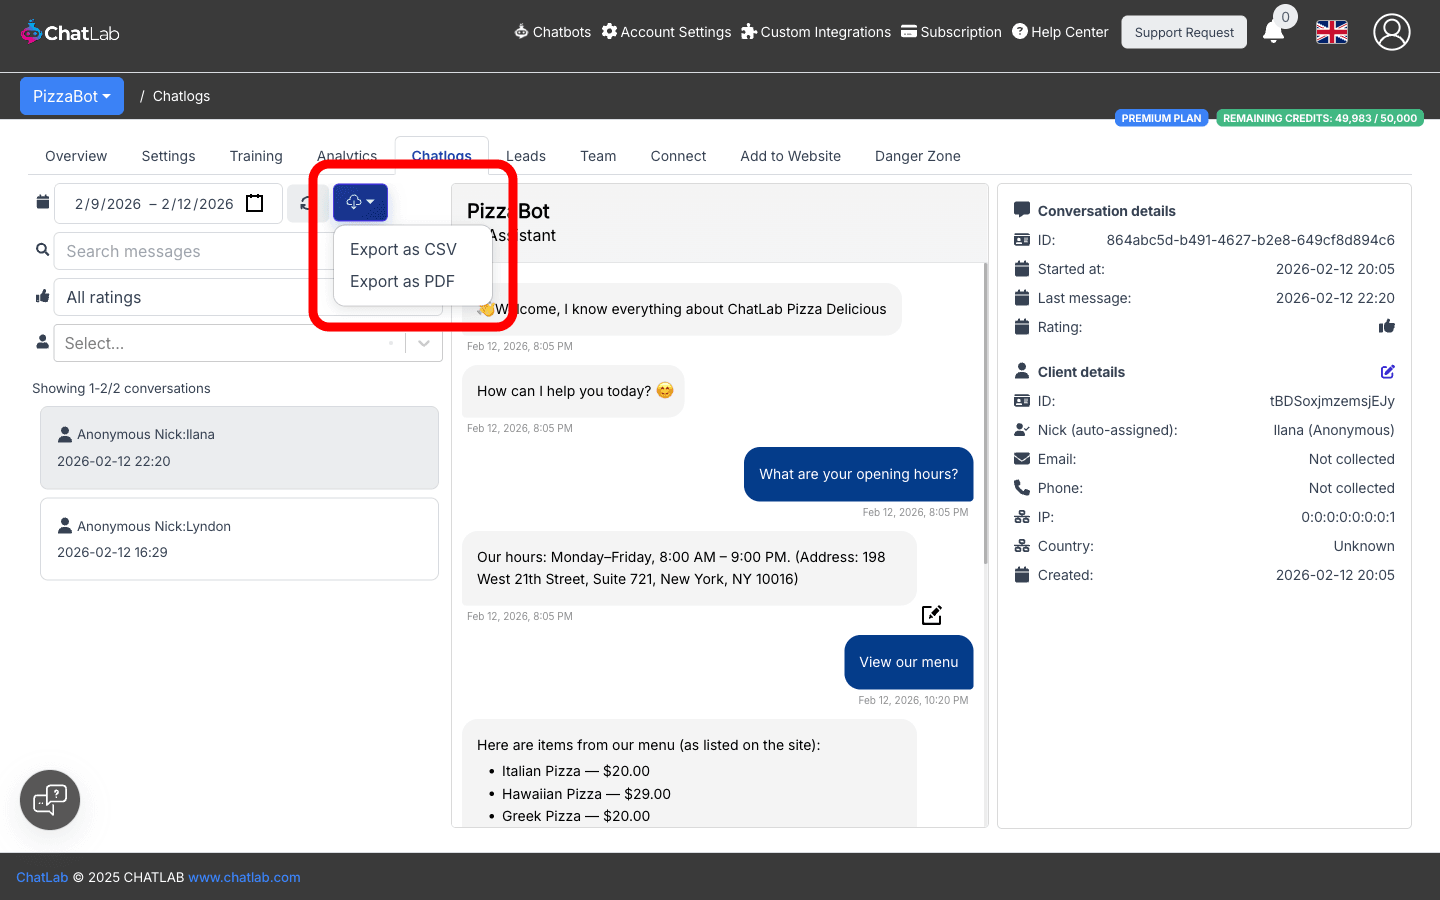
Exporting conversations
Click the download button next to the date range to open the export menu. Two formats are available:
- Export as CSV -- downloads a spreadsheet-compatible file
- Export as PDF -- downloads a formatted PDF document
The export includes all conversations that match your current filters (date range, keyword, rating).
Viewing a conversation
Click any conversation in the left-hand list to load its message history in the center column. Messages are displayed in the same format visitors see in the chat widget:
- Visitor messages appear on the right (dark background)
- Bot responses appear on the left (light background)
- Each message includes a timestamp
If the conversation includes special events -- such as a live chat session, a lead collection form submission, a product search, or a human support request -- those are rendered inline within the message history.
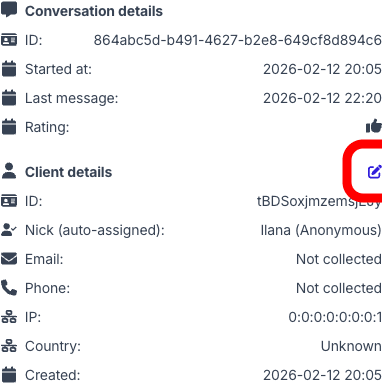
Conversation details
The right-hand panel shows metadata for the selected conversation:
- ID -- the unique conversation identifier
- Started at -- when the conversation began
- Last message -- timestamp of the most recent message
- Rating -- the visitor's thumbs-up or thumbs-down rating, if provided
If conversation summaries are enabled in your bot settings (Settings > Summaries & Memory), an AI-generated summary of the conversation also appears here.
Client details
Below the conversation details, the Client details section shows information about the visitor:
- ID -- unique client identifier
- Nick -- auto-assigned nickname (or the visitor's real name if provided via lead collection)
- Email and Phone -- contact details, if collected
- IP and Country -- network information and geographic location
- Created -- when the client record was first created
If conversation summaries are enabled, a Client profile summary may also appear, providing an AI-generated overview of the visitor across all their conversations.
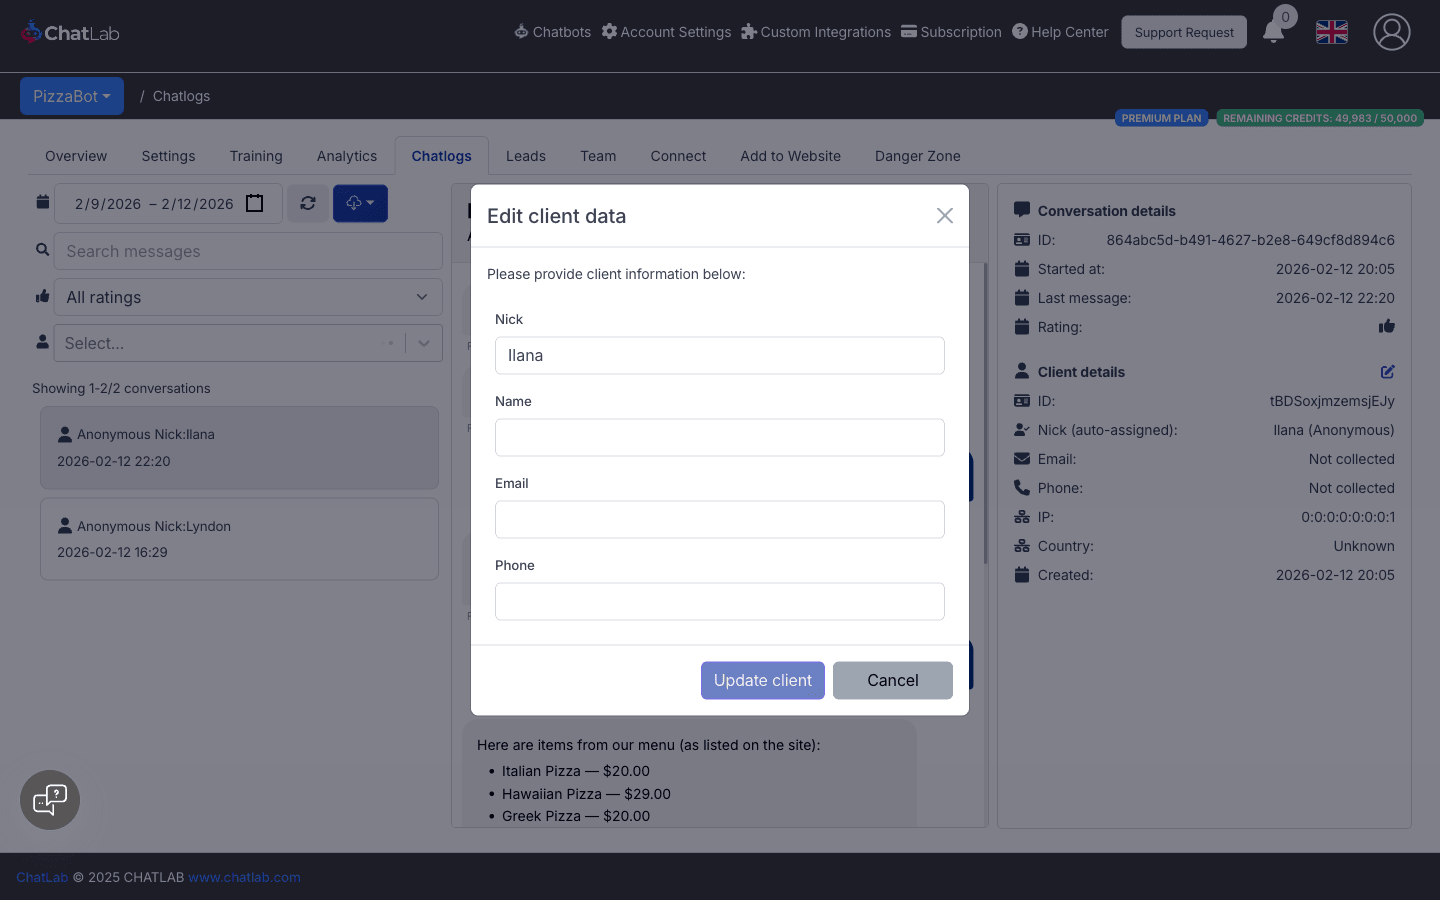
Editing client data
Click the edit icon next to the "Client details" heading to open the edit modal. You can update the client's nick, name, email, and phone number.
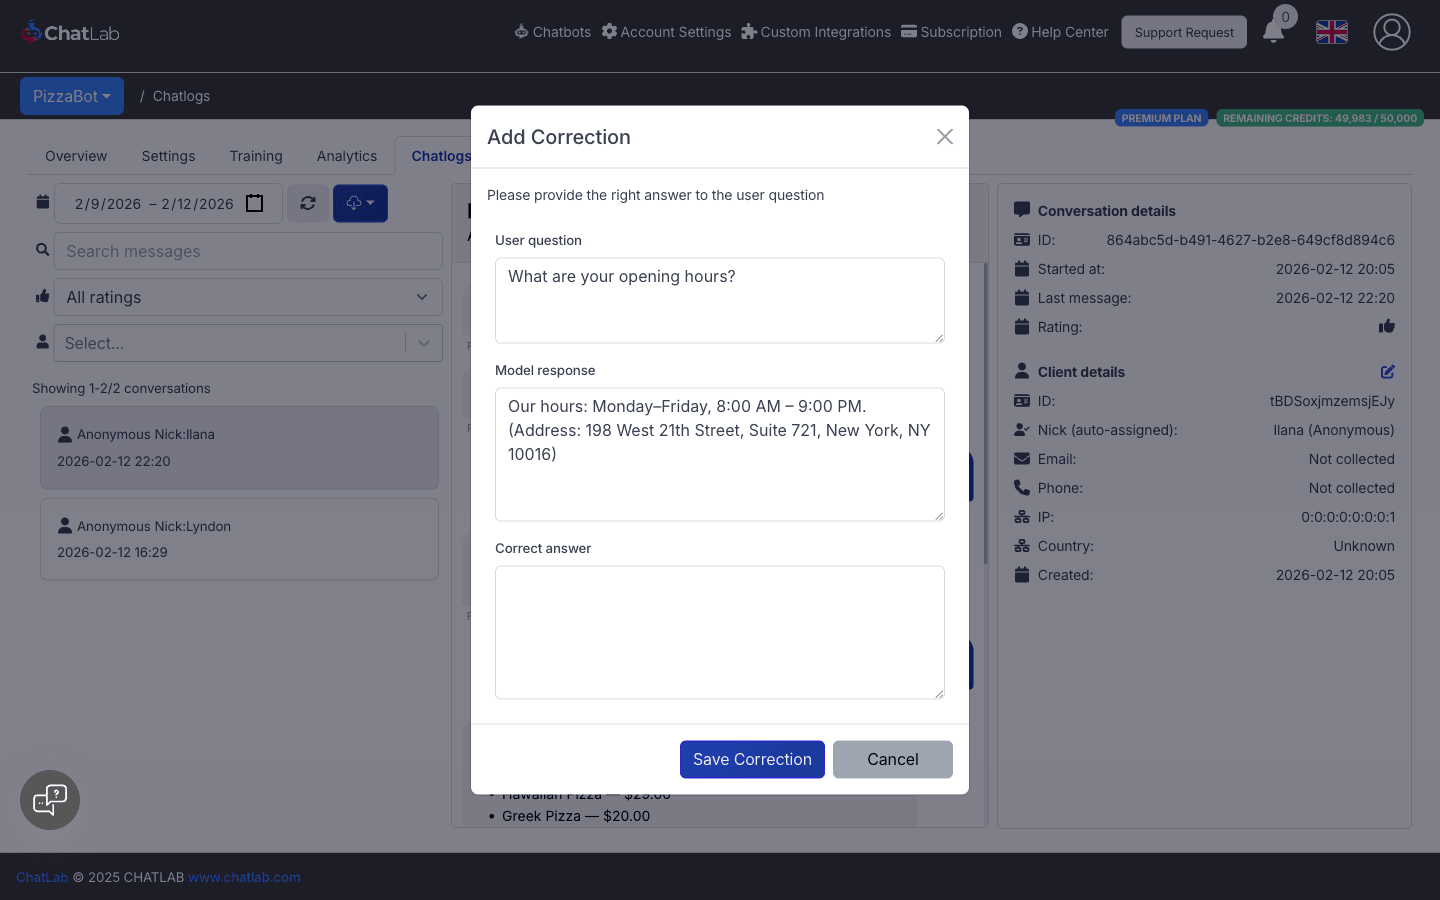
Adding corrections
When you spot an incorrect or improvable bot response, you can add a correction directly from Chatlogs. Click the edit icon in the bottom-right corner of any bot response.
A modal opens with three fields:
- User question -- the visitor's message (read-only)
- Model response -- the bot's original answer (read-only)
- Correct answer -- type the response the bot should have given
Click Save Correction to save. The correction is added to your bot's training data under Training > Corrections, helping the bot give better answers to similar questions in the future.
Live chat in Chatlogs
If a conversation has an active live chat session, it is indicated by a live chat icon on the conversation card in the left-hand list. When you select that conversation, the message input at the bottom becomes active, allowing you to type and send messages directly to the visitor in real time.