Security Settings help protect your chatbot from abuse, spam, and unauthorized access. You can restrict where your chatbot appears, limit message frequency, block specific IPs or countries, and enable automatic spam detection.
Where to Find Security Settings
From the main ChatLab administration page, select Chatbots in the main menu, click on the chatbot you want to configure, go to the Settings tab, then select Security in the left sidebar.
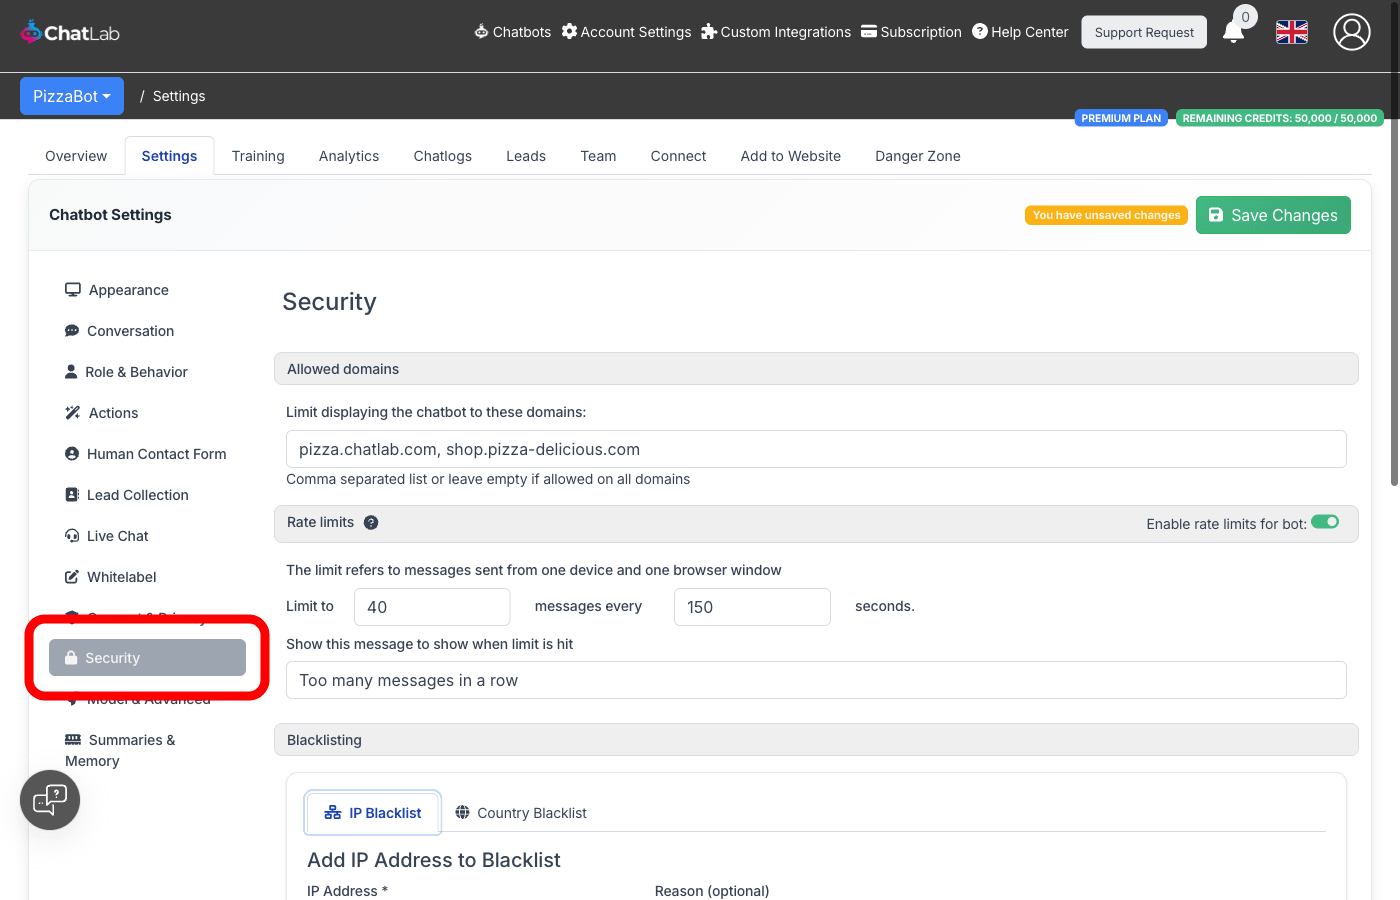
Allowed Domains
This setting restricts which websites can display your chatbot widget. By default, your chatbot can be embedded on any website.
To limit your chatbot to specific domains:
- Enter the domain names in the Allowed Domains field
- Separate multiple domains with commas (e.g.,
example.com, shop.example.com) - Click Save Changes
Leave the field empty to allow the chatbot on all domains.

This is useful when you want to prevent others from embedding your chatbot on unauthorized websites.
Rate Limits
Rate limits protect your chatbot from abuse by restricting how many messages a single user can send within a given time period. When the limit is exceeded, the chatbot displays a custom message instead of responding.
To configure rate limits:
- Toggle Enable rate limits for bot to ON
- Set the message limit (default: 40 messages)
- Set the time window in seconds (default: 150 seconds)
- Customize the message shown to users when the limit is exceeded
- Click Save Changes

The limit applies per device and per browser window. The same user opening multiple browser tabs will have separate limits for each tab.
IP Blacklist
Block specific IP addresses from interacting with your chatbot. This is useful when you identify abusive users or want to prevent access from specific sources.
To add an IP to the blacklist:
- In the Blacklisting section, select the IP Blacklist tab
- Enter the IP address (IPv4 or IPv6 format)
- Optionally add a reason for blocking
- Click Add

To remove an IP from the blacklist, find it in the Blocked IP Addresses table and click Remove.
Country Blacklist
Block all traffic from specific countries. This is useful when you receive significant spam from particular regions, or when your service is only available in certain countries.
To block a country:
- In the Blacklisting section, select the Country Blacklist tab
- Choose a country from the dropdown
- Optionally add a reason for blocking
- Click Add
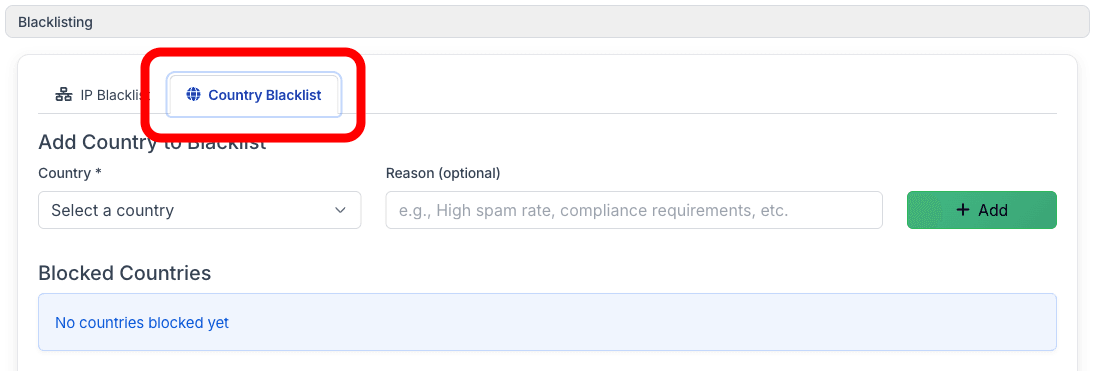
To unblock a country, find it in the Blocked Countries table and click Remove.
Spam Filter
The spam filter automatically detects and blocks suspicious activity targeting your chatbot. When enabled, the system monitors for patterns such as excessive messages, repeated message sequences, and rapid session creation, and temporarily blocks offending IP addresses.
To enable the spam filter, toggle Enable spam filter to ON and click Save Changes.
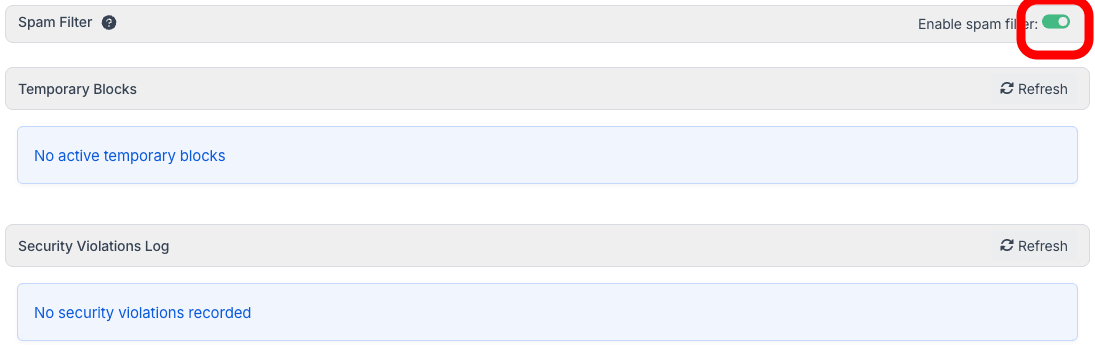
When the spam filter is enabled, two additional sections appear:
-
Temporary Blocks -- Shows IP addresses currently blocked by the spam filter. Each entry displays the IP address, the rule that was triggered, when the block started, when it expires, and the number of violations. You can manually remove a temporary block by clicking the delete button next to the entry. Click Refresh to load the latest data.
-
Security Violations Log -- A read-only history of all security events detected by the spam filter. Click Refresh to load the latest events.

The Security Violations Log shows the following details for each event:
- Date/Time -- When the violation occurred
- IP Address -- The source IP
- Country -- Country code of the IP (if detected)
- Rule -- Which security rule was triggered
- Action -- What action was taken (e.g., Temporary Block)
- Duration -- How long the block lasts