Connect your ChatLab chatbot with your CS-Cart store to give customers real-time access to product information and order tracking directly in the chat.
Important: E-Commerce Best Practices
After completing the integration below, read the comprehensive guide on optimizing your chatbot for e-commerce: How to set up ChatLab for your E-commerce store
What the Integration Provides
Product Search -- Customers can search your CS-Cart catalog by entering a phrase. The chatbot returns matching products with:
- Product name and description
- Price
- SKU (product code)
- Direct link to the product in your store
- Product image
- Available variants (sizes, colors, etc.)
You can configure which product fields are searched (name, short description, full description, keywords) and how many results to return.
Order Details -- Customers can check order status by providing their order ID and email address. The chatbot returns:
- Order status
- Ordered items with names, prices, quantities, product images, and chosen variants
- Order total and shipping cost
- Shipping carrier, tracking number, and shipment status
- Recipient name and full delivery address
- Customer phone
Step 1: Enable API Access in CS-Cart
- Log in to your CS-Cart administration panel
- Navigate to Customers > Administrators
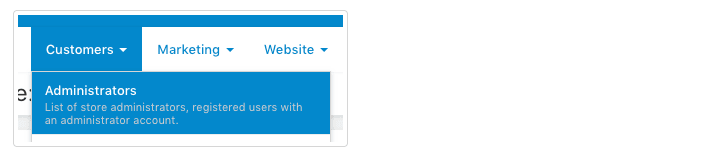
- Click on the administrator account that will be used for the API connection
- Switch to the API access tab
- Check "Yes, allow this user to use the API"
- Click Save

- Copy the API key displayed after saving -- store it securely
- Note the email address associated with this administrator account
Step 2: Connect CS-Cart in ChatLab
- Log in to ChatLab and select your bot
- Go to the Connect tab
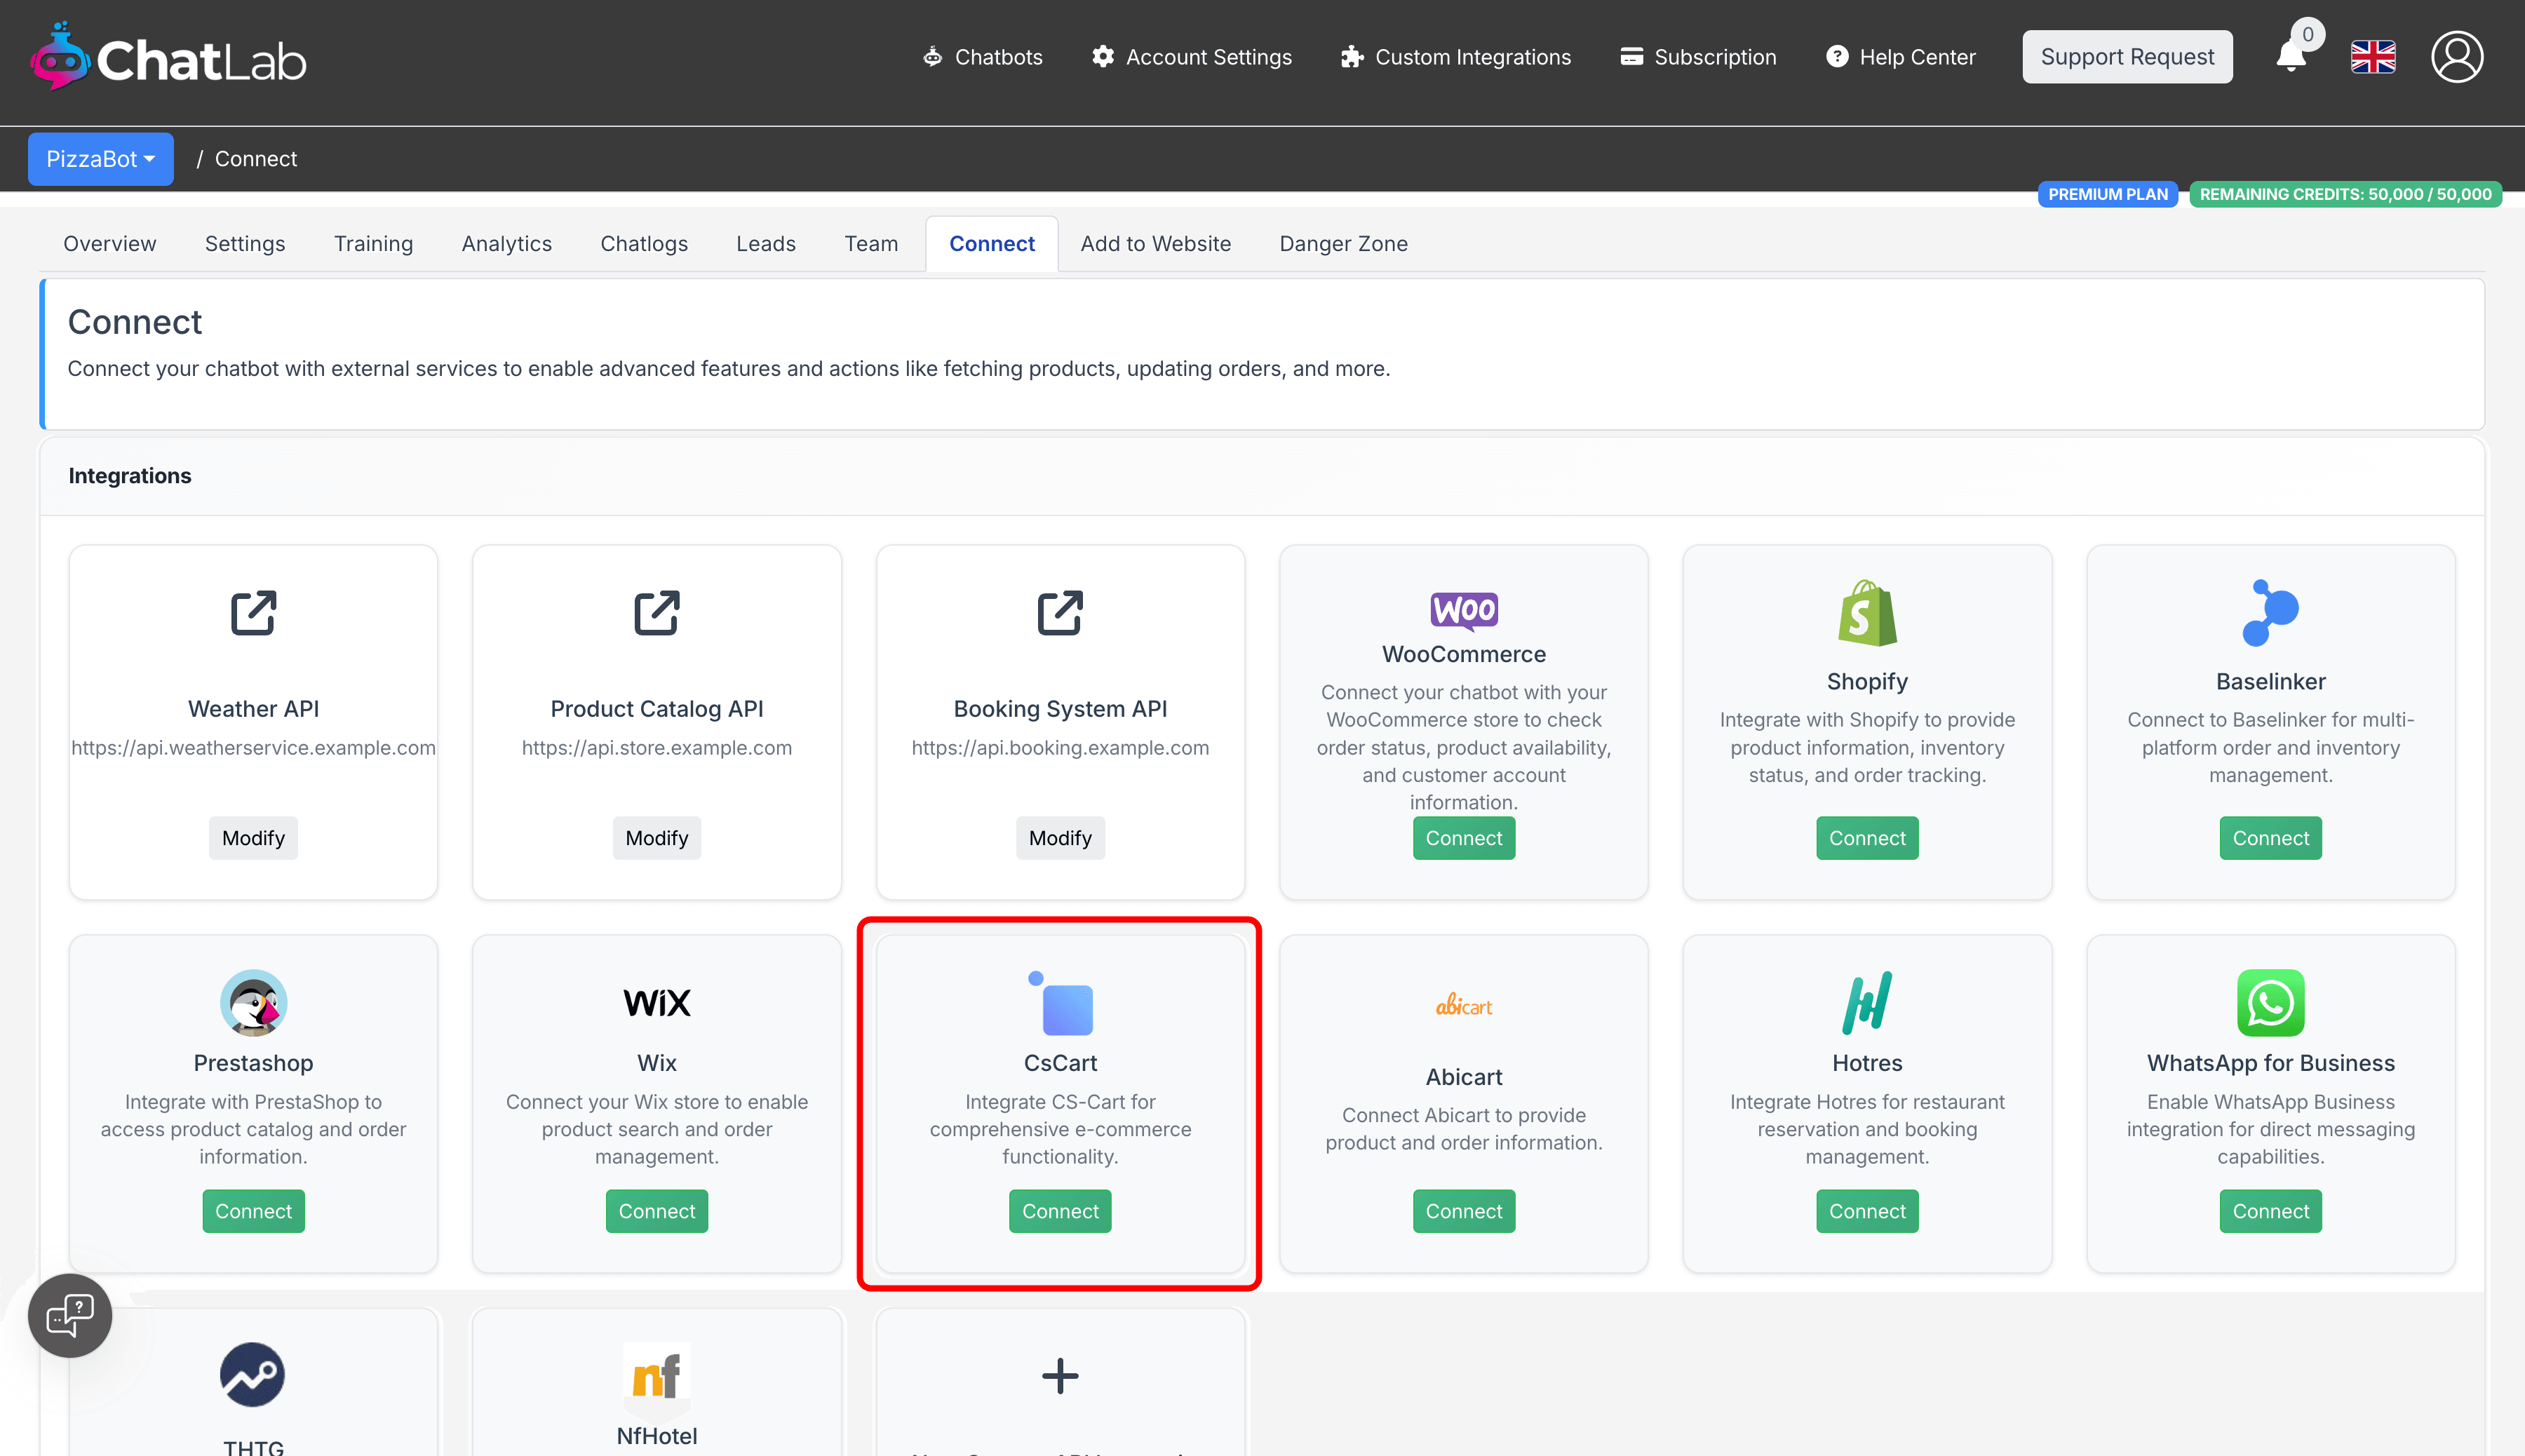
- Click Connect on the CS-Cart tile
- Enter your API Key (from Step 1)
- Enter your Account Email (the administrator email with API access)
- Enter your Shop Url (e.g.,
https://yourstore.com)
You can also configure search options:
- Searchable fields -- toggle which product fields the chatbot searches through (product name, short description, full description, keywords)
- Number of search results -- how many products to return per query (default: 5)
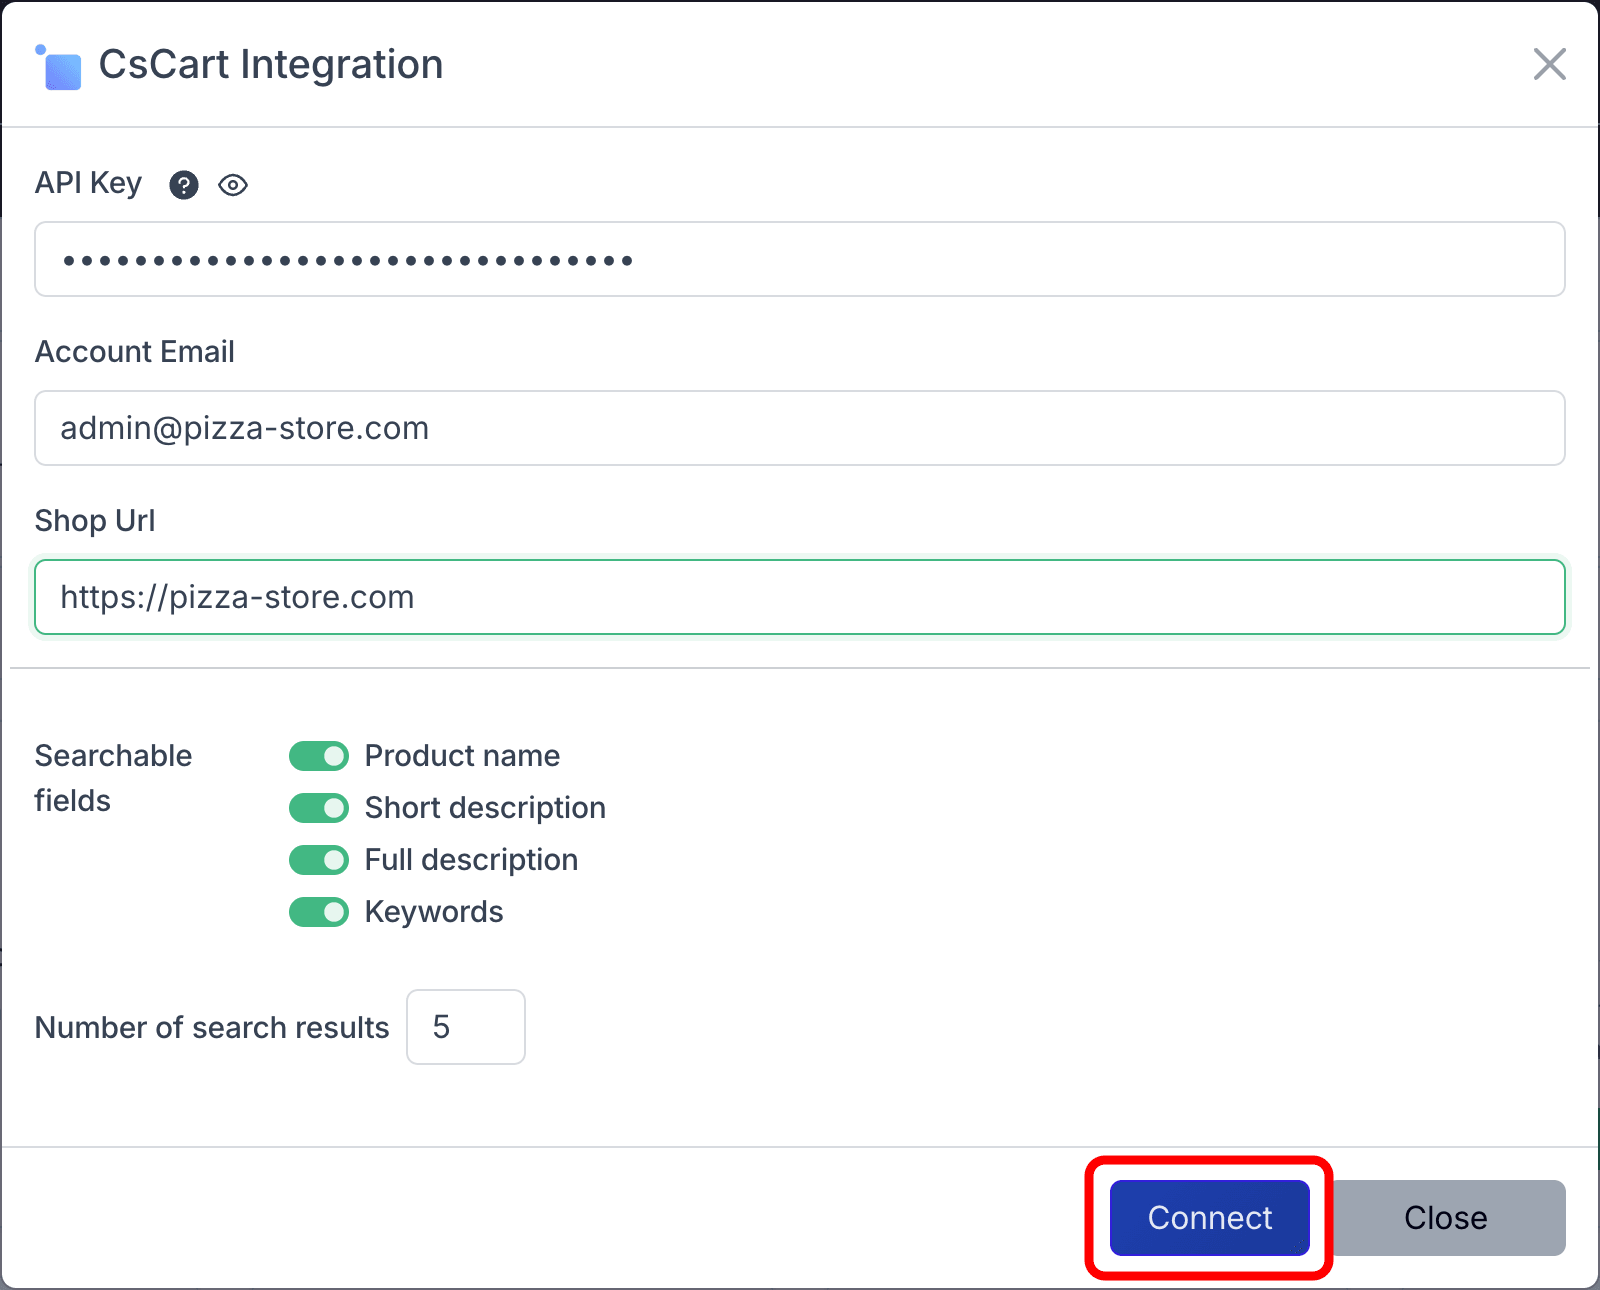
- Click Connect
After a successful connection, you will see a confirmation message with the option to configure AI actions.
Step 3: Configure CS-Cart Actions
After connecting, enable and customize individual AI actions. Navigate to Settings > Actions and filter by the CsCart platform.
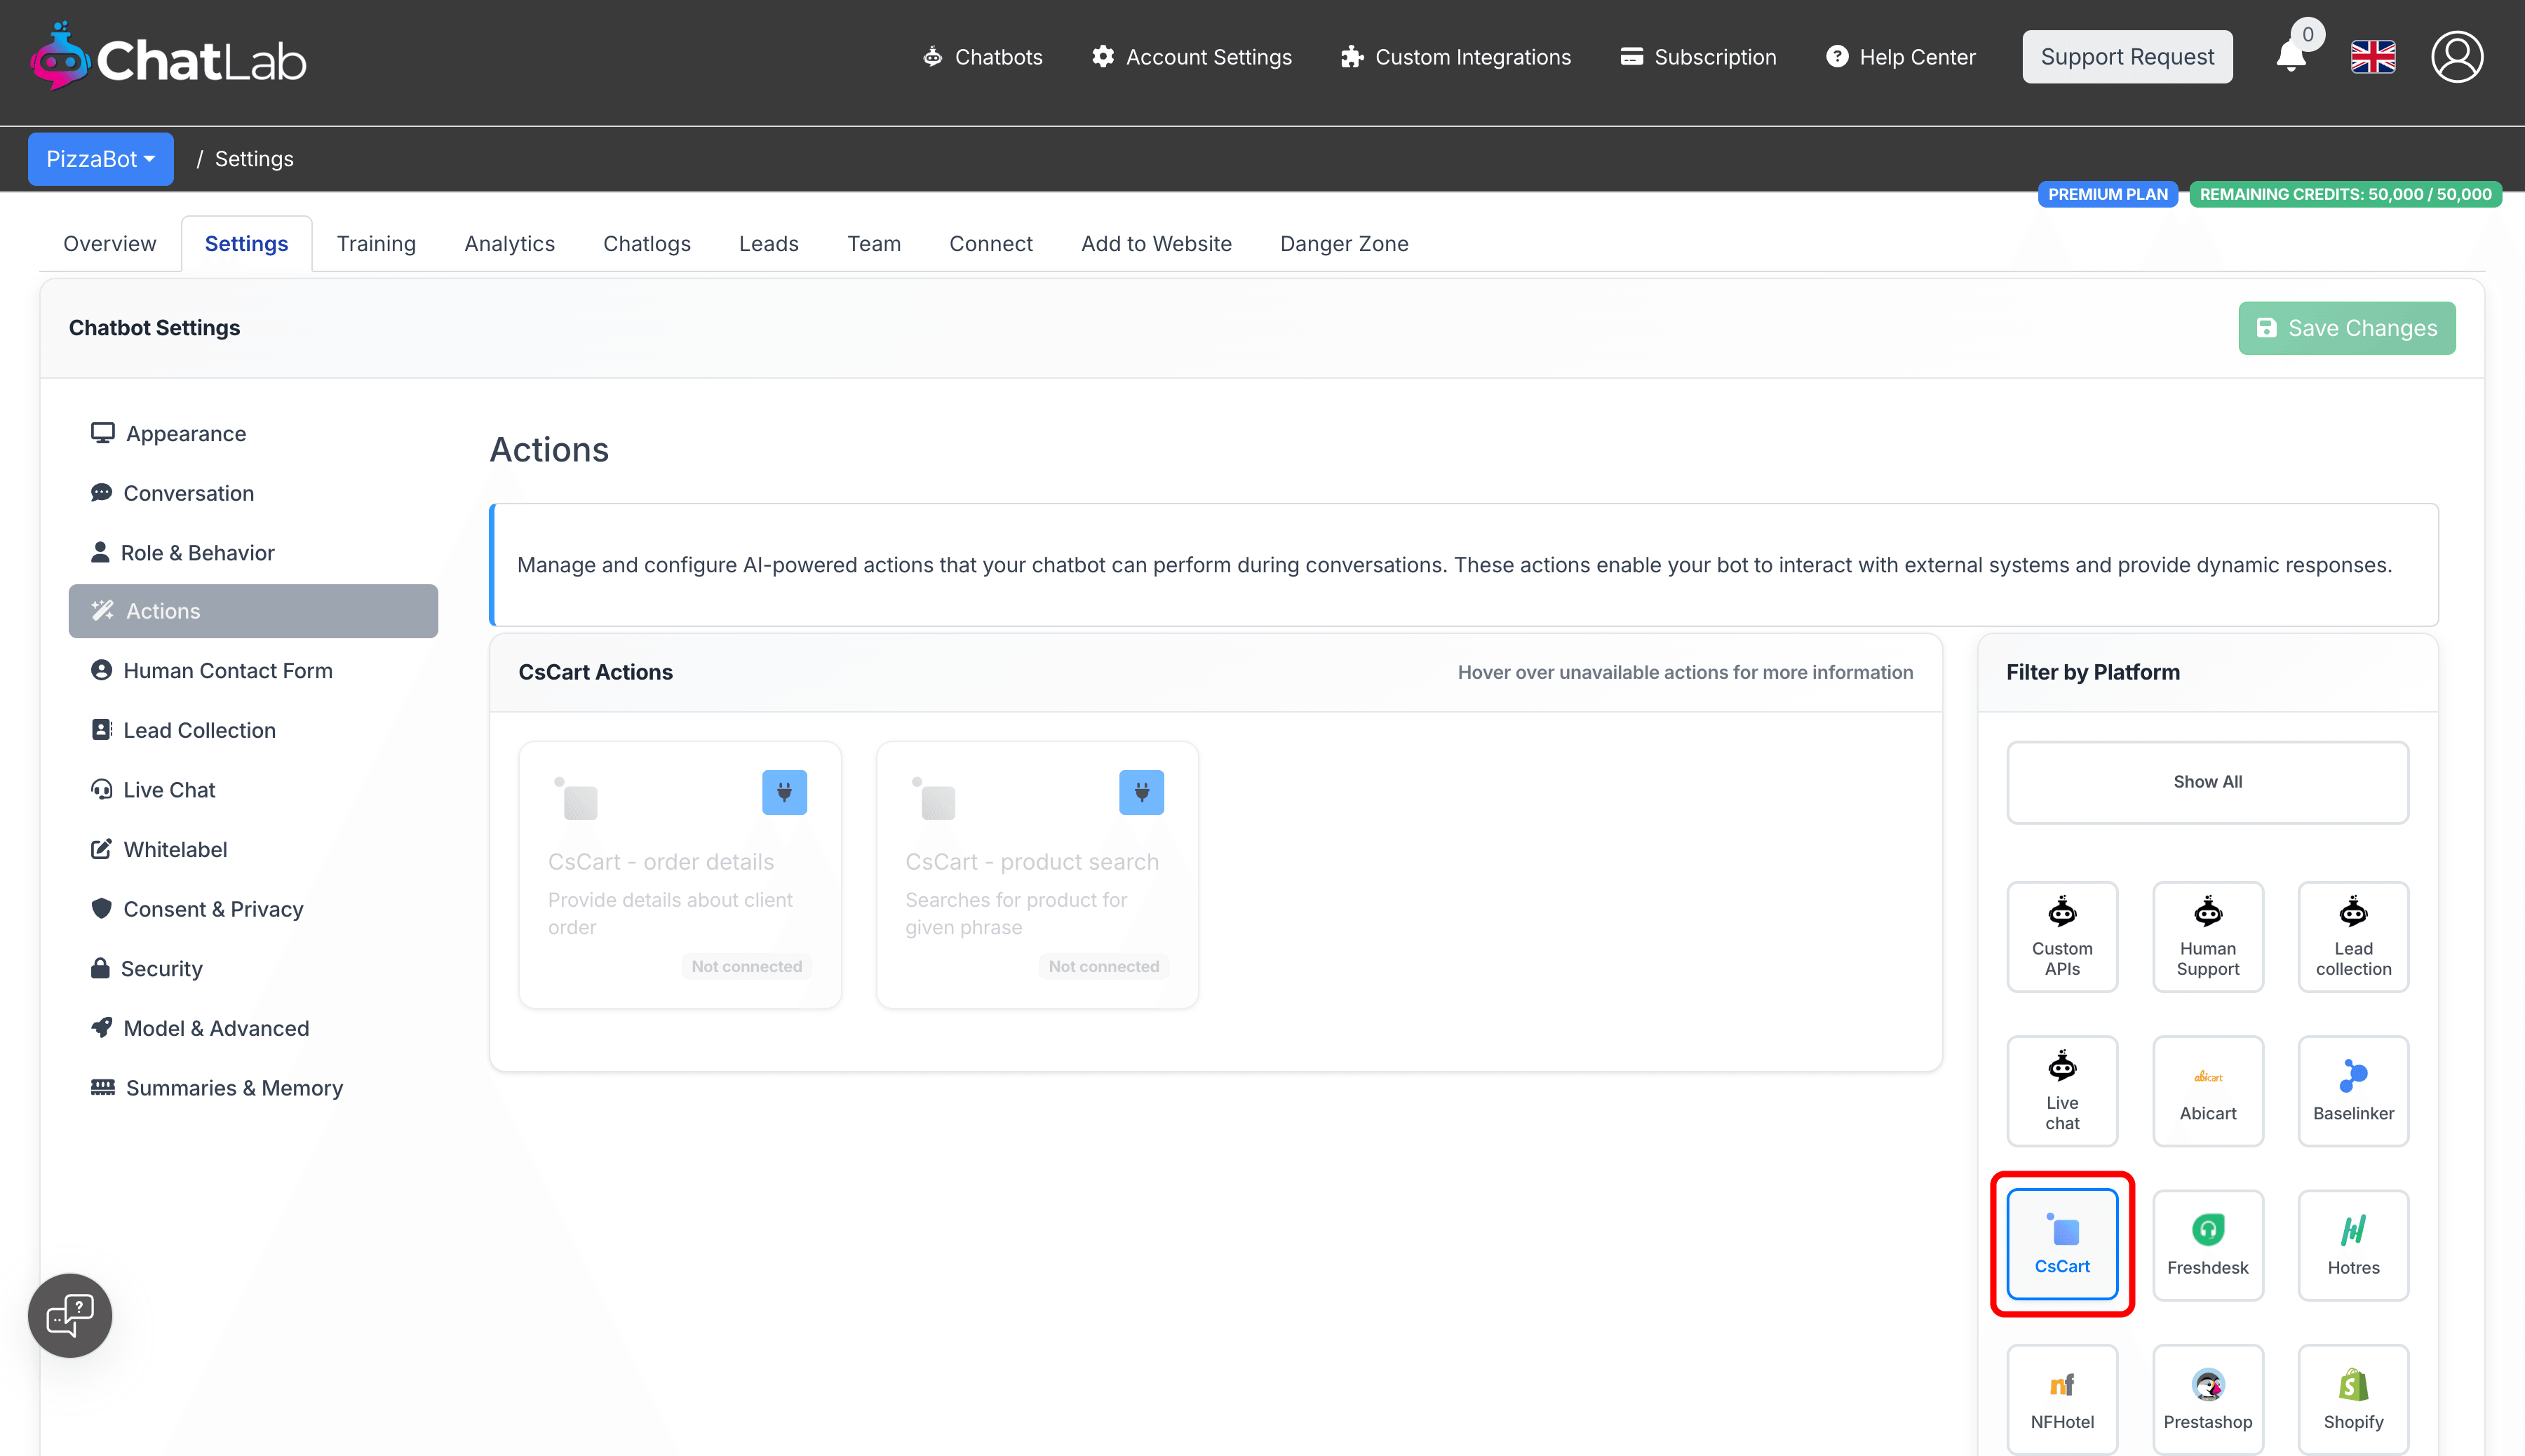
Two actions are available:
- CsCart - product search -- enables the chatbot to search your product catalog
- CsCart - order details -- enables the chatbot to look up order information
Click the activate button on each action to enable it. You can also customize the action label (the message shown to users while the action runs) and the instructions that guide how the AI uses each action.
Testing Your Integration
After activating the actions, open your chatbot widget and try:
- "Show me training gloves" (tests product search)
- "What's the status of my order 12345?" (tests order details)
Verify the responses match data from your CS-Cart store.
Tips for Search Configuration
- Enable Product name and Short description for best balance of speed and accuracy
- Add Keywords if your products have rich keyword metadata
- Only enable Full description if shorter fields don't return good results -- it may slow down searches
- Start with 5 results per query and adjust based on your catalog size
Install Chatbot on Your CS-Cart Store
To add the chat widget to your CS-Cart storefront:
- In ChatLab, go to the Add to Website tab for your bot
- Select the CS-Cart platform tab
- Copy the code snippet
- In your CS-Cart admin, go to Design > Layouts
- Paste the code snippet into a custom HTML block
- Save the layout changes