Connect your ChatLab chatbot with your Wix store to give customers real-time access to order tracking directly in the chat.
Example conversation
Check an order
Requires a connected store and its enabled order action. Available fields depend on the integration. Matching an email address is not proof of identity.

Visitor: Where is my order?
Play the example or read it below. No real customer data is used.The customer asks about an existing order.
Playback pauses when this example leaves the screen. This is a simulation, not a live chat. Widget controls inside the playback are not interactive.Read the complete example
- The customer asks about an existing order.
Visitor: Where is my order?
- The default lookup needs both identifiers.
Assistant: Please give me your order number and the email address used at checkout.
- Use fictional data in this example.
Visitor: 41982, anna@example.com
- The action queries the connected store.
Checking order 41982...
- Report only information returned by the store.
Assistant: Order 41982 is marked as shipped. The carrier is DPD. Please check the tracking page for delivery updates.
The example illustrates the customer experience. The available actions and returned information depend on this integration and your configuration.
Before you start
Create or select a chatbot first. You need permission to manage its integrations and access to the external account's connection settings. If the Connect tile shows an upgrade or contact prompt, check that your subscription includes this integration. Keep API credentials private; never paste them into website embed code.
Important: E-Commerce Best Practices
After completing the integration below, read the comprehensive guide on optimizing your chatbot for e-commerce: How to set up ChatLab for your E-commerce store
What the Integration Provides
Order Details - Customers can check order status by providing their order number and email address. Both values are validated against your Wix store records. The chatbot returns:
- Order number, date, and current status
- Order total and currency
- Payment status
- Ordered items with names, quantities, prices, SKU, and product image
- Shipping address and billing address (name, company, street, city, postal code, country, phone)
- Delivery method and estimated delivery time
Step 1: Get Your Wix Site ID
- Sign in to your Wix admin dashboard
- In your browser's address bar, locate the
siteIdparameter in the URL - Copy the Site ID value

Step 2: Create a Wix API Key
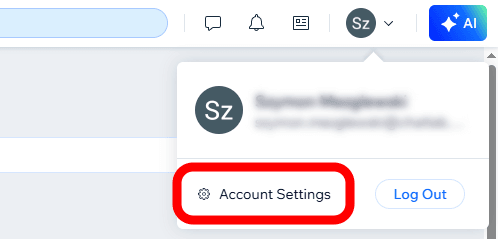
- In the Wix dashboard, click your profile icon (top-right) and select Account Settings
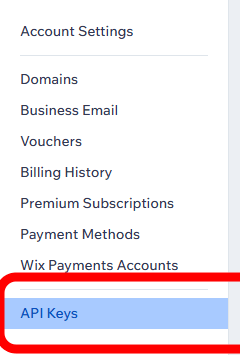
- Open the API Keys section from the left sidebar
- Click Generate API Key

- Name your key (e.g., "chatlab") and grant these permissions from the All site permissions group:
- Wix Stores
- Wix eCommerce
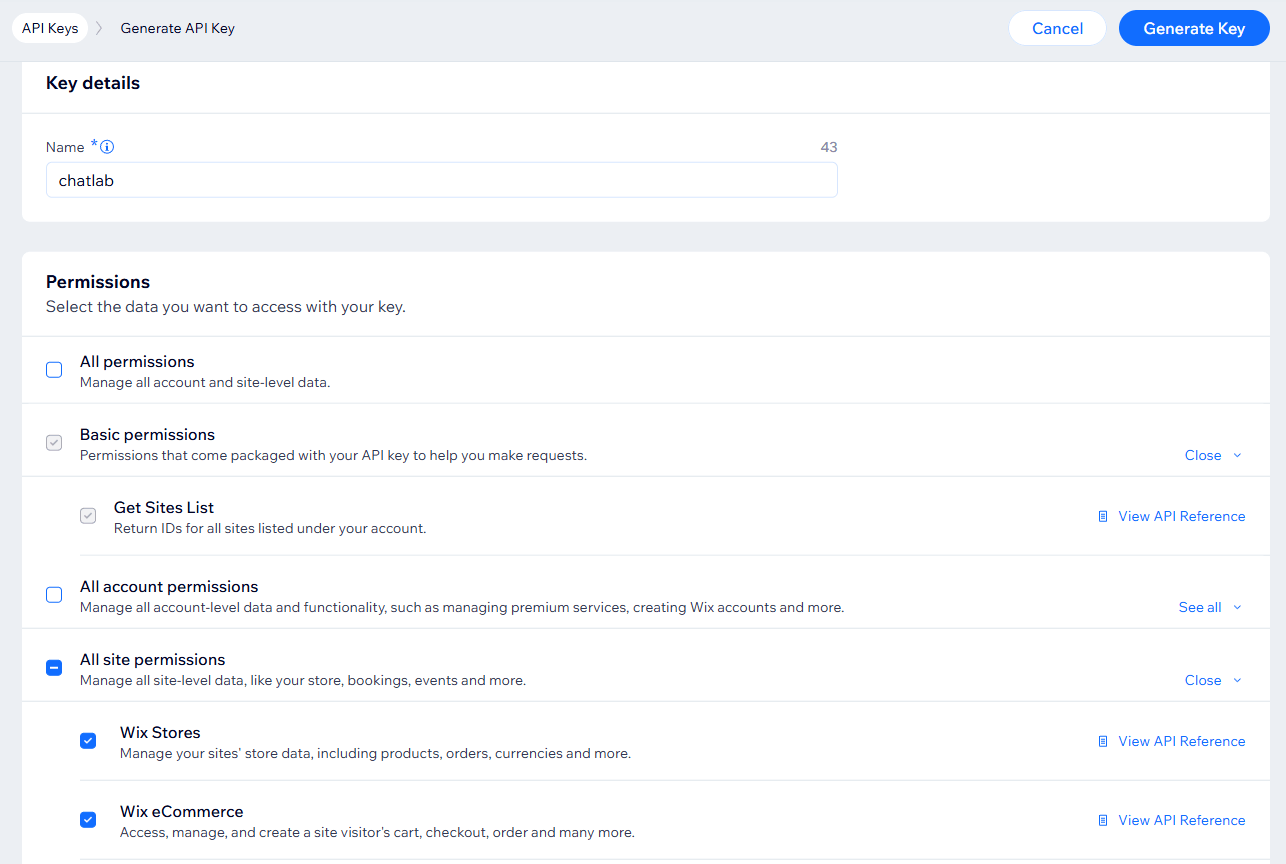
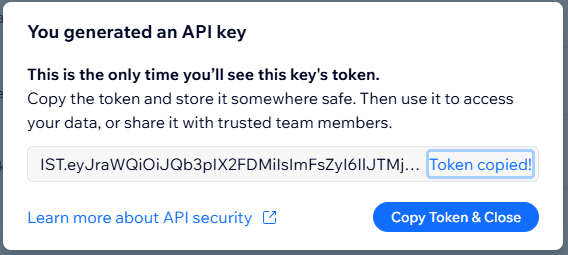
- Click Generate Key, complete any security prompts, and copy your API key from the one-time display - store it securely, as it cannot be shown again
Step 3: Get Your Account ID
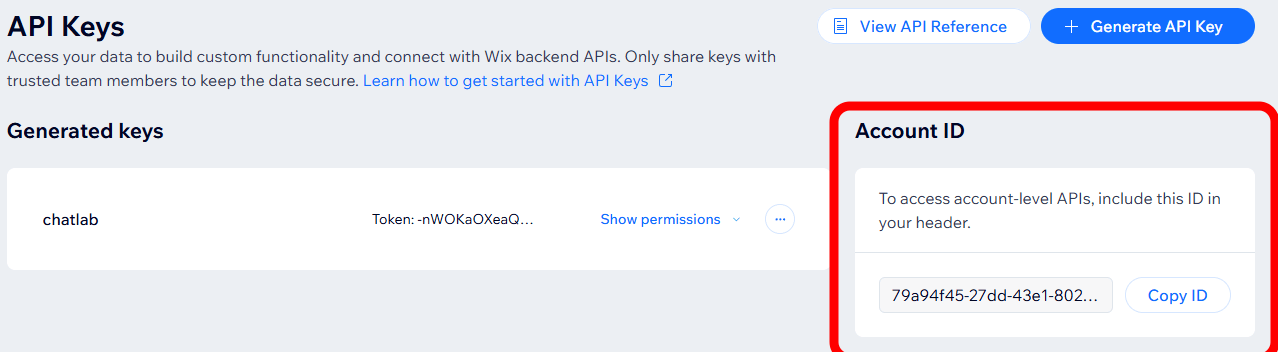
After closing the API key dialog, find the Account ID on the right side of the API Keys page. Click Copy ID to copy it.
Step 4: Connect Wix in ChatLab
- Log in to ChatLab and select your bot
- Go to the Connect tab

- Click Connect on the Wix tile
- Enter your API Key (from Step 2)
- Enter your Account Id (from Step 3)
- Enter your Site Id (from Step 1)

- Click Connect
ChatLab automatically tests the connection by verifying that your API key has the required permissions. If successful, you will see a confirmation message.
Step 5: Configure Wix Actions
The order details action is enabled when the connection is configured successfully. Review it after connecting. Navigate to Settings > Actions and filter by the Wix platform.

Open Wix - order details to review it; enable it if it is disabled. You can also customize the action label (the message shown to users while the action runs) and the instructions that guide how the AI uses the action.
Testing Your Integration
After activating the action, open your chatbot widget and try:
- "What's the status of my order #1001?" (tests order details)
Verify that the response matches data from your Wix store, including order status, items, and addresses.
Install Chatbot on Your Wix Website
To add the chat widget to your published Wix site with a connected domain, use Wix's Custom Code feature:
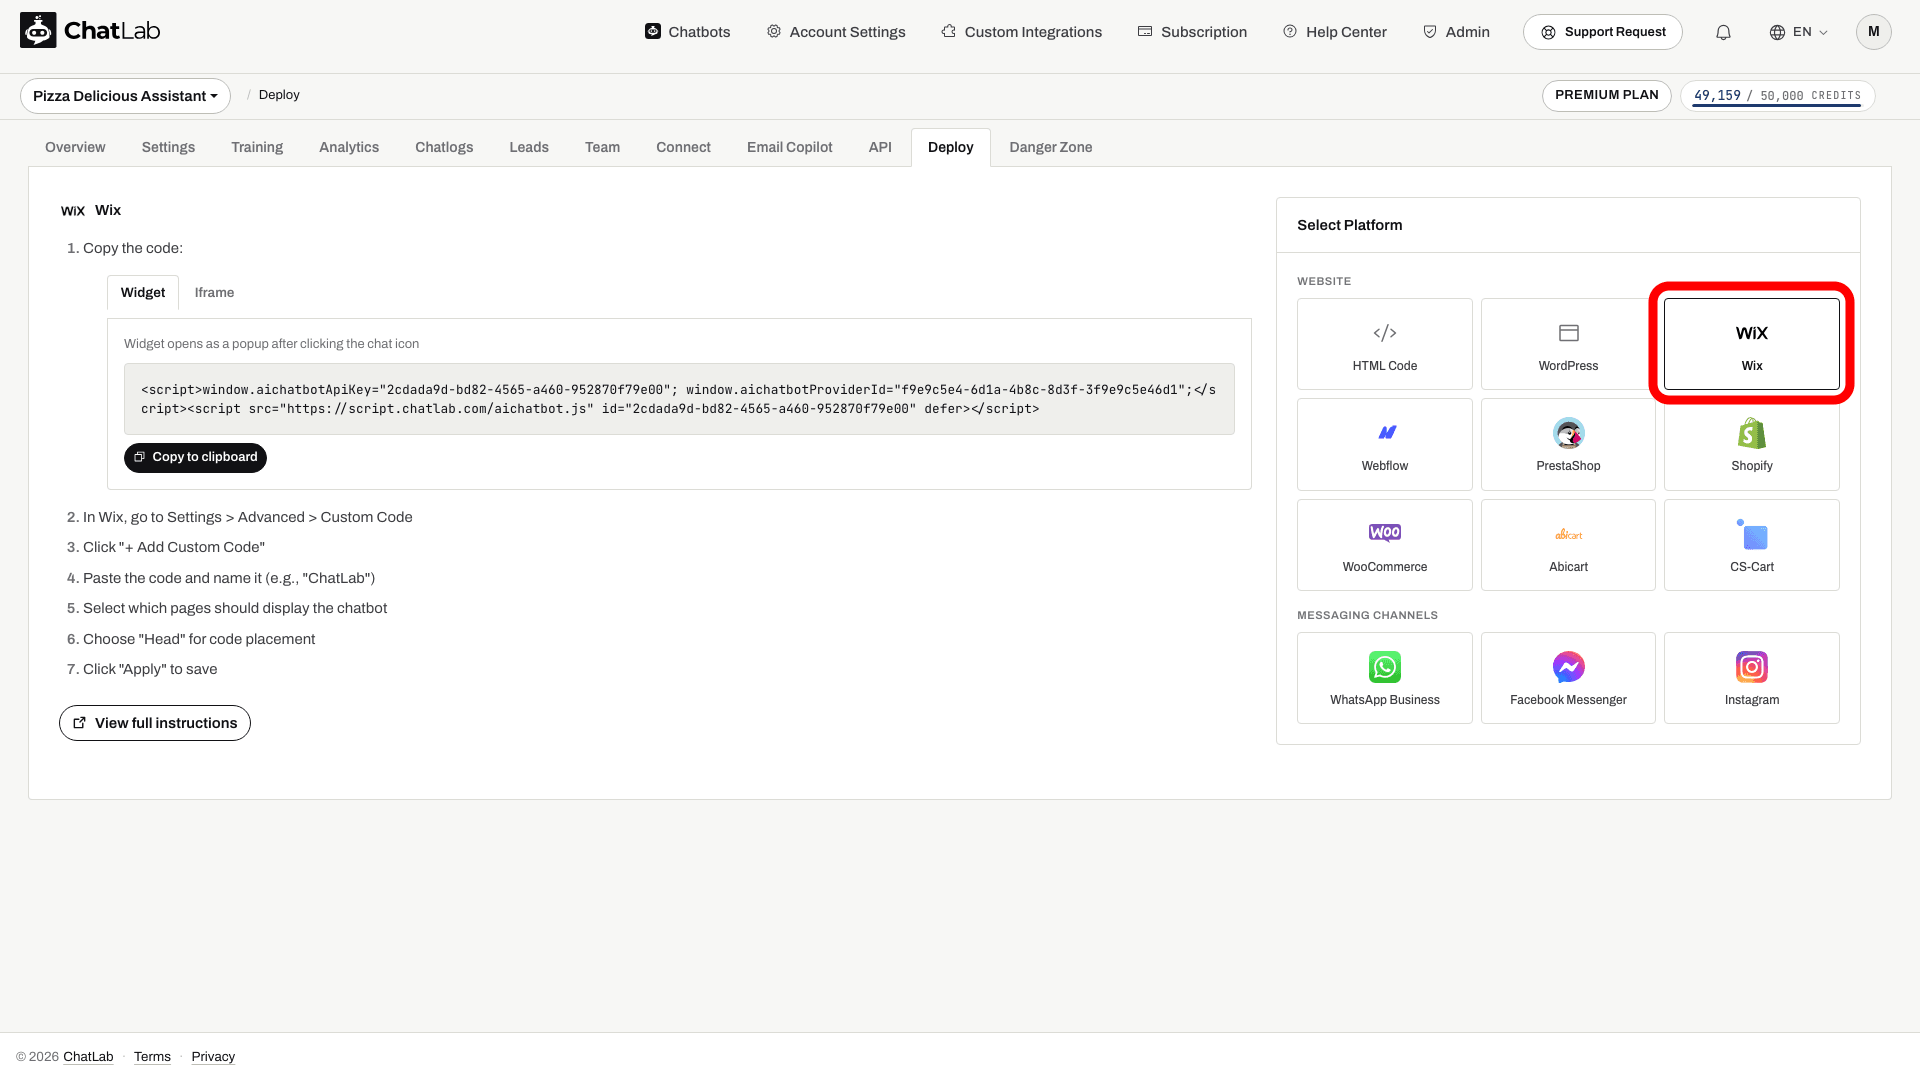
- In ChatLab, go to the Deploy tab for your bot
- Select the Wix platform tab
- Select Widget and copy the code snippet
- In Wix, go to Settings > Custom Code (under Development & integrations; older dashboards may show Advanced)
- Click + Add Custom Code
- Paste the code and name it (e.g., "ChatLab")
- Select which pages should display the chatbot
- Choose Head for code placement
- Click Apply to save
For detailed widget installation instructions, see How to add your chatbot to Wix website.