Connect your ChatLab chatbot with your Freshdesk helpdesk to give customers the ability to create support tickets, check ticket status, and add notes to existing tickets directly in the chat.
What the Integration Provides
Get Tickets -- Customers can check their recent support tickets by providing their email address. The chatbot retrieves the 5 most recent tickets with:
- Ticket ID, subject, and status
- Creation and last update dates
Create Ticket -- Customers can submit new support tickets through the chat. The chatbot collects the required information and creates the ticket in Freshdesk with:
- Customer email and name (contact is automatically created or linked)
- Configurable custom fields (subject, description, priority, category, and any Freshdesk-specific fields)
- After successful creation, the chatbot confirms and returns the new ticket ID for reference
- If the customer provides a value that doesn't exactly match Freshdesk options, the system suggests the closest matching values
Add Ticket Note -- Customers can add follow-up comments to existing tickets by providing their email, ticket ID, and the note content. The system verifies that the ticket belongs to the requesting customer before adding the note. If the provided ticket ID is incorrect, the chatbot displays the customer's recent open tickets so they can identify the right one.
Step 1: Get Your Freshdesk API Key
- Log in to your Freshdesk account
- Click your profile picture in the top right corner
- Go to Profile Settings
- Your API key is displayed on the right side of the settings page
- Copy the API key for use in ChatLab
For more details on Freshdesk API authentication, refer to the Freshdesk API documentation.
Step 2: Connect Freshdesk in ChatLab
- Log in to ChatLab and select your bot
- Go to the Connect tab
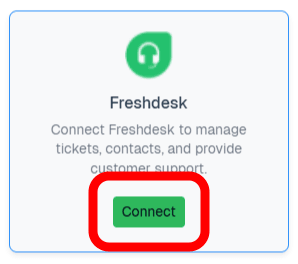
- Click Connect on the Freshdesk tile
- Enter your Freshdesk URL (e.g.,
https://yourcompany.freshdesk.com) - Enter your API Key
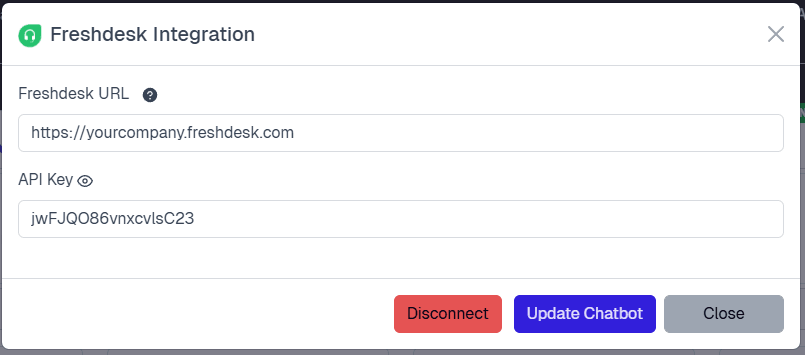
- Click Connect
After a successful connection, a confirmation modal will appear with the option to Configure AI Actions.
Step 3: Configure Freshdesk Actions
After connecting, navigate to Settings > Actions and filter by the Freshdesk platform using the sidebar on the right.
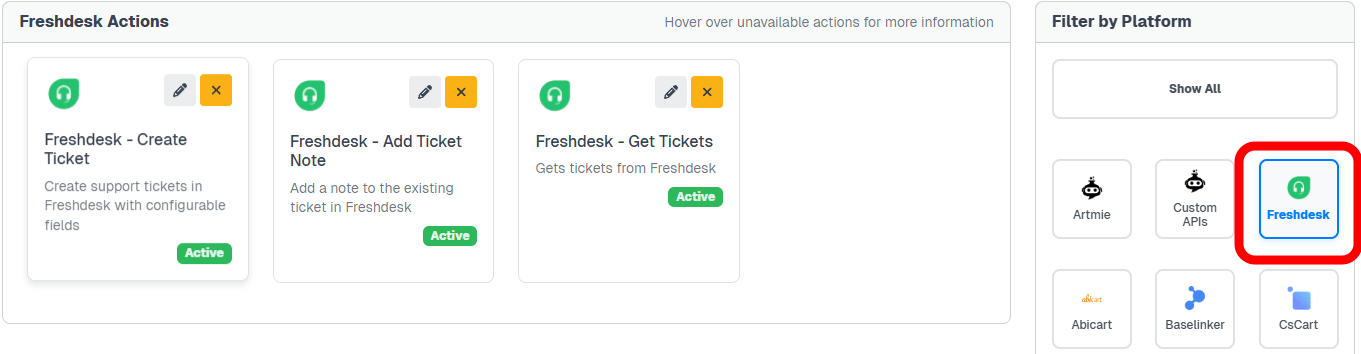
Three actions are available:
- Freshdesk - Create Ticket -- enables the chatbot to create new support tickets
- Freshdesk - Add Ticket Note -- enables the chatbot to add notes to existing tickets
- Freshdesk - Get Tickets -- enables the chatbot to retrieve a customer's recent tickets
Click the activate button on each action to enable it. You can customize the action label (the message shown to users while the action runs) and the instructions that guide how the AI uses each action.
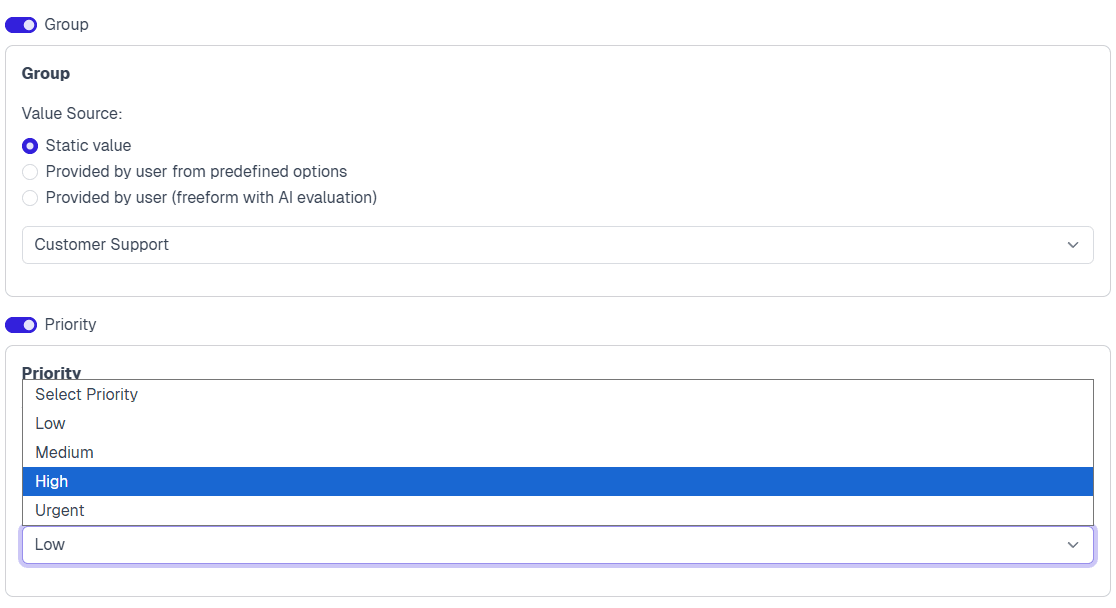
Configuring Create Ticket Fields
The Create Ticket action supports flexible field configuration to match your Freshdesk ticket structure. When you activate this action, a Ticket Fields Configuration tab appears where you can enable and configure individual fields.
For each field, choose how the value is provided:
Static Value -- The field is automatically filled with a predefined value. The customer never sees or interacts with this field. Use this for internal categorization, default priorities, or source tracking (e.g., always set source to "Chatbot").
Provided by User from Predefined Options -- The customer selects from a limited list of options you define. Use this for fields with a small number of clear choices (2-10 options), such as issue type or priority level.
Provided by User (Freeform with AI Evaluation) -- The customer provides free-text input, and the AI interprets and converts it to the correct format based on your instructions. Use this for fields with many possible values (such as a country field with dozens of options) or where the AI can intelligently normalize input.
Writing Effective Field Instructions
When using freeform AI evaluation, provide clear instructions for the AI:
- Specify the expected format -- What should the final value look like?
- Provide conversion examples -- Show how common inputs should be transformed
- Handle edge cases -- Mention any special rules or exceptions
Example for a Country field:
Country name in ISO 3166-1 format - short English country name.
Always validate and convert user input to this format.
Examples:
- "USA", "US", "America" → "United States"
- "UK", "Britain", "England" → "United Kingdom"
- "Deutschland" → "Germany"
With these instructions, the AI accepts various user inputs and automatically converts them to the correct Freshdesk-expected format.
Testing Your Integration
After activating the actions, open your chatbot widget and try:
- "Show me my support tickets" (tests Get Tickets)
- "I need to create a support ticket" (tests Create Ticket)
- "I want to add a note to ticket #12345" (tests Add Ticket Note)
Verify that tickets are created correctly in Freshdesk and that the returned information matches your Freshdesk data.
Common Use Cases
Checking ticket status -- A customer asks "What's the status of my support tickets?" The chatbot asks for their email, retrieves their 5 most recent tickets, and displays the ticket IDs, subjects, and current statuses.
Creating a new support request -- A customer says "I have a problem with my order and need help." The chatbot collects their email, name, and issue details based on your configured fields, creates the ticket in Freshdesk, and confirms with the new ticket ID.
Following up on an existing ticket -- A customer wants to add more information to ticket #5678. The chatbot verifies their email, confirms the ticket belongs to them, collects the additional information, and adds it as a note.
Best Practices
- Add FAQs to your bot's knowledge base to reduce unnecessary ticket creation -- the chatbot can answer common questions directly
- Customize action instructions with your specific support policies (e.g., "Always ask for the customer's order number when creating tickets")
- Only require fields that are essential for your support team -- fewer fields mean faster ticket creation for customers
- Use static values for fields that should always have the same value (e.g., source set to "Chatbot")
Managing the Integration
- To update your API credentials, return to the Connect tab, click on the Freshdesk tile, modify the fields, and click Update Chatbot
- To disconnect, click the Disconnect button in the Freshdesk integration modal -- this deactivates all Freshdesk AI actions