Adding ChatLab to your website lets visitors interact with your AI chatbot directly on your site. This guide explains how to get the embed code and add it to your website.
Opening Add to Website
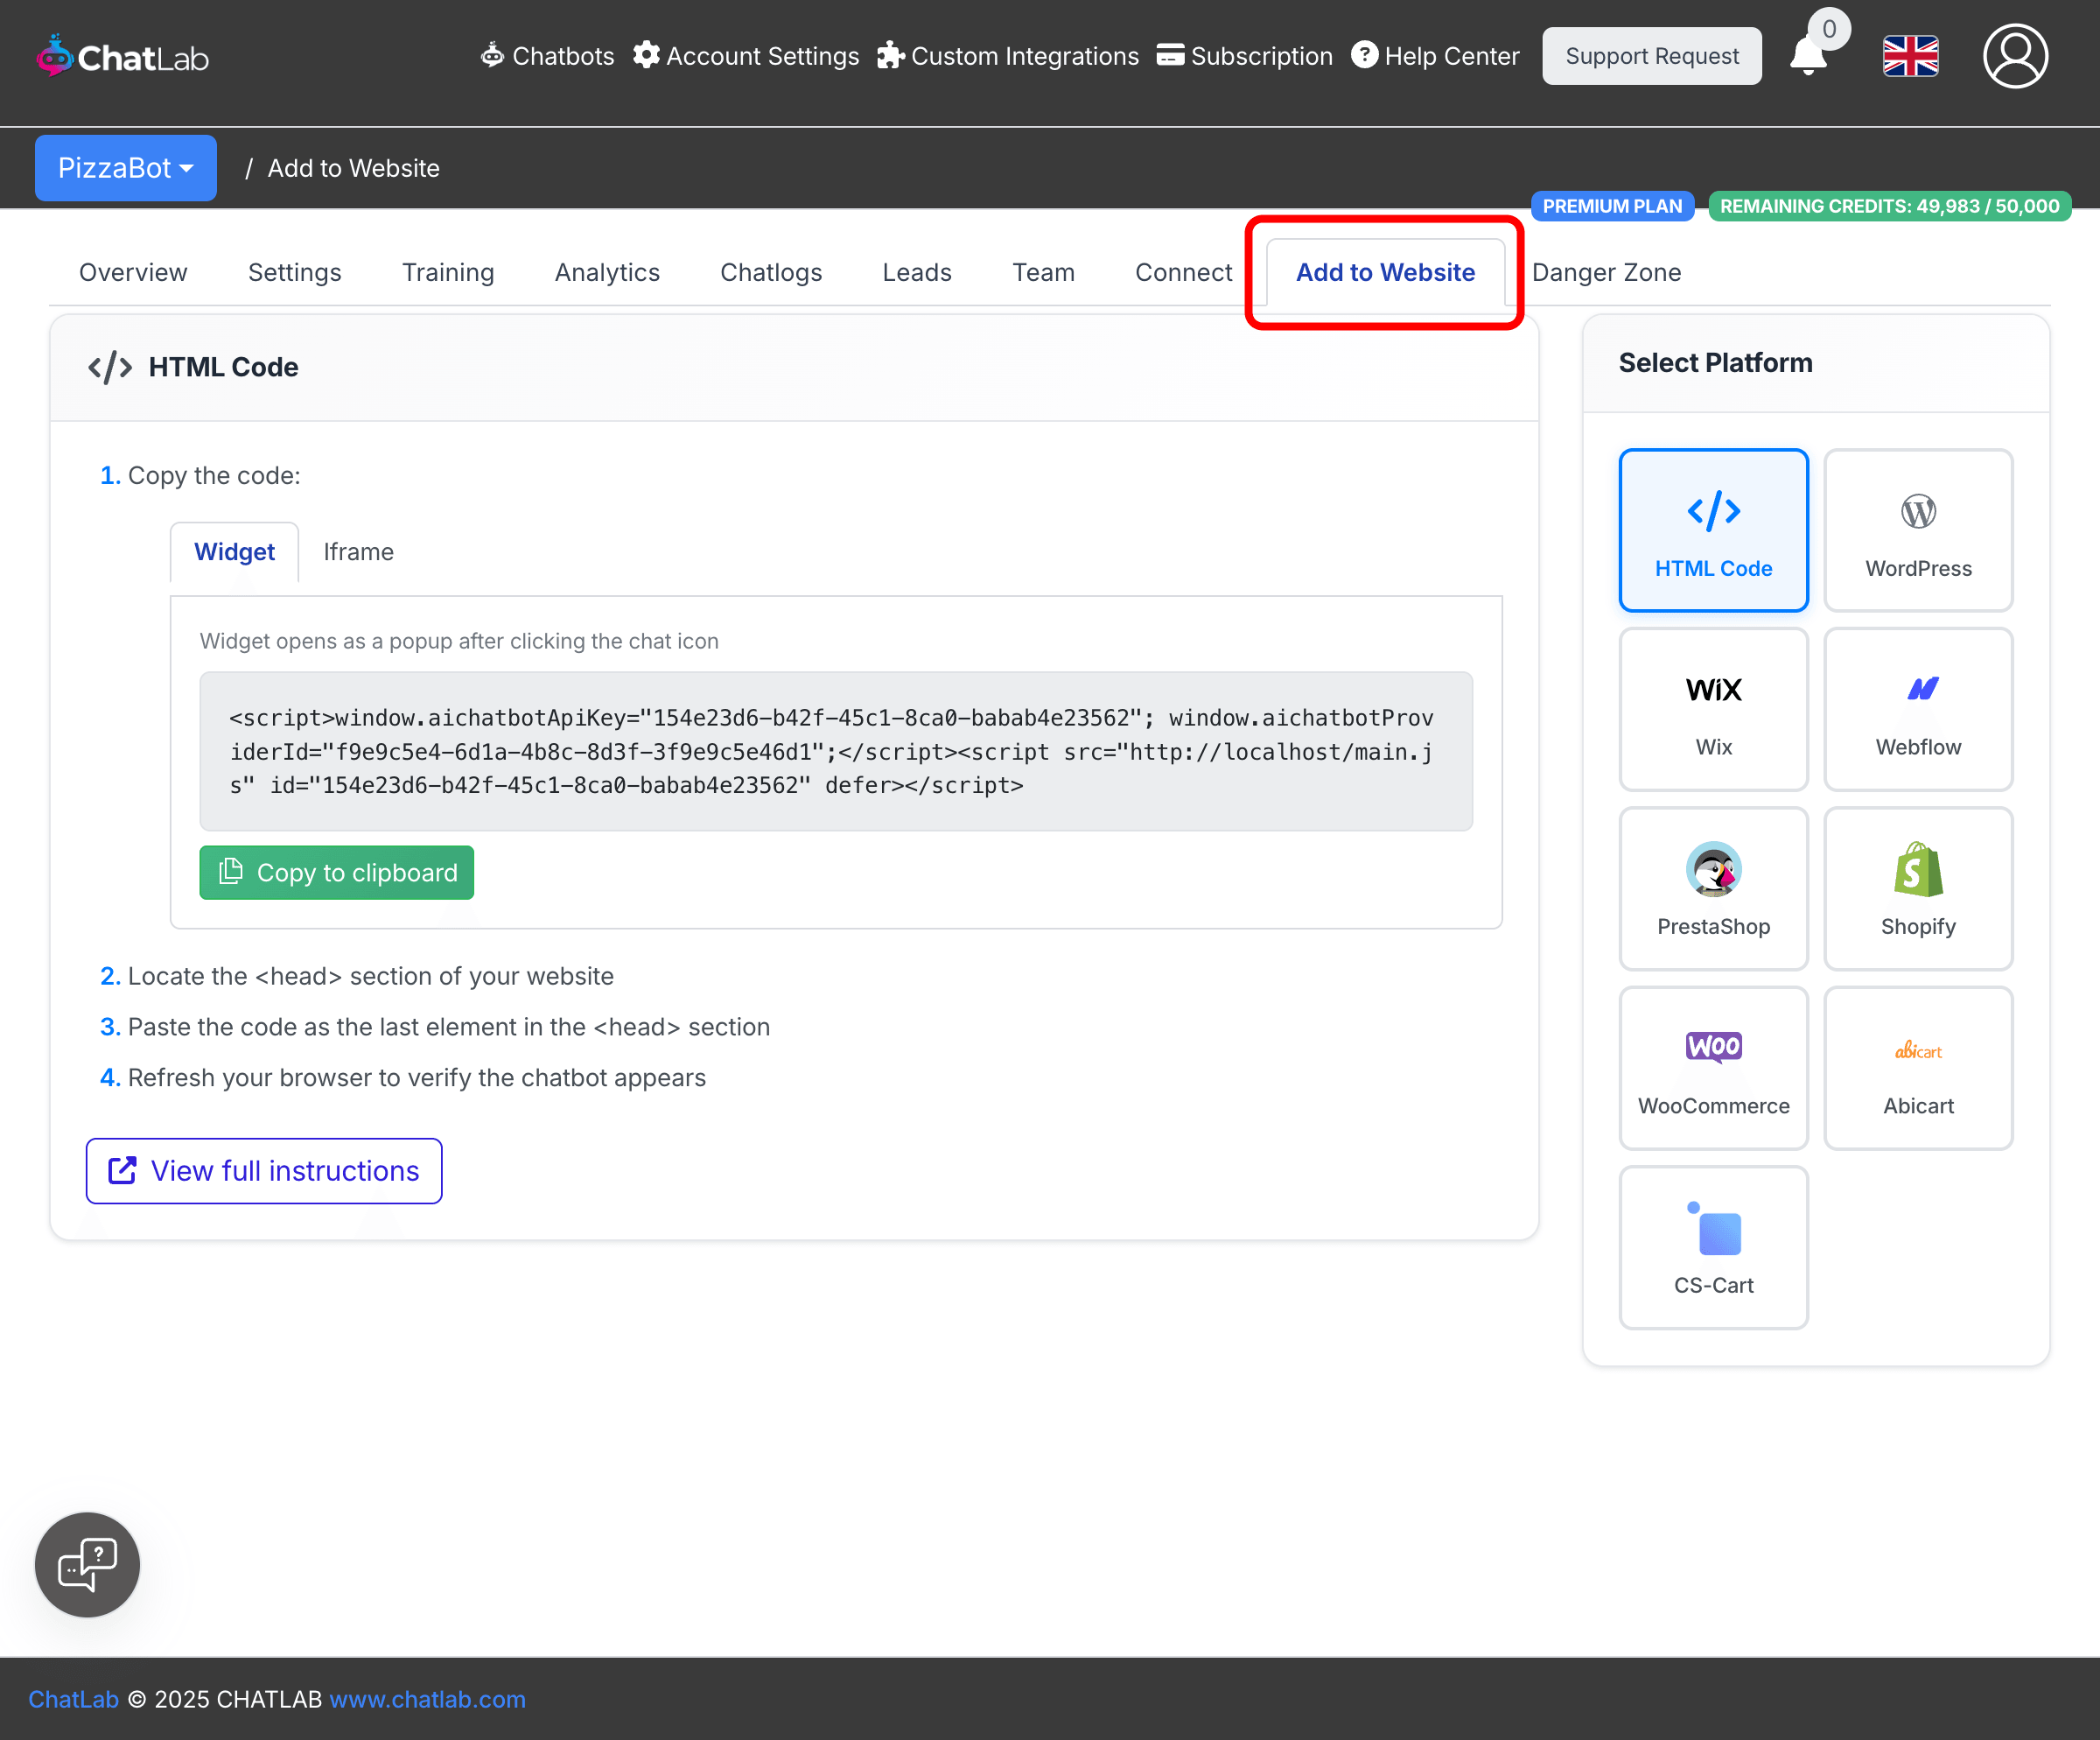
Select your chatbot from the main dashboard, then click the Add to Website tab.
Choosing your platform
The Select Platform panel on the right shows all supported platforms. Click the platform that matches your website to see tailored installation instructions.
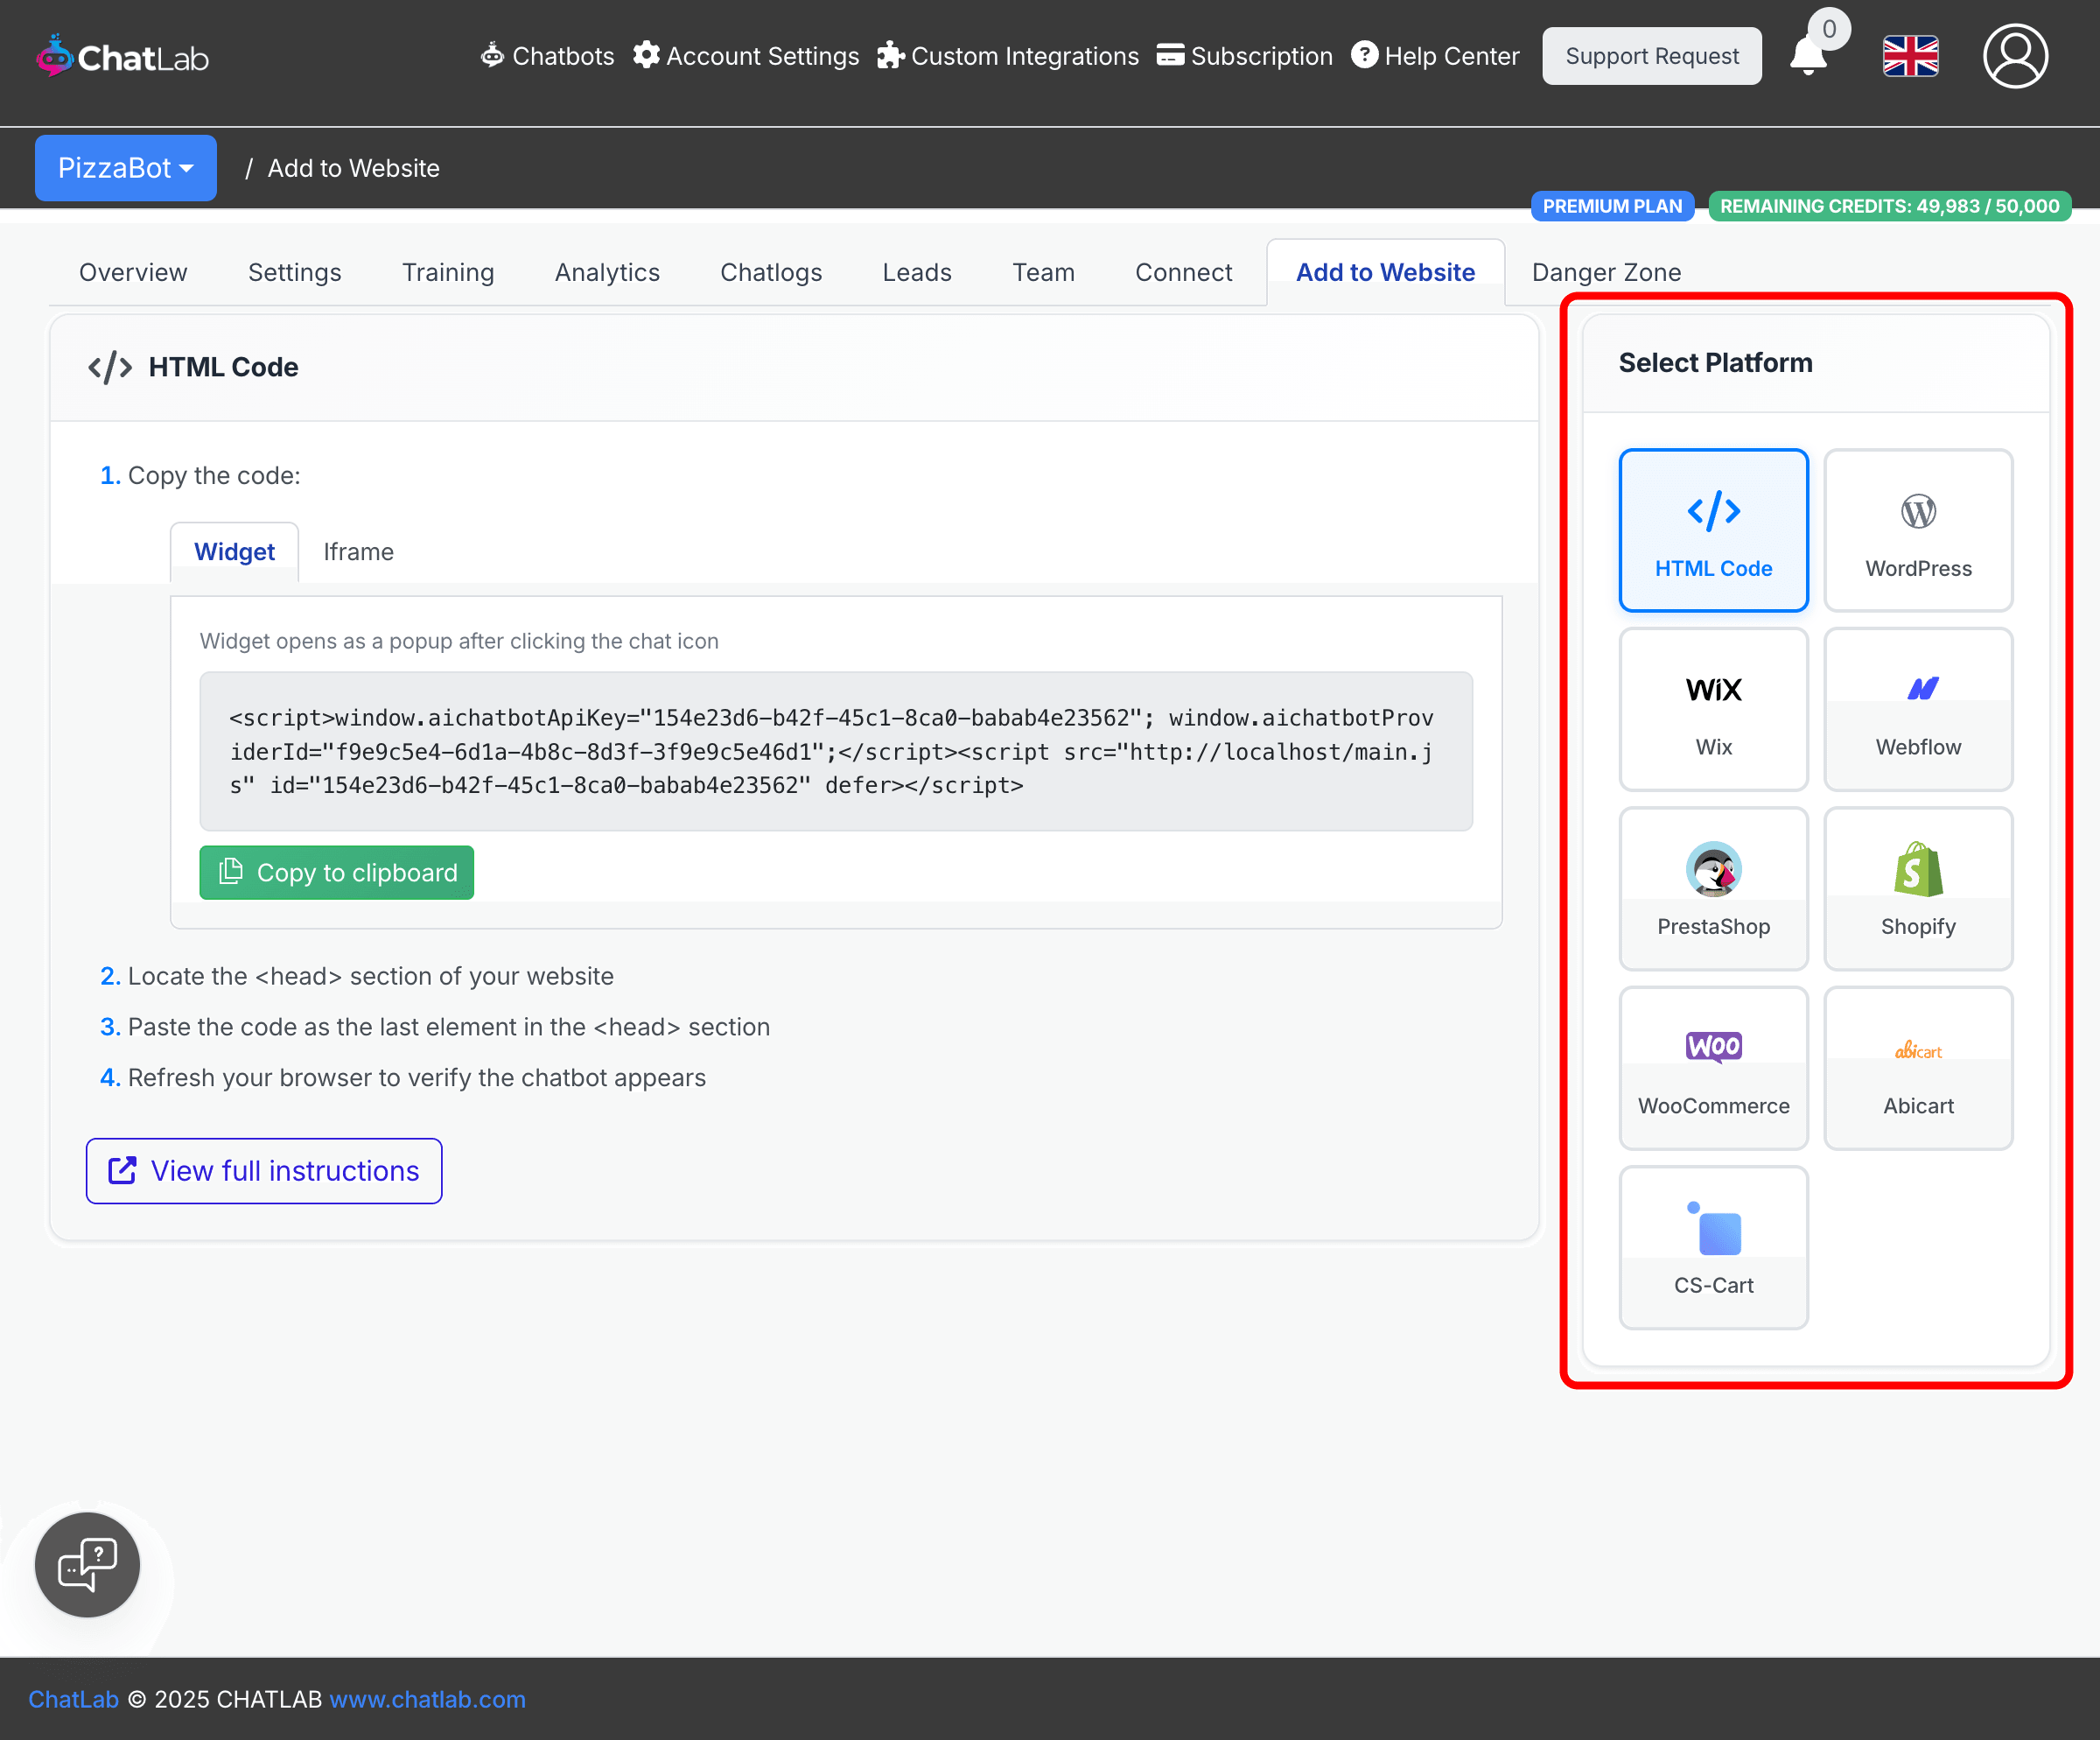
Supported platforms:
- HTML Code -- works with any website where you can edit the HTML
- WordPress -- via the official ChatLab plugin or manual code insertion
- Wix -- via Settings > Advanced > Custom Code
- Webflow -- via Site Settings > Custom Code (requires premium Webflow plan)
- PrestaShop -- via the ChatLab PrestaShop module or manual code insertion
- Shopify -- via the theme.liquid file
- WooCommerce -- via the WordPress plugin or manual code insertion
- Abicart -- via Store design > Themes > Site header
- CS-Cart -- via Design > Layouts > Custom HTML code
Each platform shows step-by-step instructions specific to that integration. For platforms with dedicated help articles, a View full instructions link appears at the bottom.
Adding via HTML Code
The HTML Code option works with any website where you have access to the source code. You will see two embed options: Widget and Iframe.
Widget mode
The Widget tab shows the code that adds a chat icon to your website. When visitors click the icon, a chat popup opens.
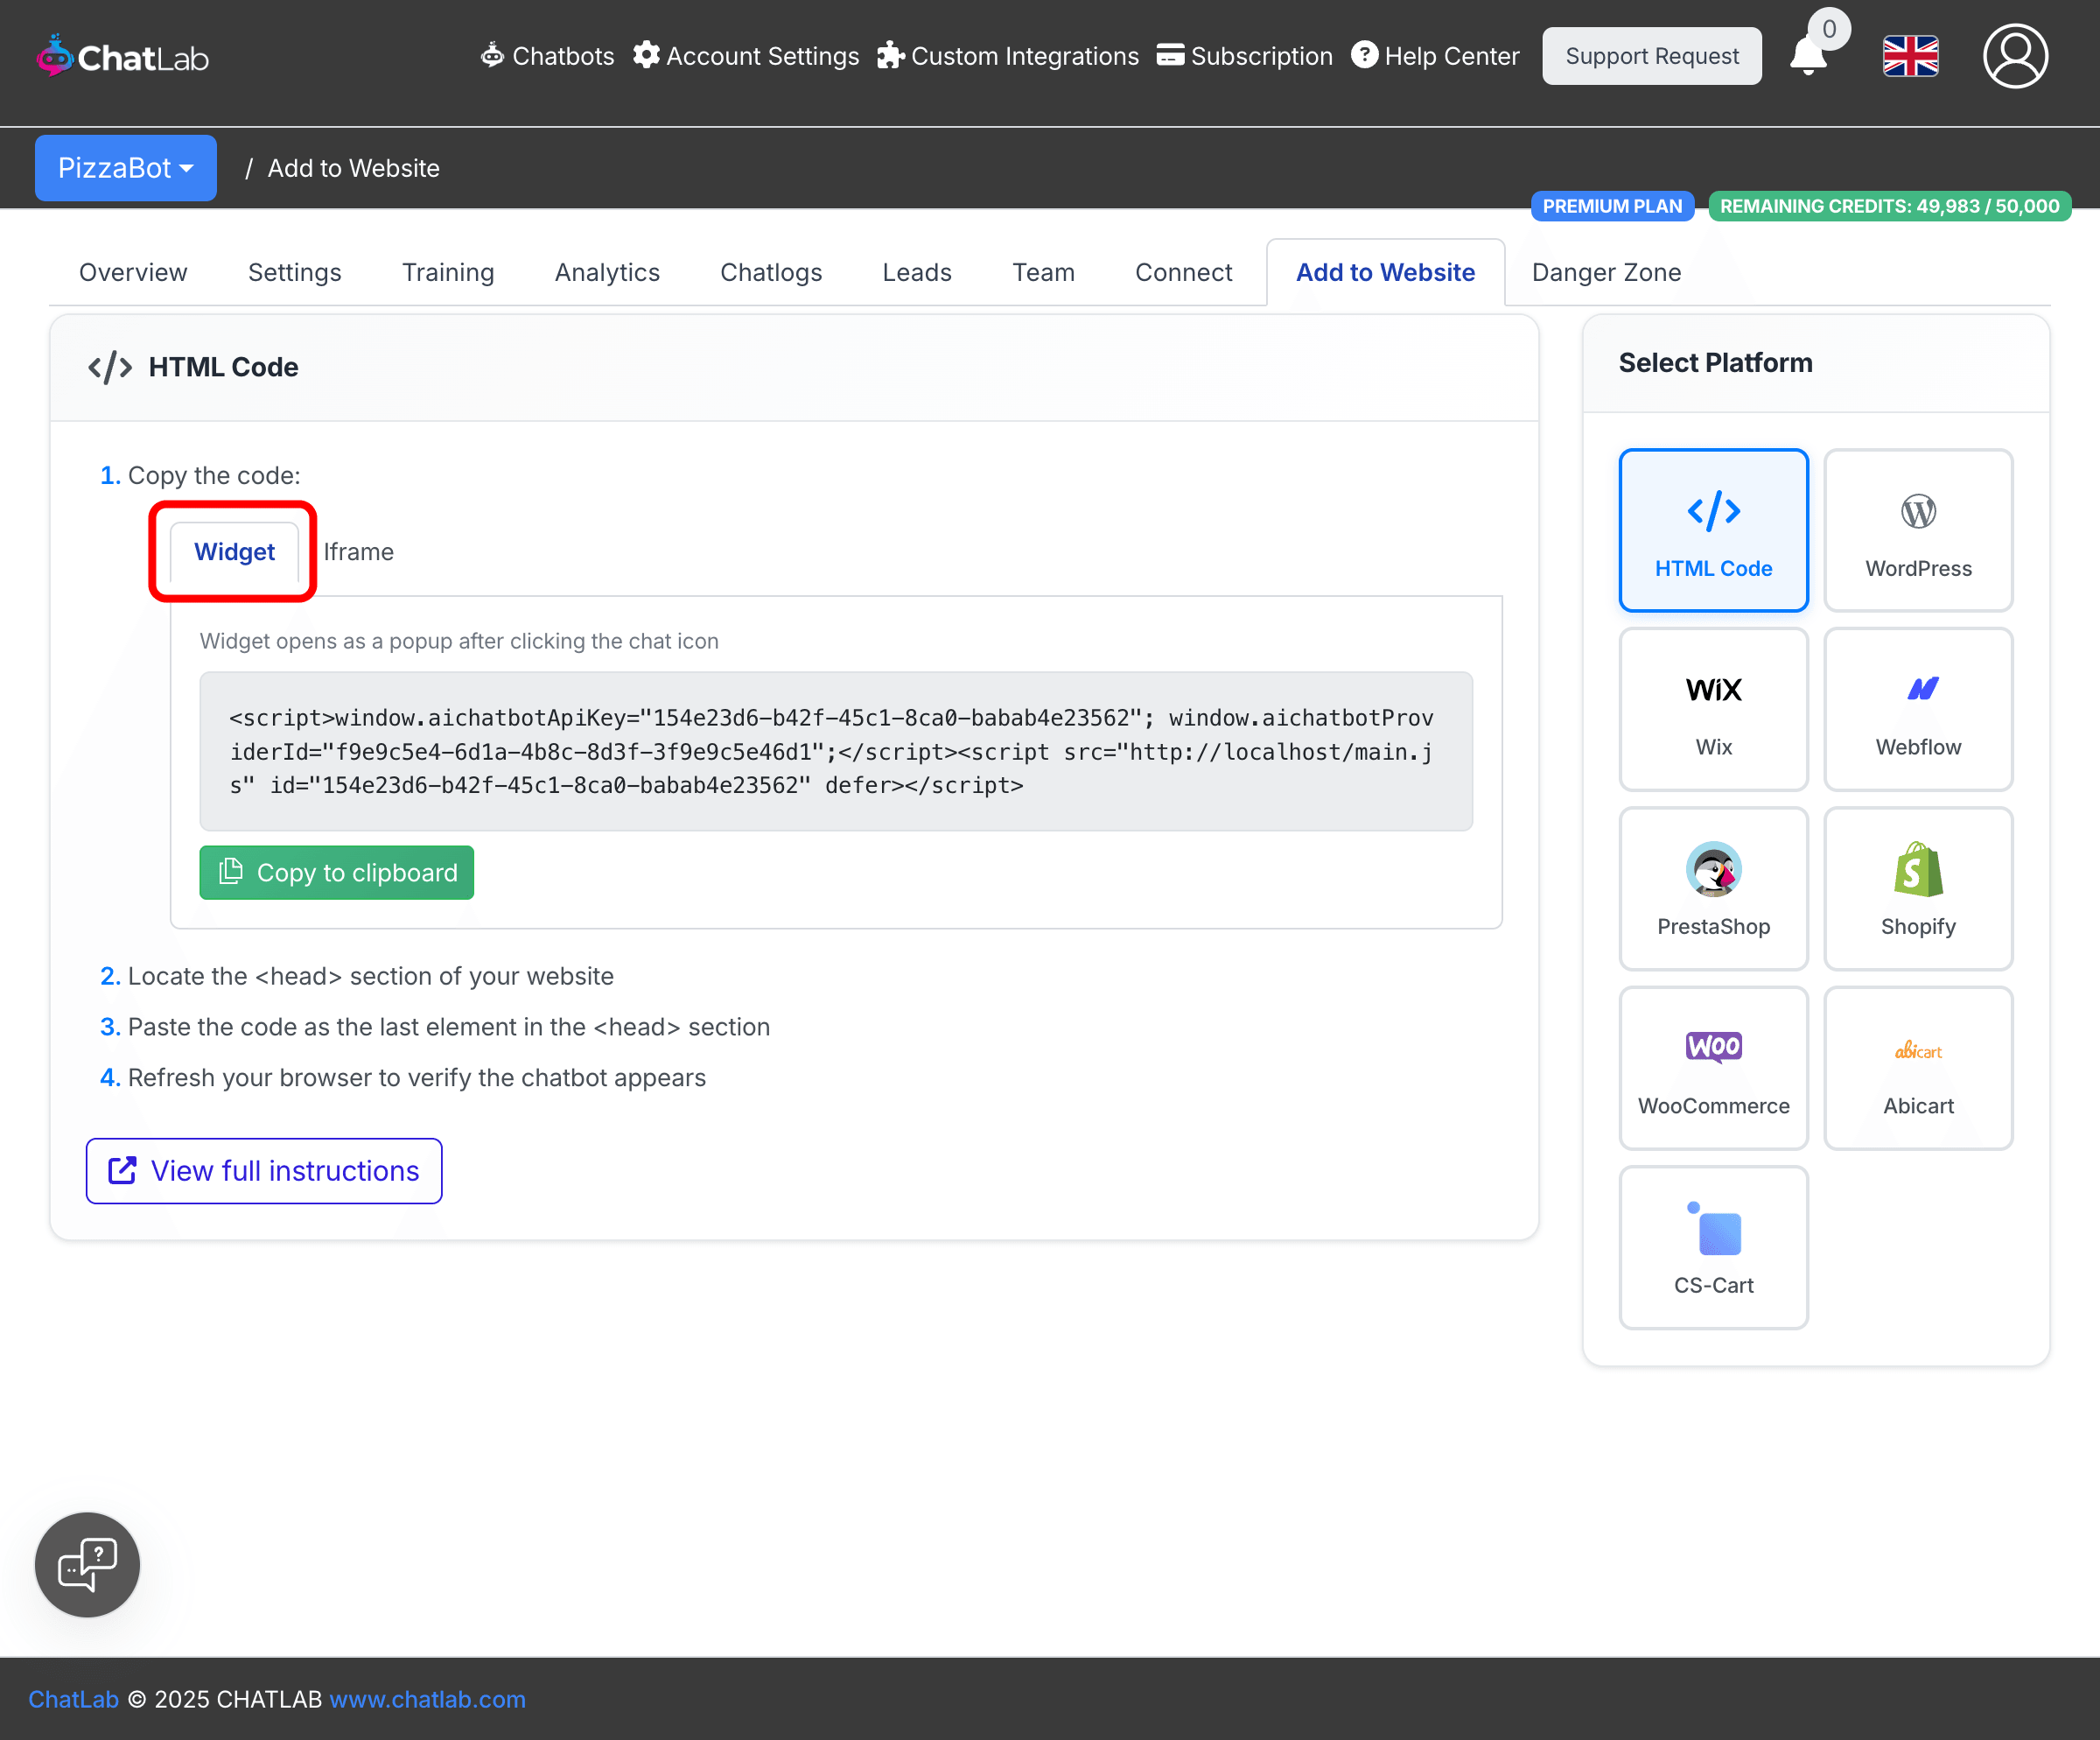
- Click the Widget tab
- Click Copy to clipboard to copy the code
- Locate the
<head>section of your website - Paste the code as the last element in the
<head>section - Refresh your browser to verify the chatbot icon appears
Iframe mode
The Iframe tab shows the code that embeds the chatbot directly into your page content. The chatbot is always visible and can be surrounded by other page elements.
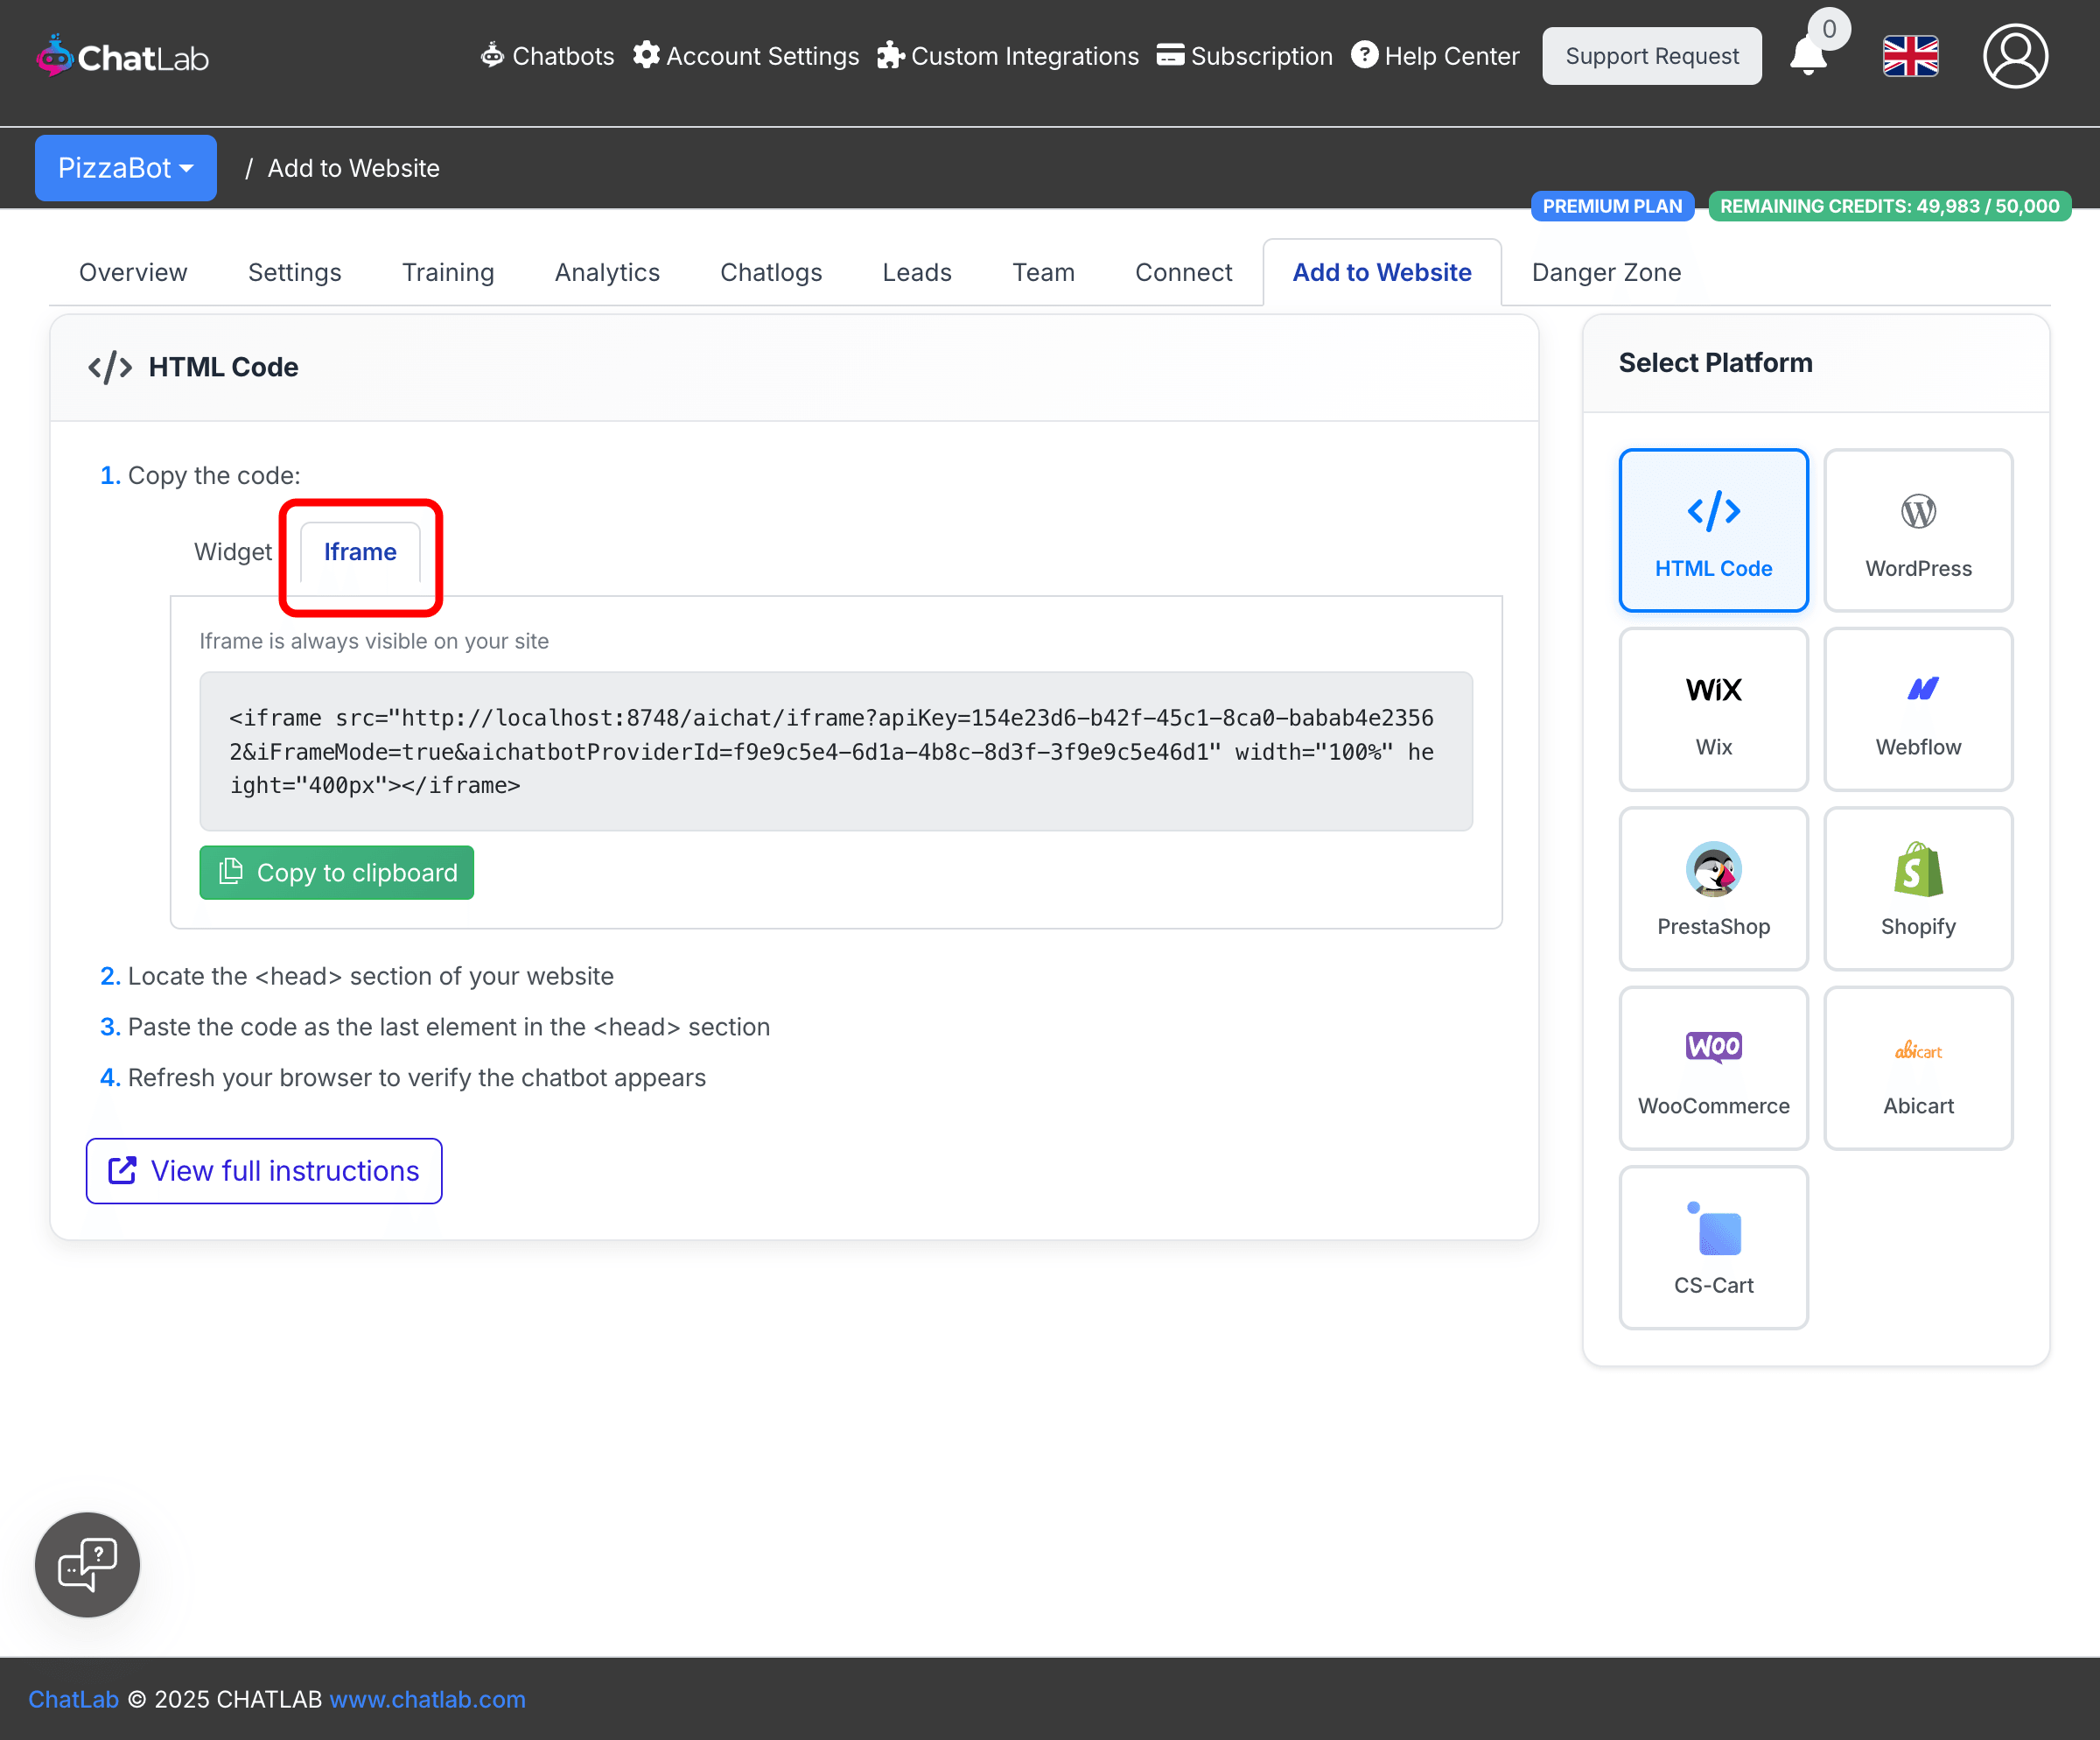
- Click the Iframe tab
- Click Copy to clipboard to copy the code
- Paste the code anywhere in your website's HTML where you want the chatbot to appear
- Adjust the
widthandheightattributes to fit your layout
Not sure which to choose? Read What is the difference between widget and Iframe? for a detailed comparison.
Adding via WordPress or WooCommerce
WordPress and WooCommerce platforms offer two installation methods: Plugin Installation (recommended) and Manual Installation.
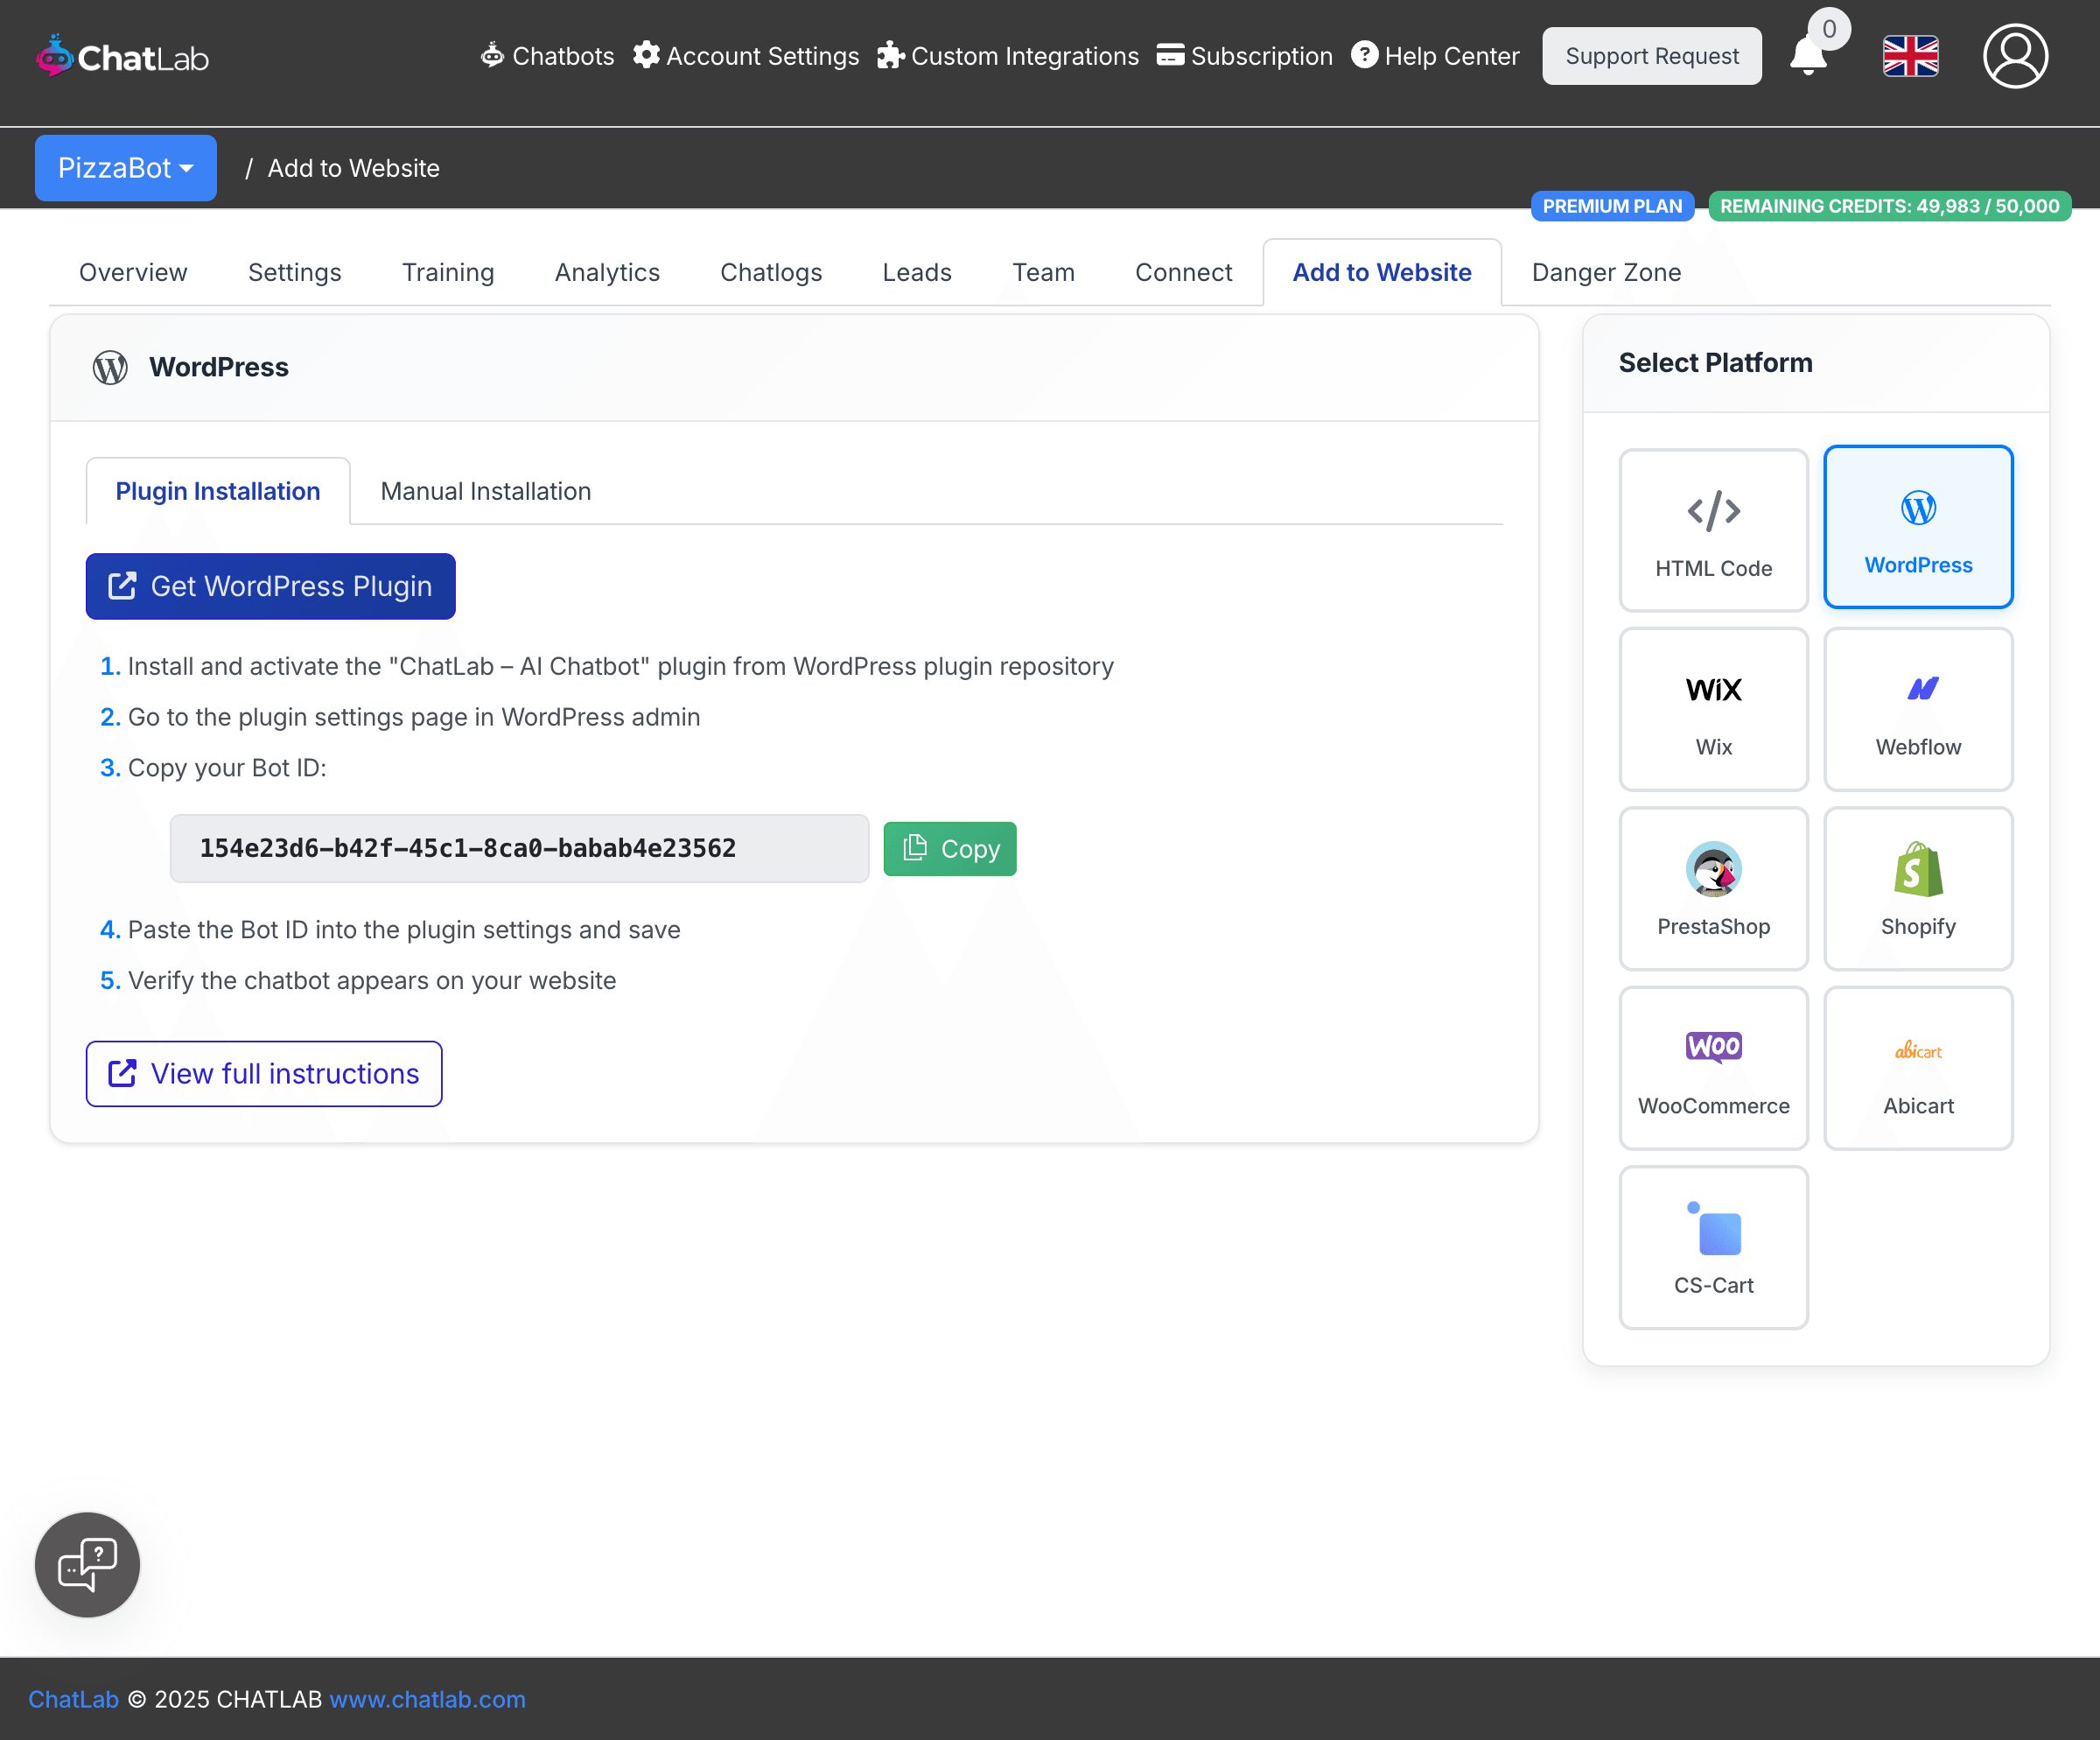
Plugin Installation (recommended)
- Click Get WordPress Plugin to open the WordPress plugin repository
- Install and activate the "ChatLab -- AI Chatbot" plugin
- Go to the plugin settings page in WordPress admin
- Copy your Bot ID from ChatLab using the Copy button
- Paste the Bot ID into the plugin settings and save
- Verify the chatbot appears on your website
Manual Installation
Switch to the Manual Installation tab for code-based installation:
- Install the "Insert Headers and Footers" plugin in WordPress
- Go to Settings > Insert Headers and Footers
- Copy the code from ChatLab and paste it into the Header section
- Save and refresh your website
For full details, see How to add your chatbot to WordPress website.
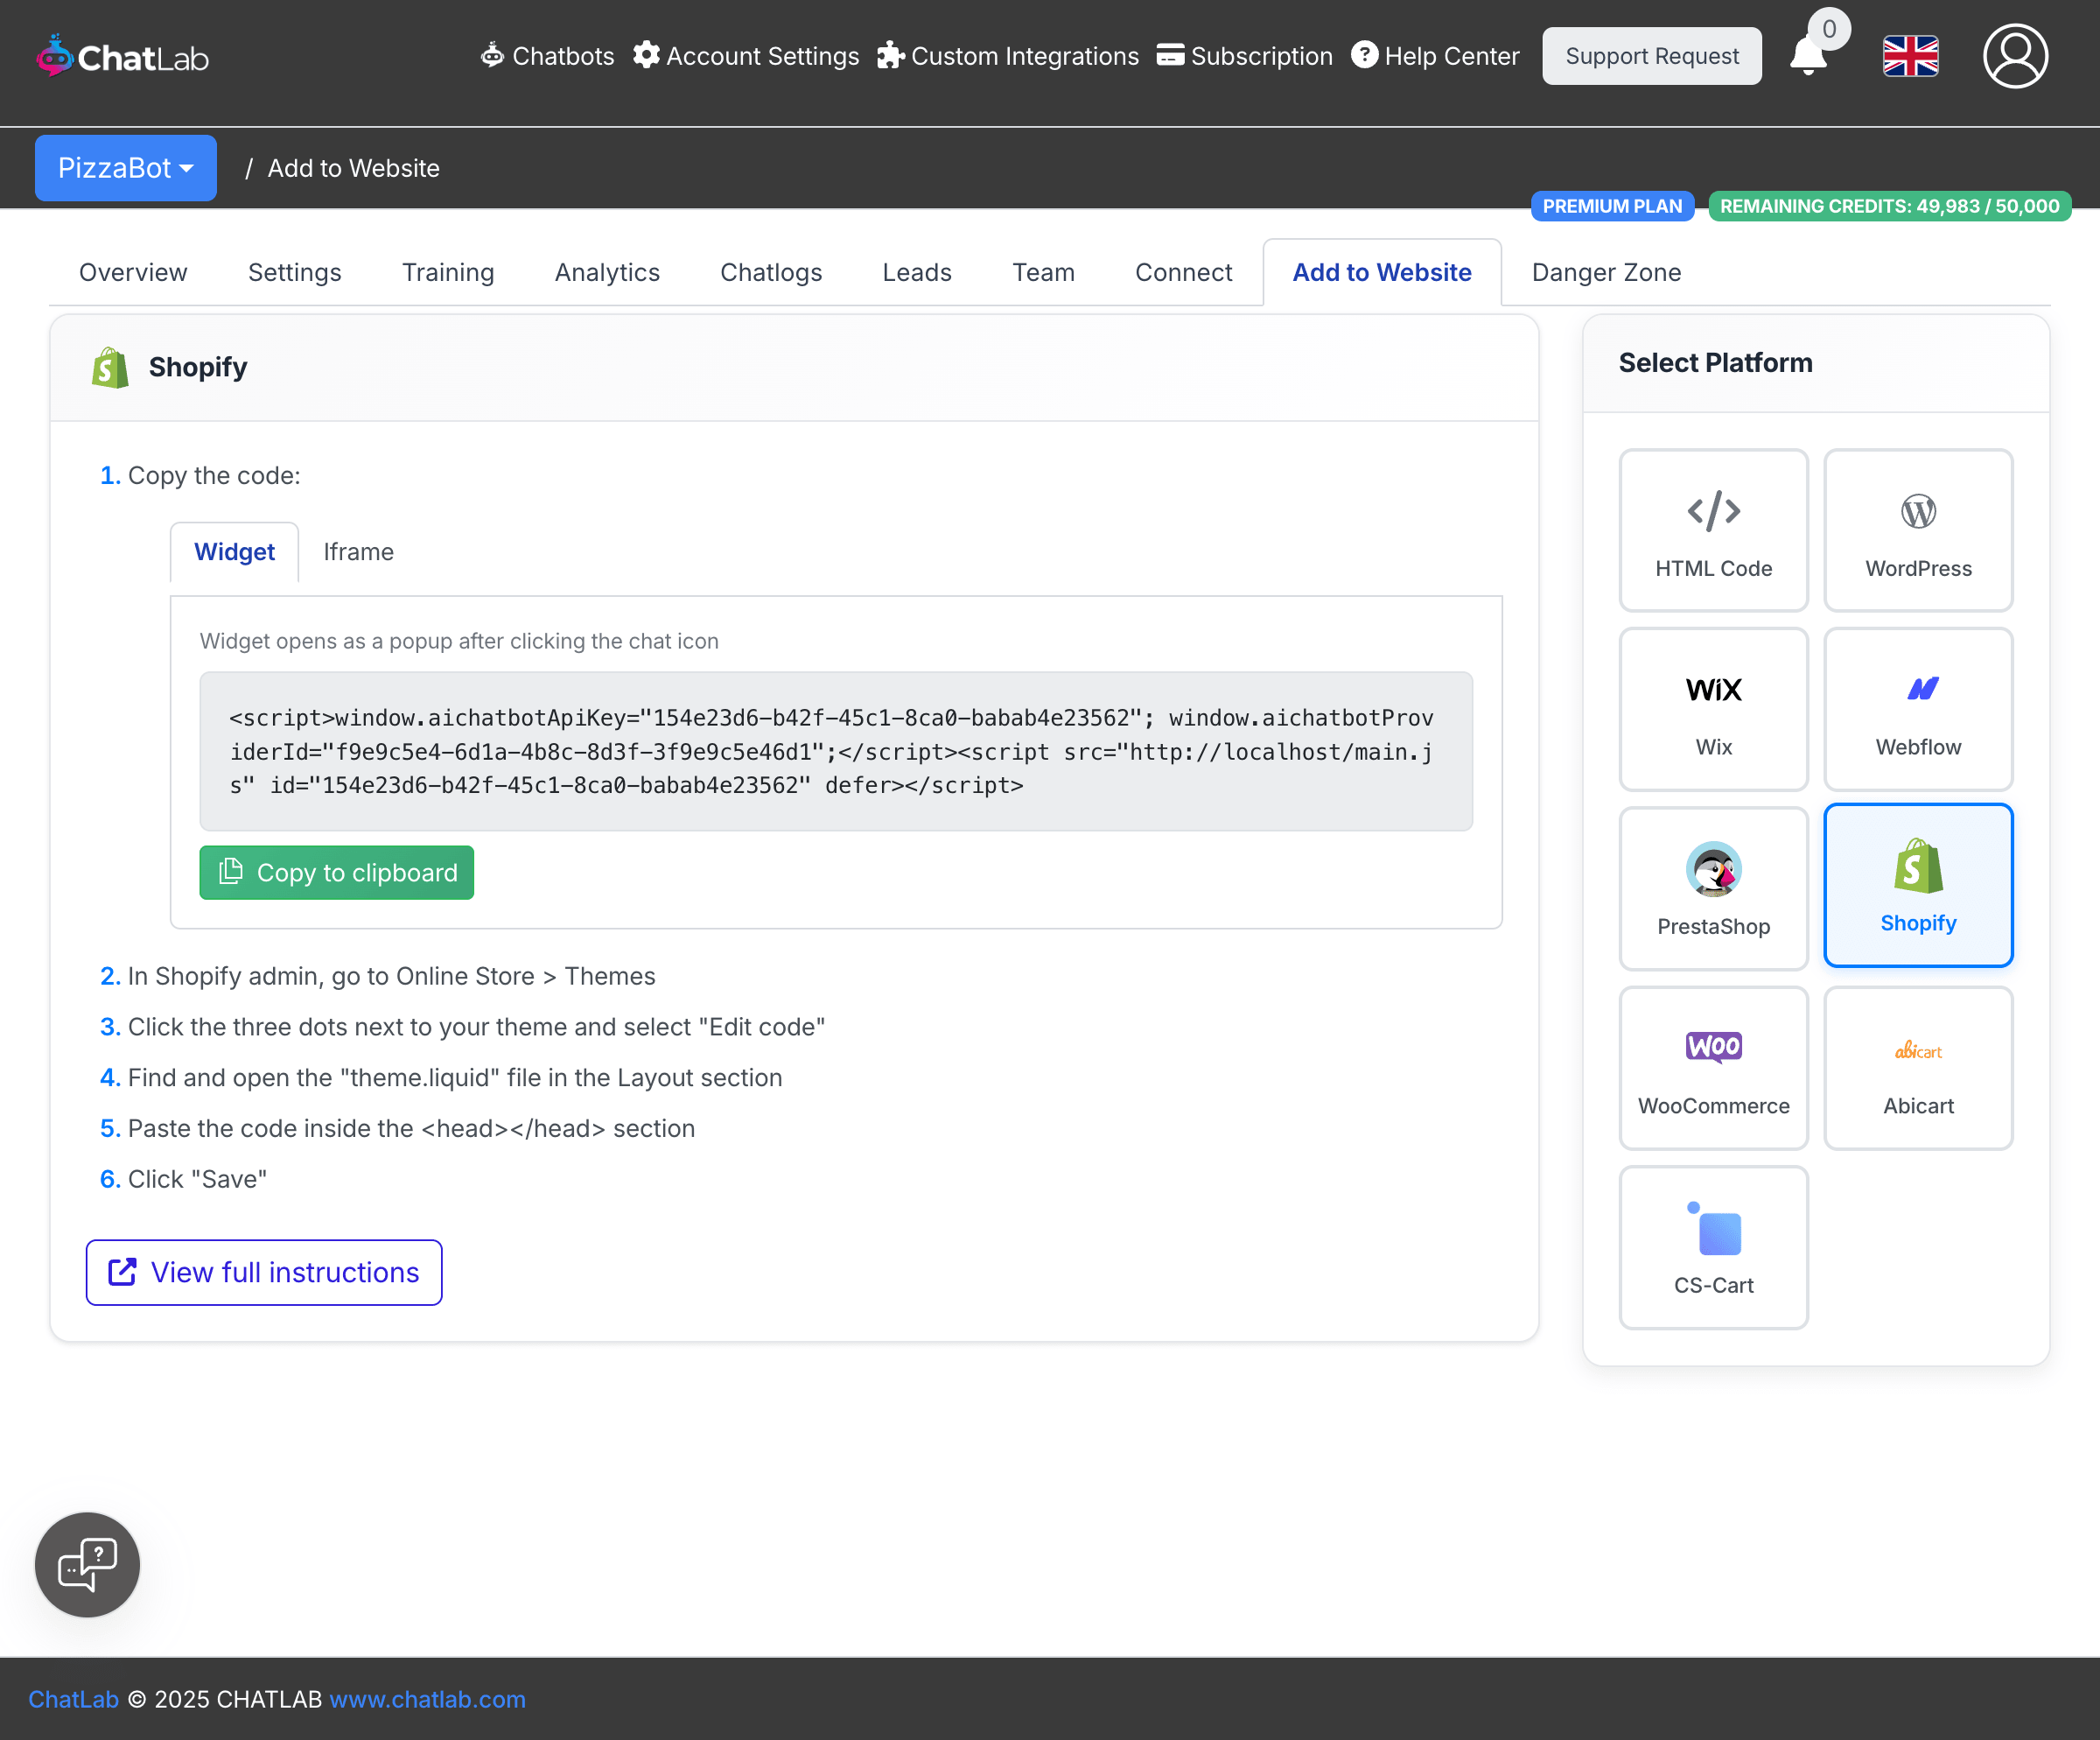
Adding via other platforms
For Shopify, Wix, Webflow, PrestaShop, Abicart, and CS-Cart, select the platform in the Select Platform panel. Each platform shows:
- The embed code with Widget and Iframe options
- Platform-specific, step-by-step paste instructions
- A View full instructions link to the full platform guide
GDPR compliance
If you need your chatbot to load only after cookie consent is granted, see Setting up ChatLab for GDPR compliance for integration guides covering CookieBot, Usercentrics, and Google Tag Manager.
Content Security Policy (CSP)
If your website uses Content Security Policy headers, you need to allow ChatLab domains for the chatbot to work. The required directives depend on whether you use Widget or Iframe mode.
Widget mode
The widget loads a script on your page that creates the chat interface. Add these directives to your CSP header:
script-src https://script.chatlab.com;
style-src https://script.chatlab.com https://fonts.googleapis.com 'unsafe-inline';
connect-src https://api.chatlab.com wss://api.chatlab.com;
font-src https://fonts.gstatic.com;
By default, the widget injects some styles inline, so 'unsafe-inline' is required in style-src.
CSP Safe Mode - avoiding unsafe-inline
If your website security policy does not allow 'unsafe-inline' in style-src, you can enable CSP Safe Mode. This makes the widget load all styles from external CSS files instead of injecting them inline.
To enable it, add window.aichatbotCspSafe = true; before the ChatLab script tag:
<script>
  window.aichatbotApiKey = "YOUR_API_KEY";
  window.aichatbotCspSafe = true;
</script>
<script src="https://script.chatlab.com/aichatbot.js" defer></script>
With CSP Safe Mode enabled, you no longer need 'unsafe-inline' and your CSP header can use:
script-src https://script.chatlab.com;
style-src https://script.chatlab.com https://fonts.googleapis.com;
connect-src https://api.chatlab.com wss://api.chatlab.com;
font-src https://fonts.gstatic.com;
Iframe mode
The iframe loads the entire chatbot from a single URL, so only one directive is needed:
frame-src https://api.chatlab.com;