Adding a ChatLab chatbot to your WordPress website lets visitors interact with your AI assistant directly on your site. There are two installation methods: the WordPress plugin (recommended) or manual code embed.
Before you start
Create and train your chatbot before sharing it with customers. For installation, you also need permission to edit and publish the website. See How to create your first chatbot.
Step 1 - Open the Deploy tab in ChatLab
- Log in to ChatLab and select the chatbot you want to embed
- Click the Deploy tab, then select WordPress from the platform panel on the right

The WordPress panel shows two tabs: Plugin Installation and Manual Installation.
Method 1: WordPress Plugin (recommended)
The plugin method is the simplest way to add ChatLab to WordPress - no code editing required.
- Click Get the plugin on WordPress.org to open the plugin page on wordpress.org

- Install and activate the "ChatLab - AI Chatbot" plugin from the WordPress plugin repository
- In your WordPress admin, open ChatLab and click Continue. For a WooCommerce store, leave WooCommerce integration selected if you also want product search and order lookup.
- Sign in to your ChatLab account and choose the chatbot you want to display.
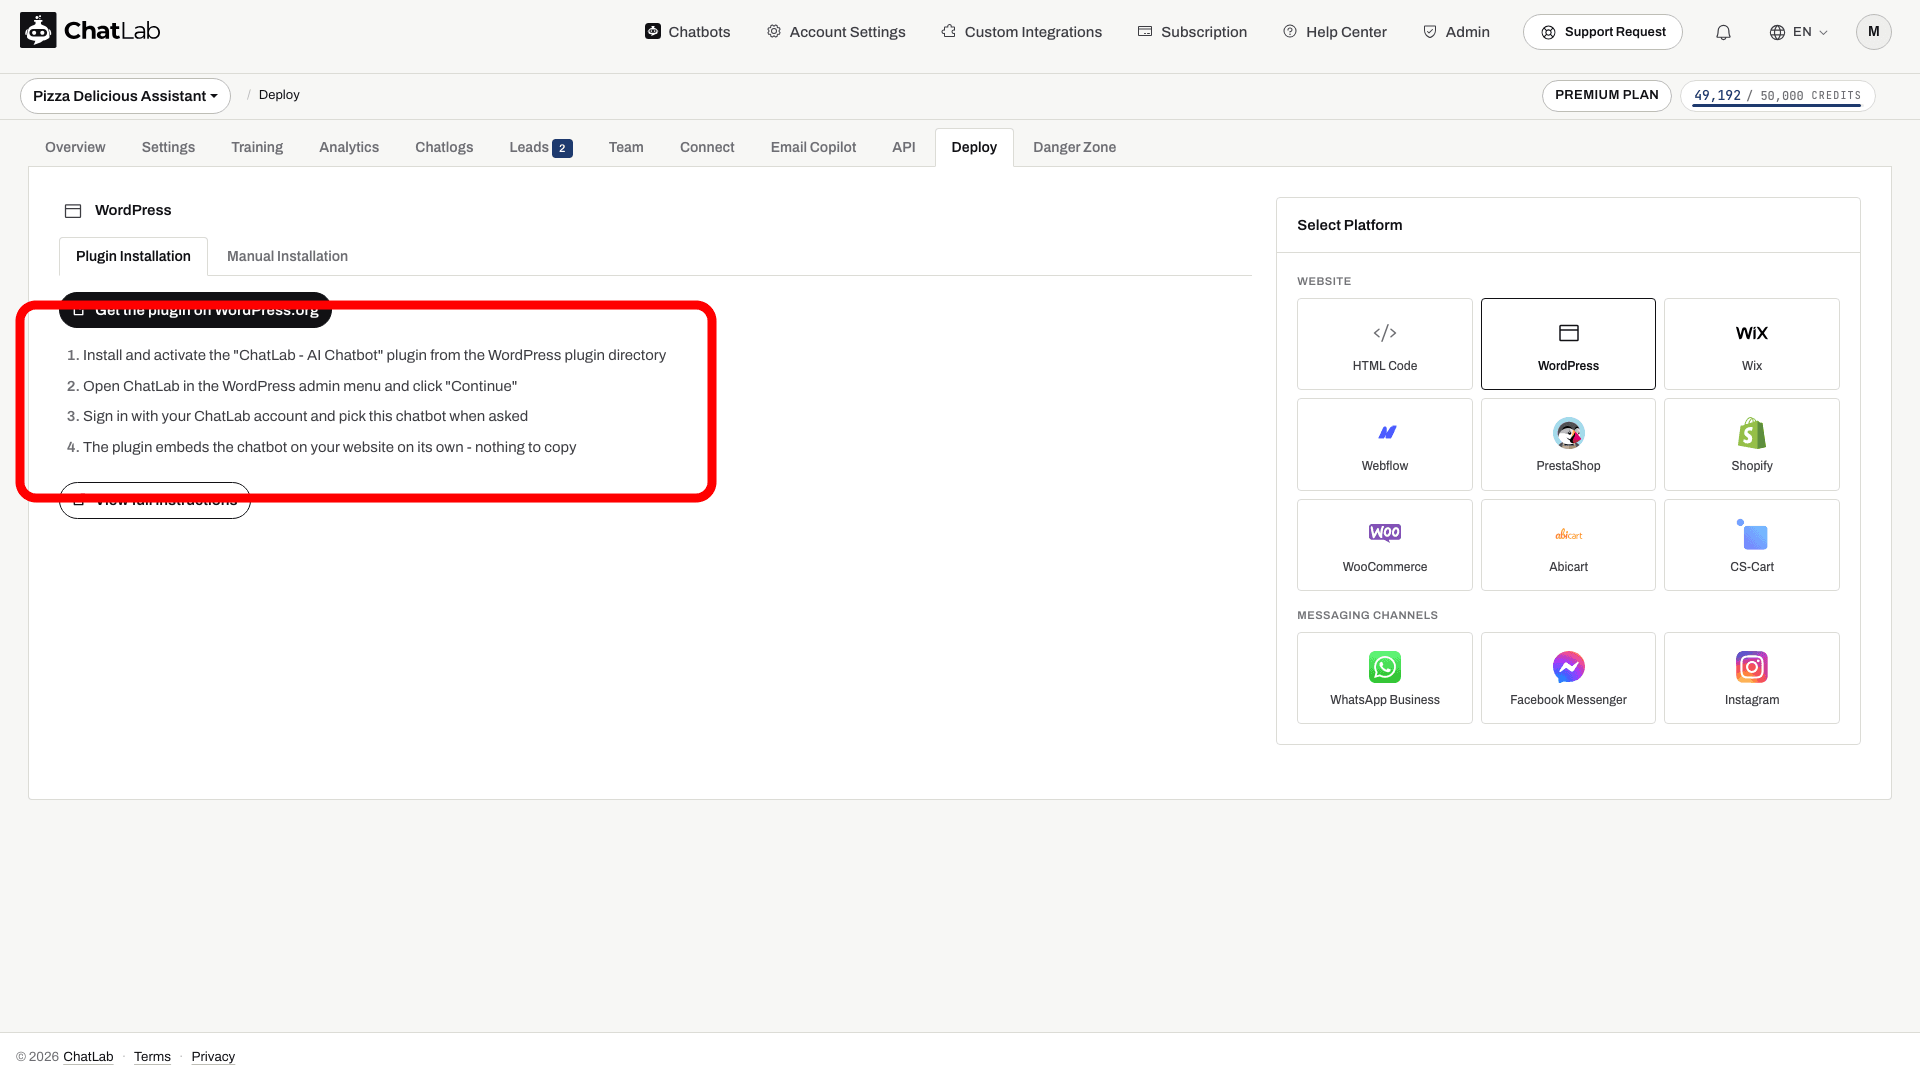
- Complete the guided connection and return to WordPress. The plugin installs the widget automatically.
- Open your website in a browser to verify the chatbot icon appears
Method 2: Manual Installation
If you prefer to embed the code manually, click the Manual Installation tab.
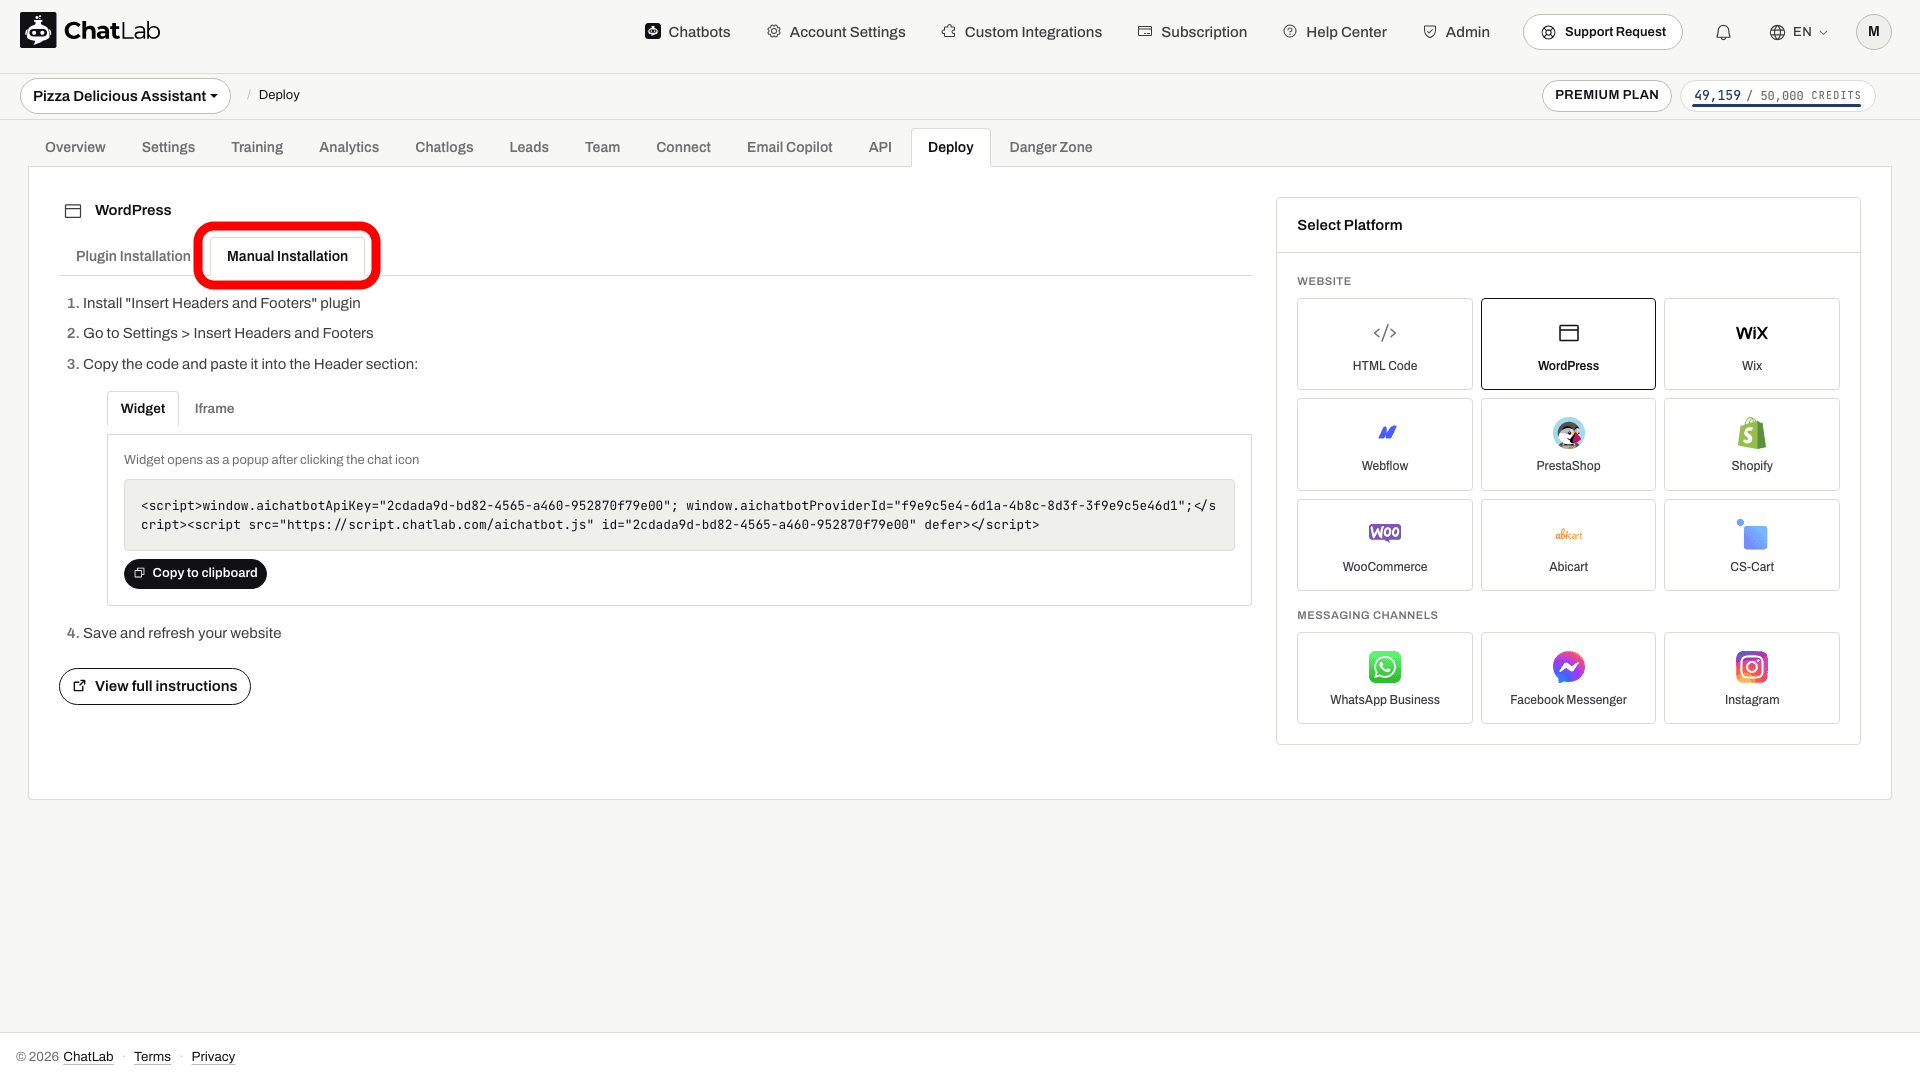
- Install and activate a header-code plugin, such as WPCode (formerly Insert Headers and Footers).
- For WPCode, open Code Snippets > Header & Footer. See WPCode header and footer instructions.
- In ChatLab, choose between Widget (chat popup triggered by a chat icon) or Iframe (always-visible chat embedded in the page). See What is the difference between widget and Iframe? for a comparison
- Click Copy to clipboard to copy the code
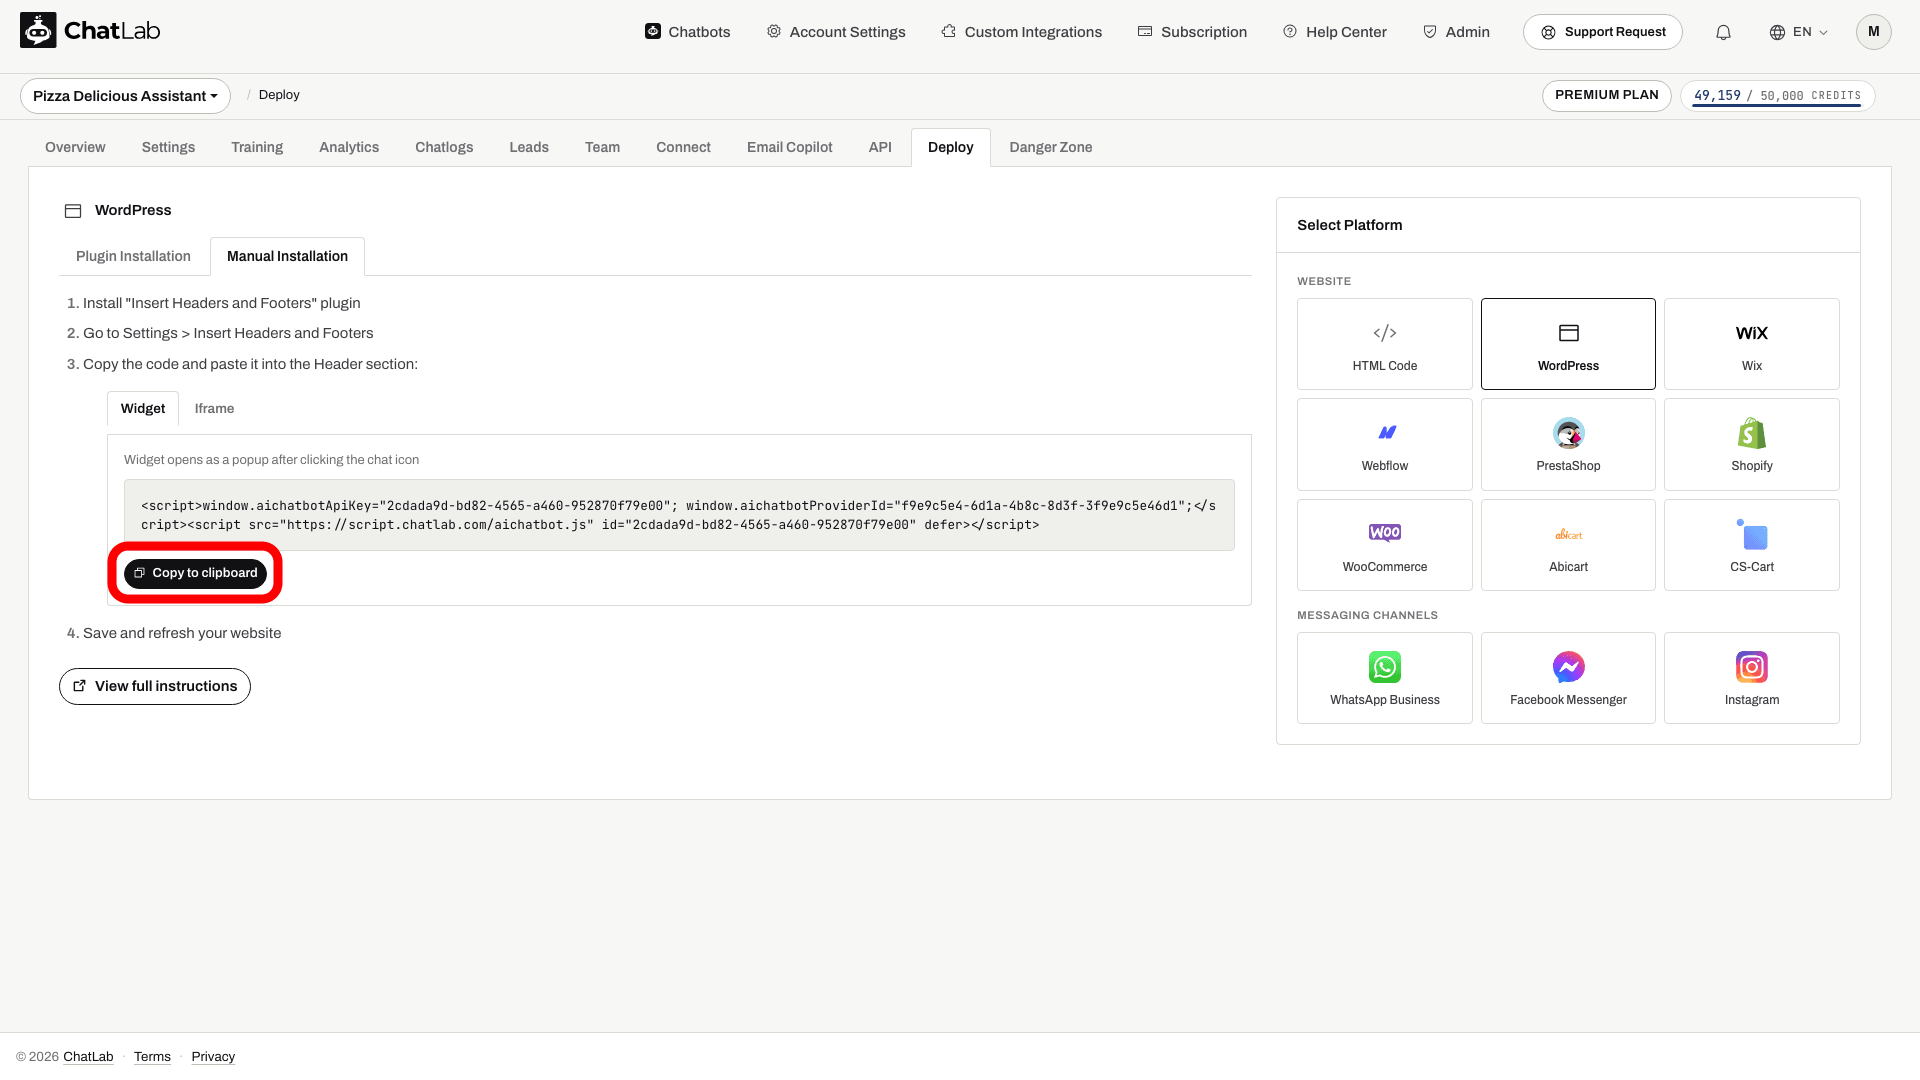
- For Widget, paste the code into the Header field and save. For Iframe, paste it into an HTML content block on the page where the chat should appear, using an account/editor that permits iframe HTML, then update or publish the page. Do not paste an iframe into the header.
- Refresh your website to verify the chatbot appears
Verifying the installation
After completing either method, open your WordPress site in a browser. You should see the chat icon in the corner of the page (widget mode) or the chat window embedded on the page (iframe mode). Click the icon to open the chat and send a test message to confirm everything is working.