Personal-data processing needs an appropriate legal basis; consent is one possible basis, not a universal requirement for all processing. If you rely on consent, it must be freely given, specific, informed, unambiguous, and withdrawable. See the EDPB's guidance on lawful processing. Assess applicable cookie/device-storage rules separately with your privacy adviser.
The controls below perform different technical functions. Neither a policy checkbox nor delayed loading guarantees compliance. An in-widget gate does not prevent the widget script, network requests, or browser storage from being used before a conversation starts.
Approach 1 - In-Widget Privacy Consent. Require visitors to accept your Privacy Policy directly inside the chat widget before they can start a conversation or submit personal information.
Approach 2 - Load After Consent. Prevent the chatbot script from loading at all until the visitor grants cookie/marketing consent through your Consent Management Platform (CMP).
Approach 1: In-Widget Privacy Consent
ChatLab has built-in consent settings that let you require visitors to accept your Privacy Policy before interacting with the chatbot. The widget itself handles the consent flow - no external tools needed.
Accessing the settings
Open your chatbot in the dashboard, go to the Settings tab, then click Consent & Privacy in the left sidebar.

Consent toggles
The Request user consent card has four toggles.

- Require Privacy Policy consent before starting a new conversation - When enabled, visitors must accept the policy before sending their first message. This is the broadest option: it automatically covers all forms (lead collection, human support, and live chat), so the other three toggles become disabled.
- Require Privacy Policy consent for human support - Adds a consent checkbox to the human support contact form.
- Require Privacy Policy consent for lead collection - Adds a consent checkbox to the lead collection form.
- Require Privacy Policy consent for live chat session - Adds a consent checkbox to the live chat form.
If you only need consent for specific interactions (for example, only when collecting personal data via leads), enable the individual toggles instead of the "new conversation" toggle.
Customizing the consent messages
Below the toggles, the Consent & Privacy card lets you configure what visitors see.

- Consent intro message - The text displayed above the consent checkbox. For example: "Please confirm you've read and accepted our Privacy Policy to continue."
- Message to inform users about Privacy Policy consent requirement - The checkbox label text. Use markdown to include a link to your privacy policy:
I have read and accept the [Privacy Policy](https://www.example.com/privacy-policy).
After configuring, wait for the saved status. Test in a new visitor session, including each form you use. Turning off the new-conversation option does not automatically restore the individual form toggles it cleared.
Approach 2: Load After Consent (CMP Integration)
If you classify the chatbot as a marketing tool under your cookie policy, you should prevent the ChatLab script from loading until the visitor grants consent. This requires integration with a Consent Management Platform.
Default ChatLab embed code
The standard ChatLab embed code looks like this:
<script>
  window.aichatbotApiKey = "YOUR_API_KEY_HERE";
  window.aichatbotProviderId = "YOUR_PROVIDER_ID_HERE";
</script>
<script src="https://script.chatlab.com/aichatbot.js" id="YOUR_API_KEY_HERE" defer></script>
This code loads immediately when the page opens, regardless of the visitor's consent preferences.
You can find your API Key and Provider ID on the Deploy tab of your chatbot.
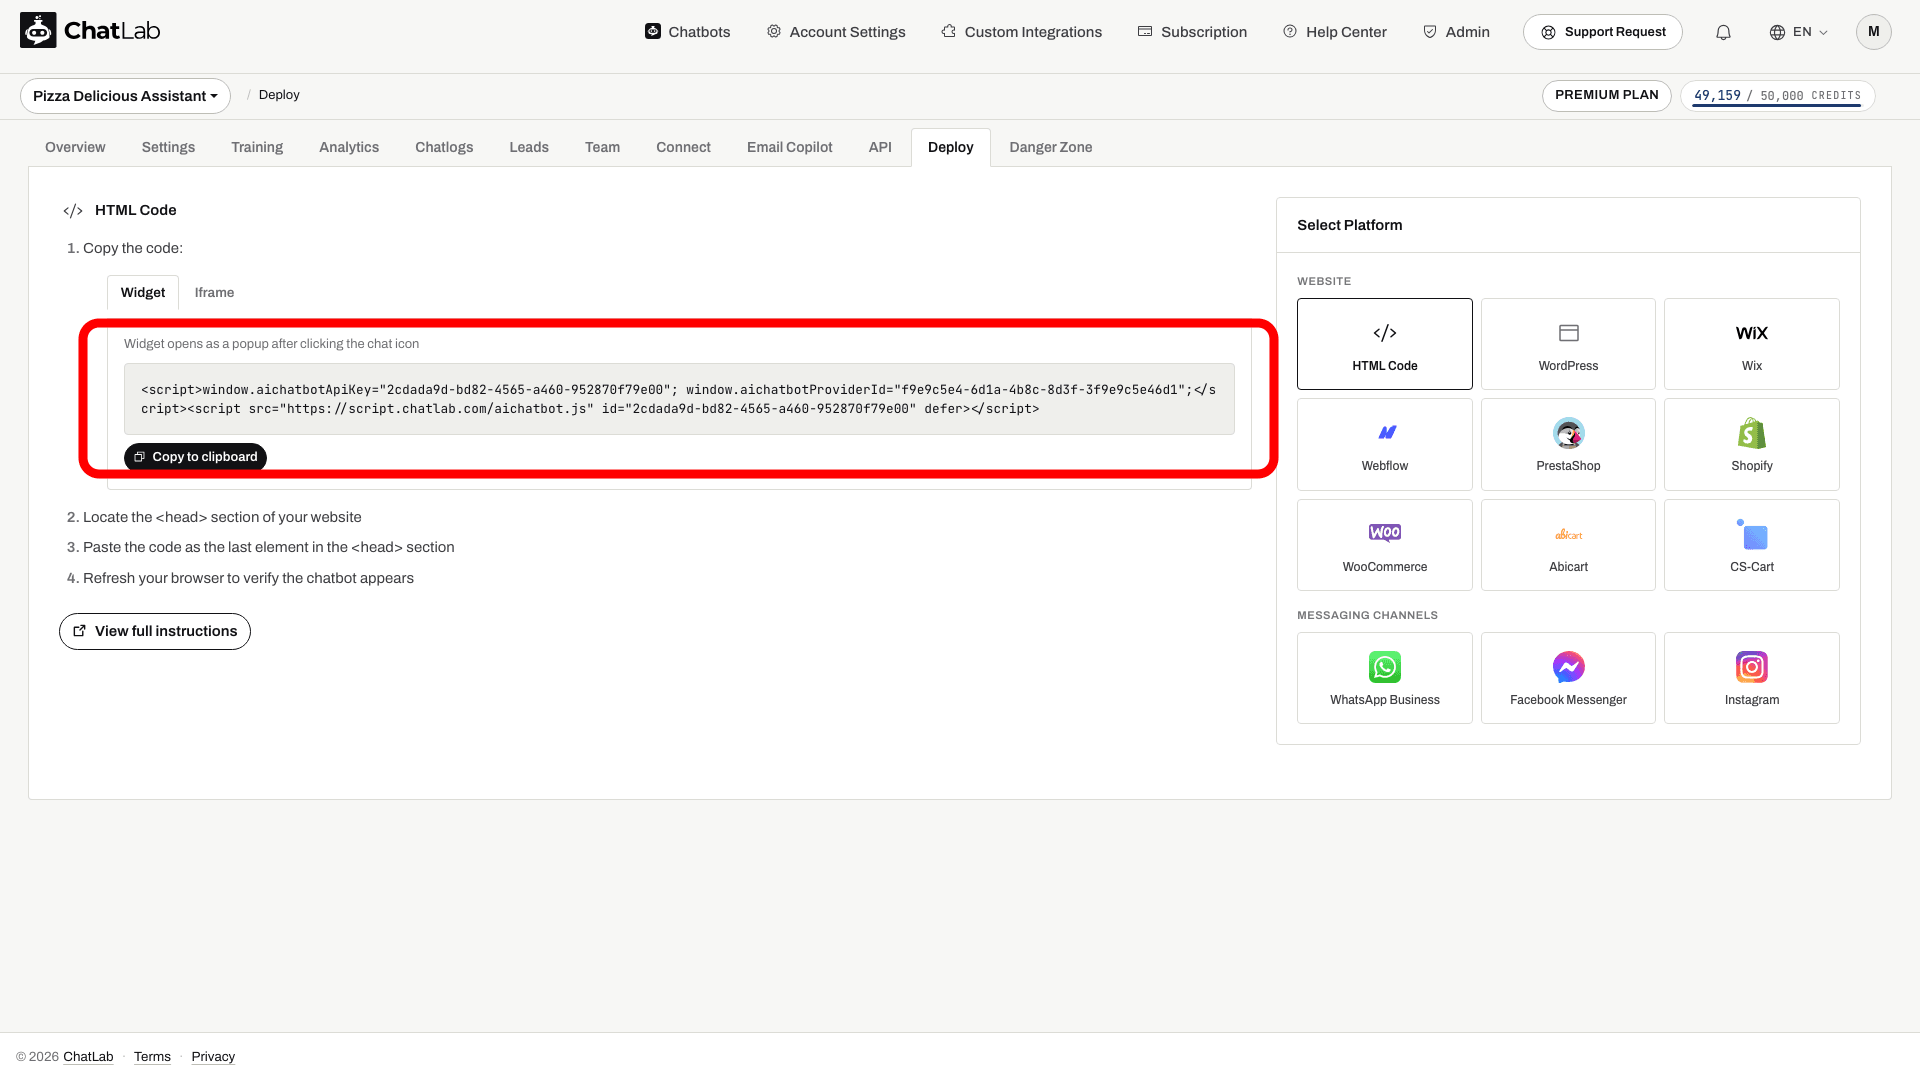
Use the following pattern as an implementation example, then validate it with your actual CMP and website. The examples are not a certification or a substitute for testing.
Prepare One Conditional Loader
Remove the normal, unconditional ChatLab installation from your site, plugins, and tag manager so there is only one loading path. Copy your public embed key and provider ID from Deploy, not a secret ck_ or mk_ API key. If your deployment uses a branded script host, retain the URL from Deploy.
Define this helper before registering your consent listeners. It does not load ChatLab until called with true.
<script>
  window.applyChatLabConsent = function (allowed) {
    if (!allowed) {
      if (window.chatLabLoadedAfterConsent) window.location.reload();
      return;
    }
    if (window.chatLabLoadedAfterConsent) return;
    window.chatLabLoadedAfterConsent = true;
    window.aichatbotApiKey = "YOUR_API_KEY_HERE";
    window.aichatbotProviderId = "YOUR_PROVIDER_ID_HERE";

    var script = document.createElement("script");
    script.src = "https://script.chatlab.com/aichatbot.js";
    script.id = window.aichatbotApiKey;
    script.defer = true;
    document.head.appendChild(script);
  };
</script>
On withdrawal, this example reloads the page after the CMP has stored the denied choice. The next page load must stay blocked. A reload can discard unsaved page input, so incorporate it into your site's withdrawal flow. Merely removing the script element does not stop already-executed code, connections, or an existing widget. Reloading also does not erase previously collected data or stored consent records.
Cookiebot
Choose the category that matches your documented purposes; marketing here is an example, not a classification imposed by ChatLab. Cookiebot exposes the singular consent object. Its ready, acceptance, and decline events let you re-check that category. See Cookiebot's developer documentation.
Install this listener before the CMP can emit its initial event:
<script>
  function checkChatLabCookiebotConsent() {
    window.applyChatLabConsent(
      !!(window.Cookiebot && window.Cookiebot.consent &&
         window.Cookiebot.consent.marketing)
    );
  }
  window.addEventListener("CookiebotOnConsentReady", checkChatLabCookiebotConsent);
  window.addEventListener("CookiebotOnAccept", checkChatLabCookiebotConsent);
  window.addEventListener("CookiebotOnDecline", checkChatLabCookiebotConsent);
  checkChatLabCookiebotConsent();
</script>
Usercentrics
Register ChatLab as a service with your assessed purpose/category. Use the implementation for your installed Web CMP version. Where custom window events are available, configure an event named ucEvent in Implementation > Data Layer & Events, then register the listener before the CMP initializes. The service name in the example must exactly match your configuration.
<script>
  window.addEventListener("ucEvent", function (event) {
    if (event.detail && event.detail.event === "consent_status") {
      window.applyChatLabConsent(event.detail.ChatLab === true);
    }
  });
</script>
This follows Usercentrics' custom-event guidance. Confirm that your setup emits the initial stored choice as well as later updates. If it does not, use the documented initial-state API for your version; do not assume a listener alone handles returning visitors.
Google Tag Manager
- Integrate your CMP with GTM and establish the required denied consent defaults before other tags run.
- Create a Custom HTML tag containing the conditional loader and a call to
applyChatLabConsent(true). - Open the tag's Consent Settings and configure Additional Consent Checks for the consent types chosen for this service.
- Use the actual consent-ready/update data-layer event supplied by your CMP as the trigger. Also cover returning visitors whose consent was already granted.
- Handle withdrawal through the CMP's stored-choice and page-reload flow described above.
- Test in GTM Preview before publishing.
A Custom HTML tag does not become consent-aware simply because your site has a banner. Do not copy a fictional event name such as CookieConsentDeclaration; the event and consent variables must exist in your container. See Google's tag consent settings.
Verify Before Publishing
In a fresh browser session, check these cases using the browser's Network panel:
- Before any choice and after rejection: no ChatLab loader, widget, or API requests should occur.
- After approval: the widget loads once and can start a conversation.
- Returning with stored approval: the widget loads without another click.
- After withdrawal: the page reloads, the denied choice persists, and ChatLab stays unloaded.
- With in-widget consent enabled: the expected policy checkbox appears before the configured interaction.
Also inspect iframe embeds, other plugins, and duplicate tags: blocking one script does not block a second installation. For data-retention controls, see Deleting your data.