Adding a ChatLab chatbot to your Webflow website lets visitors interact with your AI assistant directly on your site. This guide walks through the steps to get your embed code from ChatLab and paste it into Webflow.
Step 1 -- Copy the embed code from ChatLab
- Log in to ChatLab and select the chatbot you want to embed
- Click the Add to Website tab, then select Webflow from the platform panel on the right
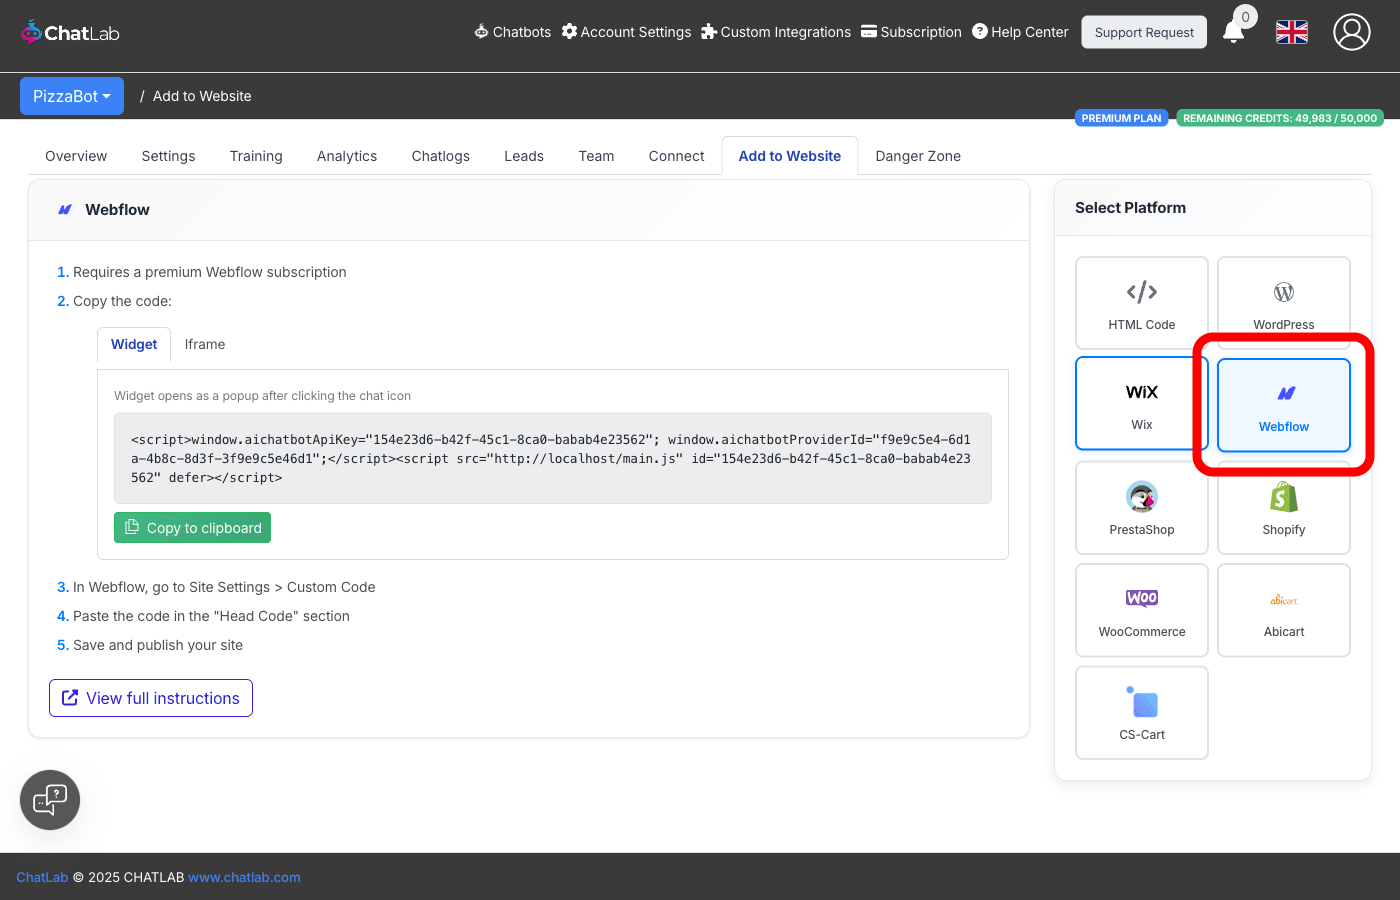
- Choose between Widget (chat popup triggered by a chat icon) or Iframe (always-visible chat embedded in the page). See What is the difference between widget and Iframe? for a comparison
- Click Copy to clipboard
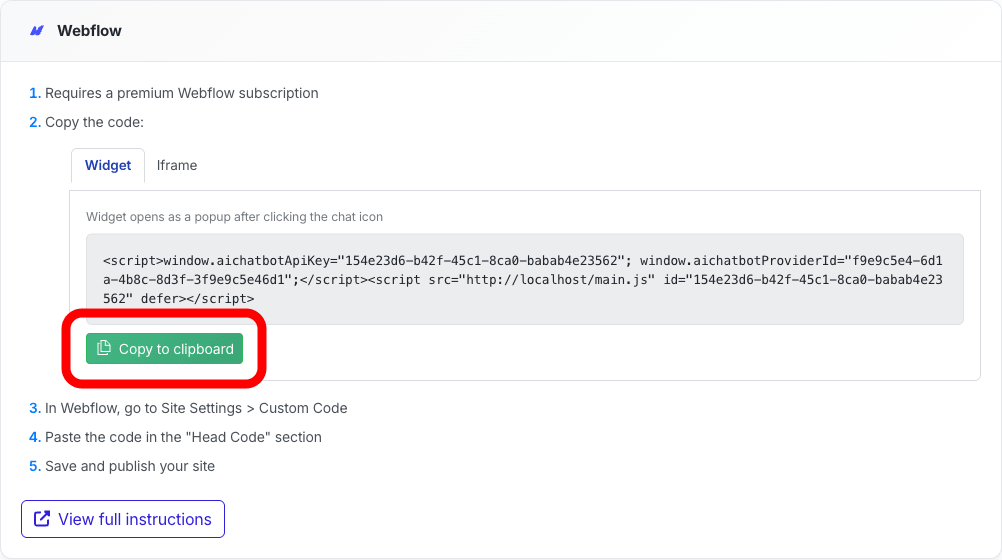
Step 2 -- Add the code to Webflow
Adding the code in Site Settings places the chatbot on every page of your Webflow site.
- Open your project in the Webflow Dashboard
- Go to Site Settings > Custom Code
- Paste the copied code into the Head Code section
- Click Save Changes
- Publish your site for the changes to take effect
Adding to a single page only
If you want the chatbot on a specific page rather than the entire site:
- Open the page in the Webflow Designer
- Click the gear icon to open Page Settings
- Scroll down to the Custom Code section
- Paste the code into the Head Code field
- Save and publish your site
Verifying the installation
After publishing, open your Webflow site in a browser. You should see the chat icon appear in the corner of the page (for widget mode) or the chat window embedded on the page (for iframe mode). Click the icon to open the chat and send a test message to confirm everything is working.