Lead collection lets your chatbot capture visitor contact details -- name, email, and phone number -- so you can follow up with potential customers.
Where to find lead collection settings
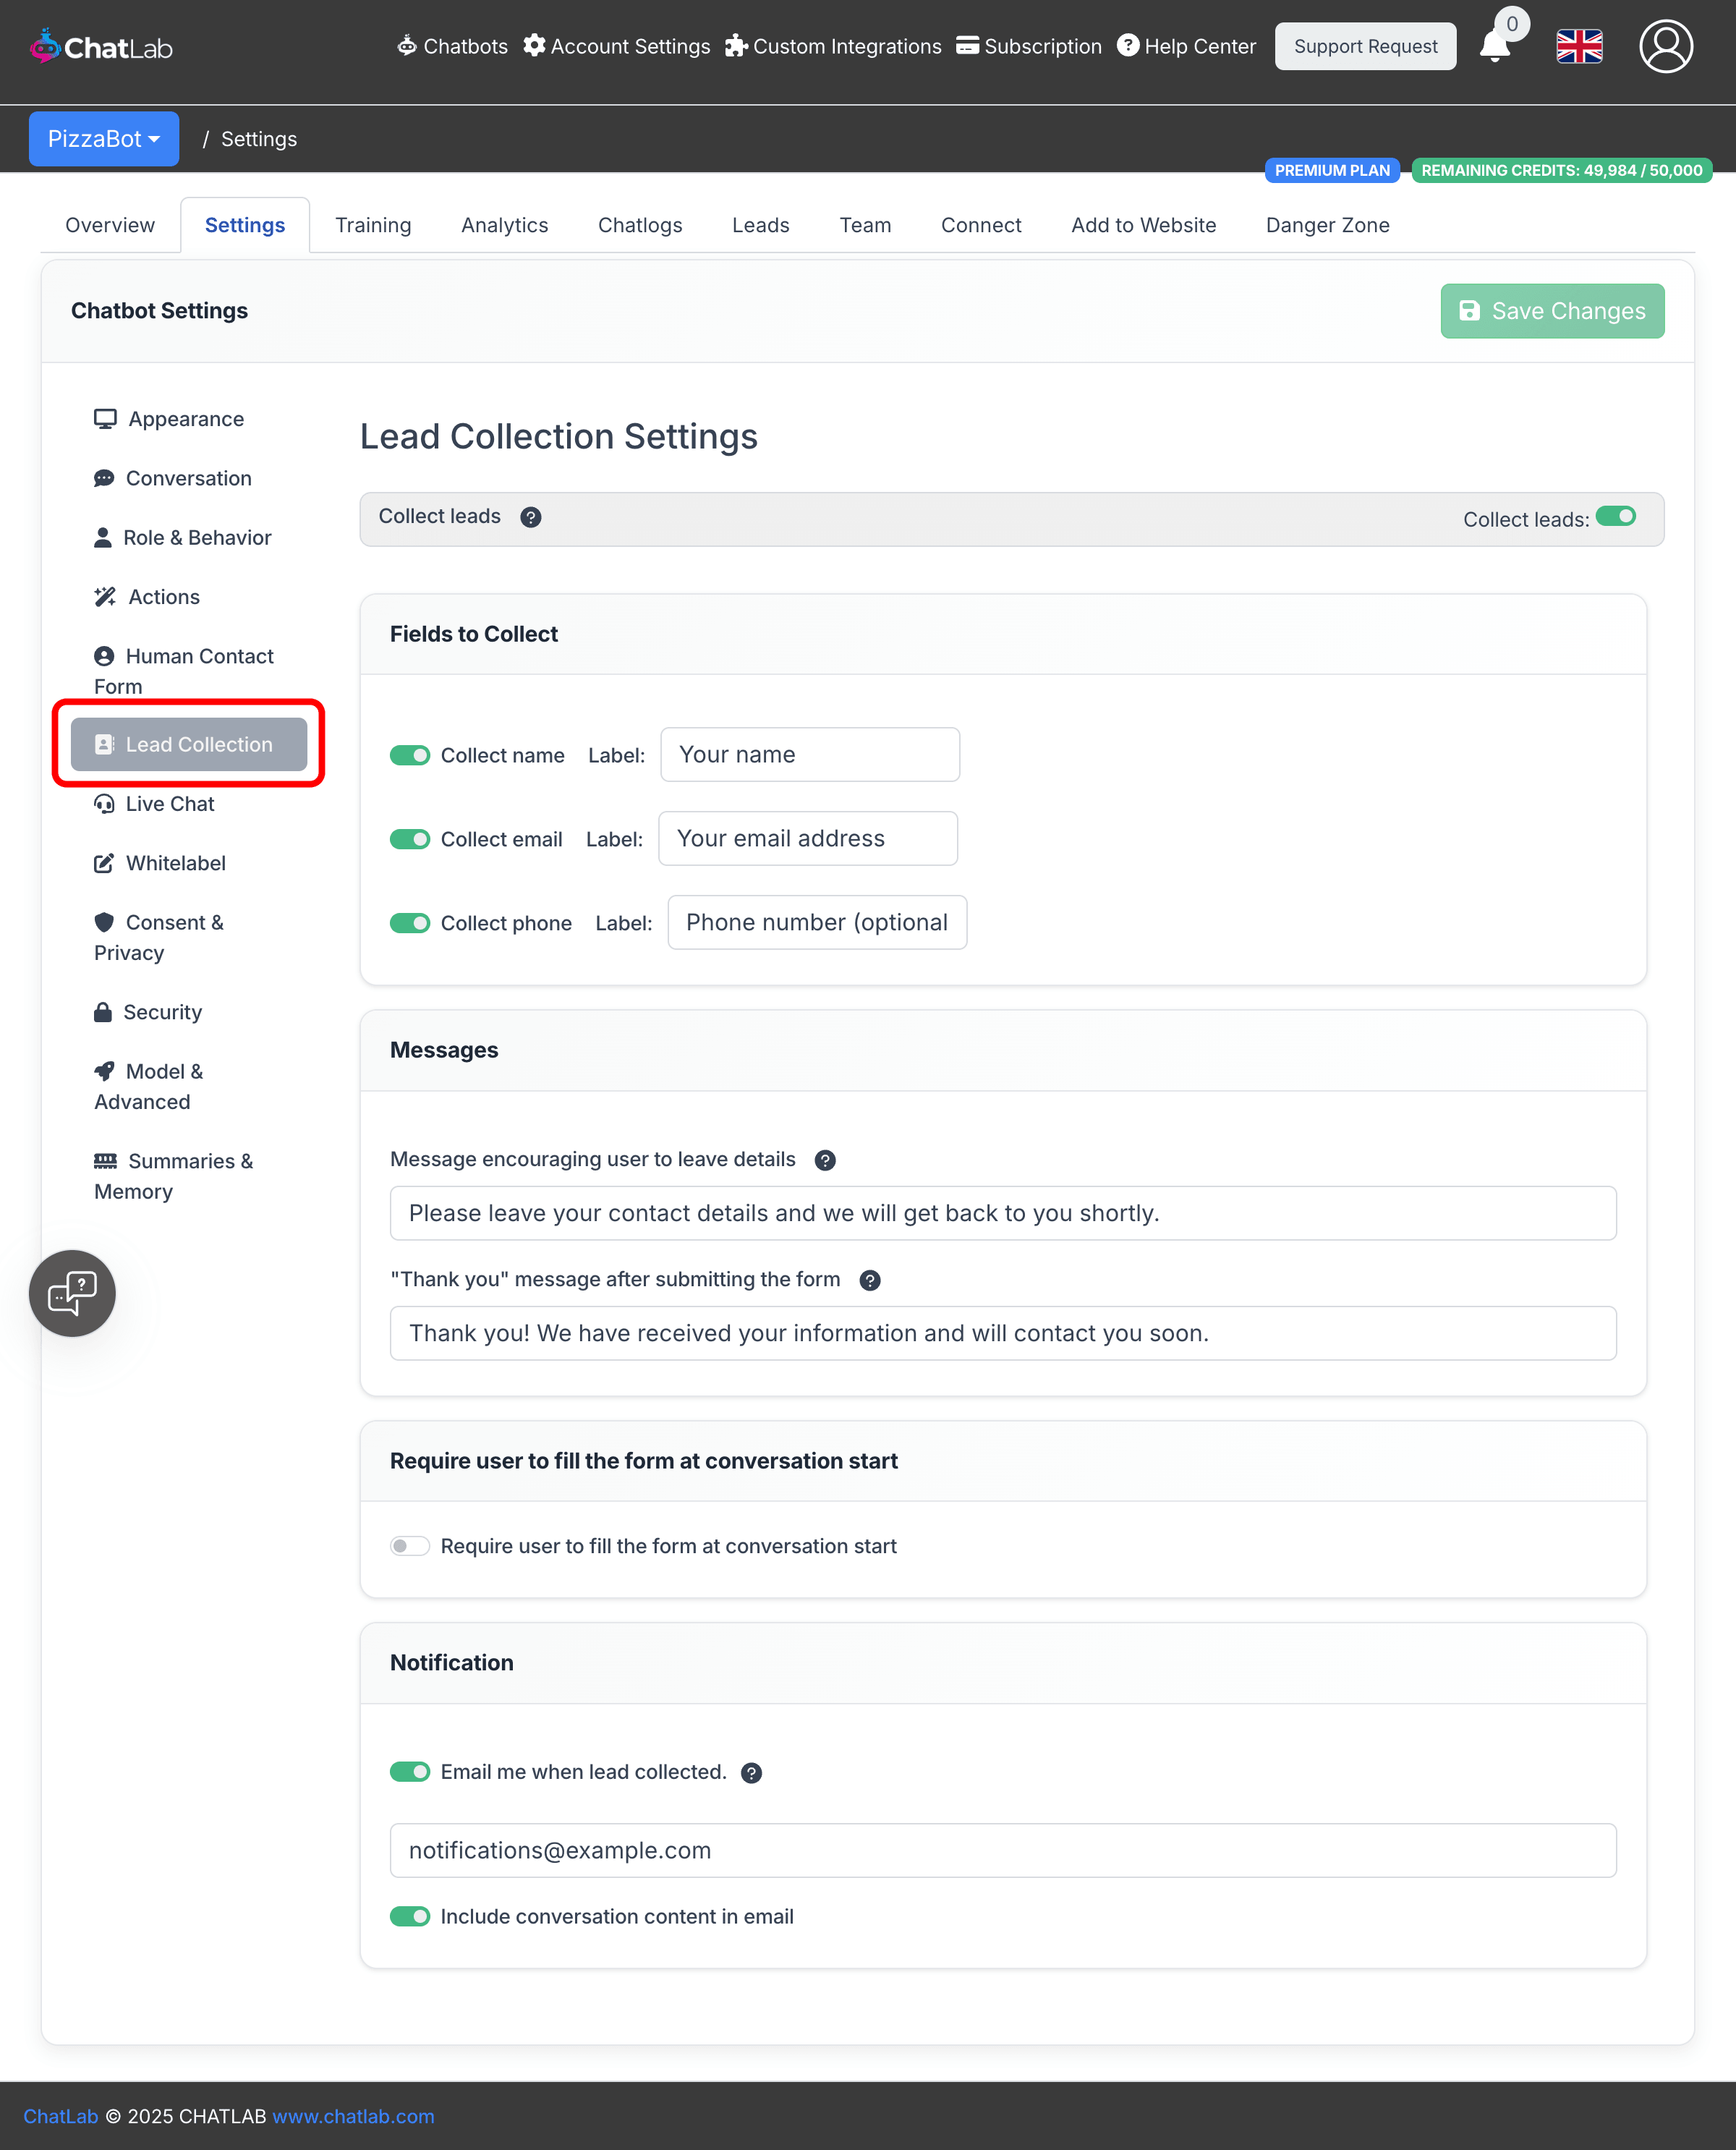
Select your chatbot, click the Settings tab, then select Lead Collection in the left sidebar.
Enable lead collection
Toggle on Collect leads at the top of the page. When enabled, four configuration sections appear below.
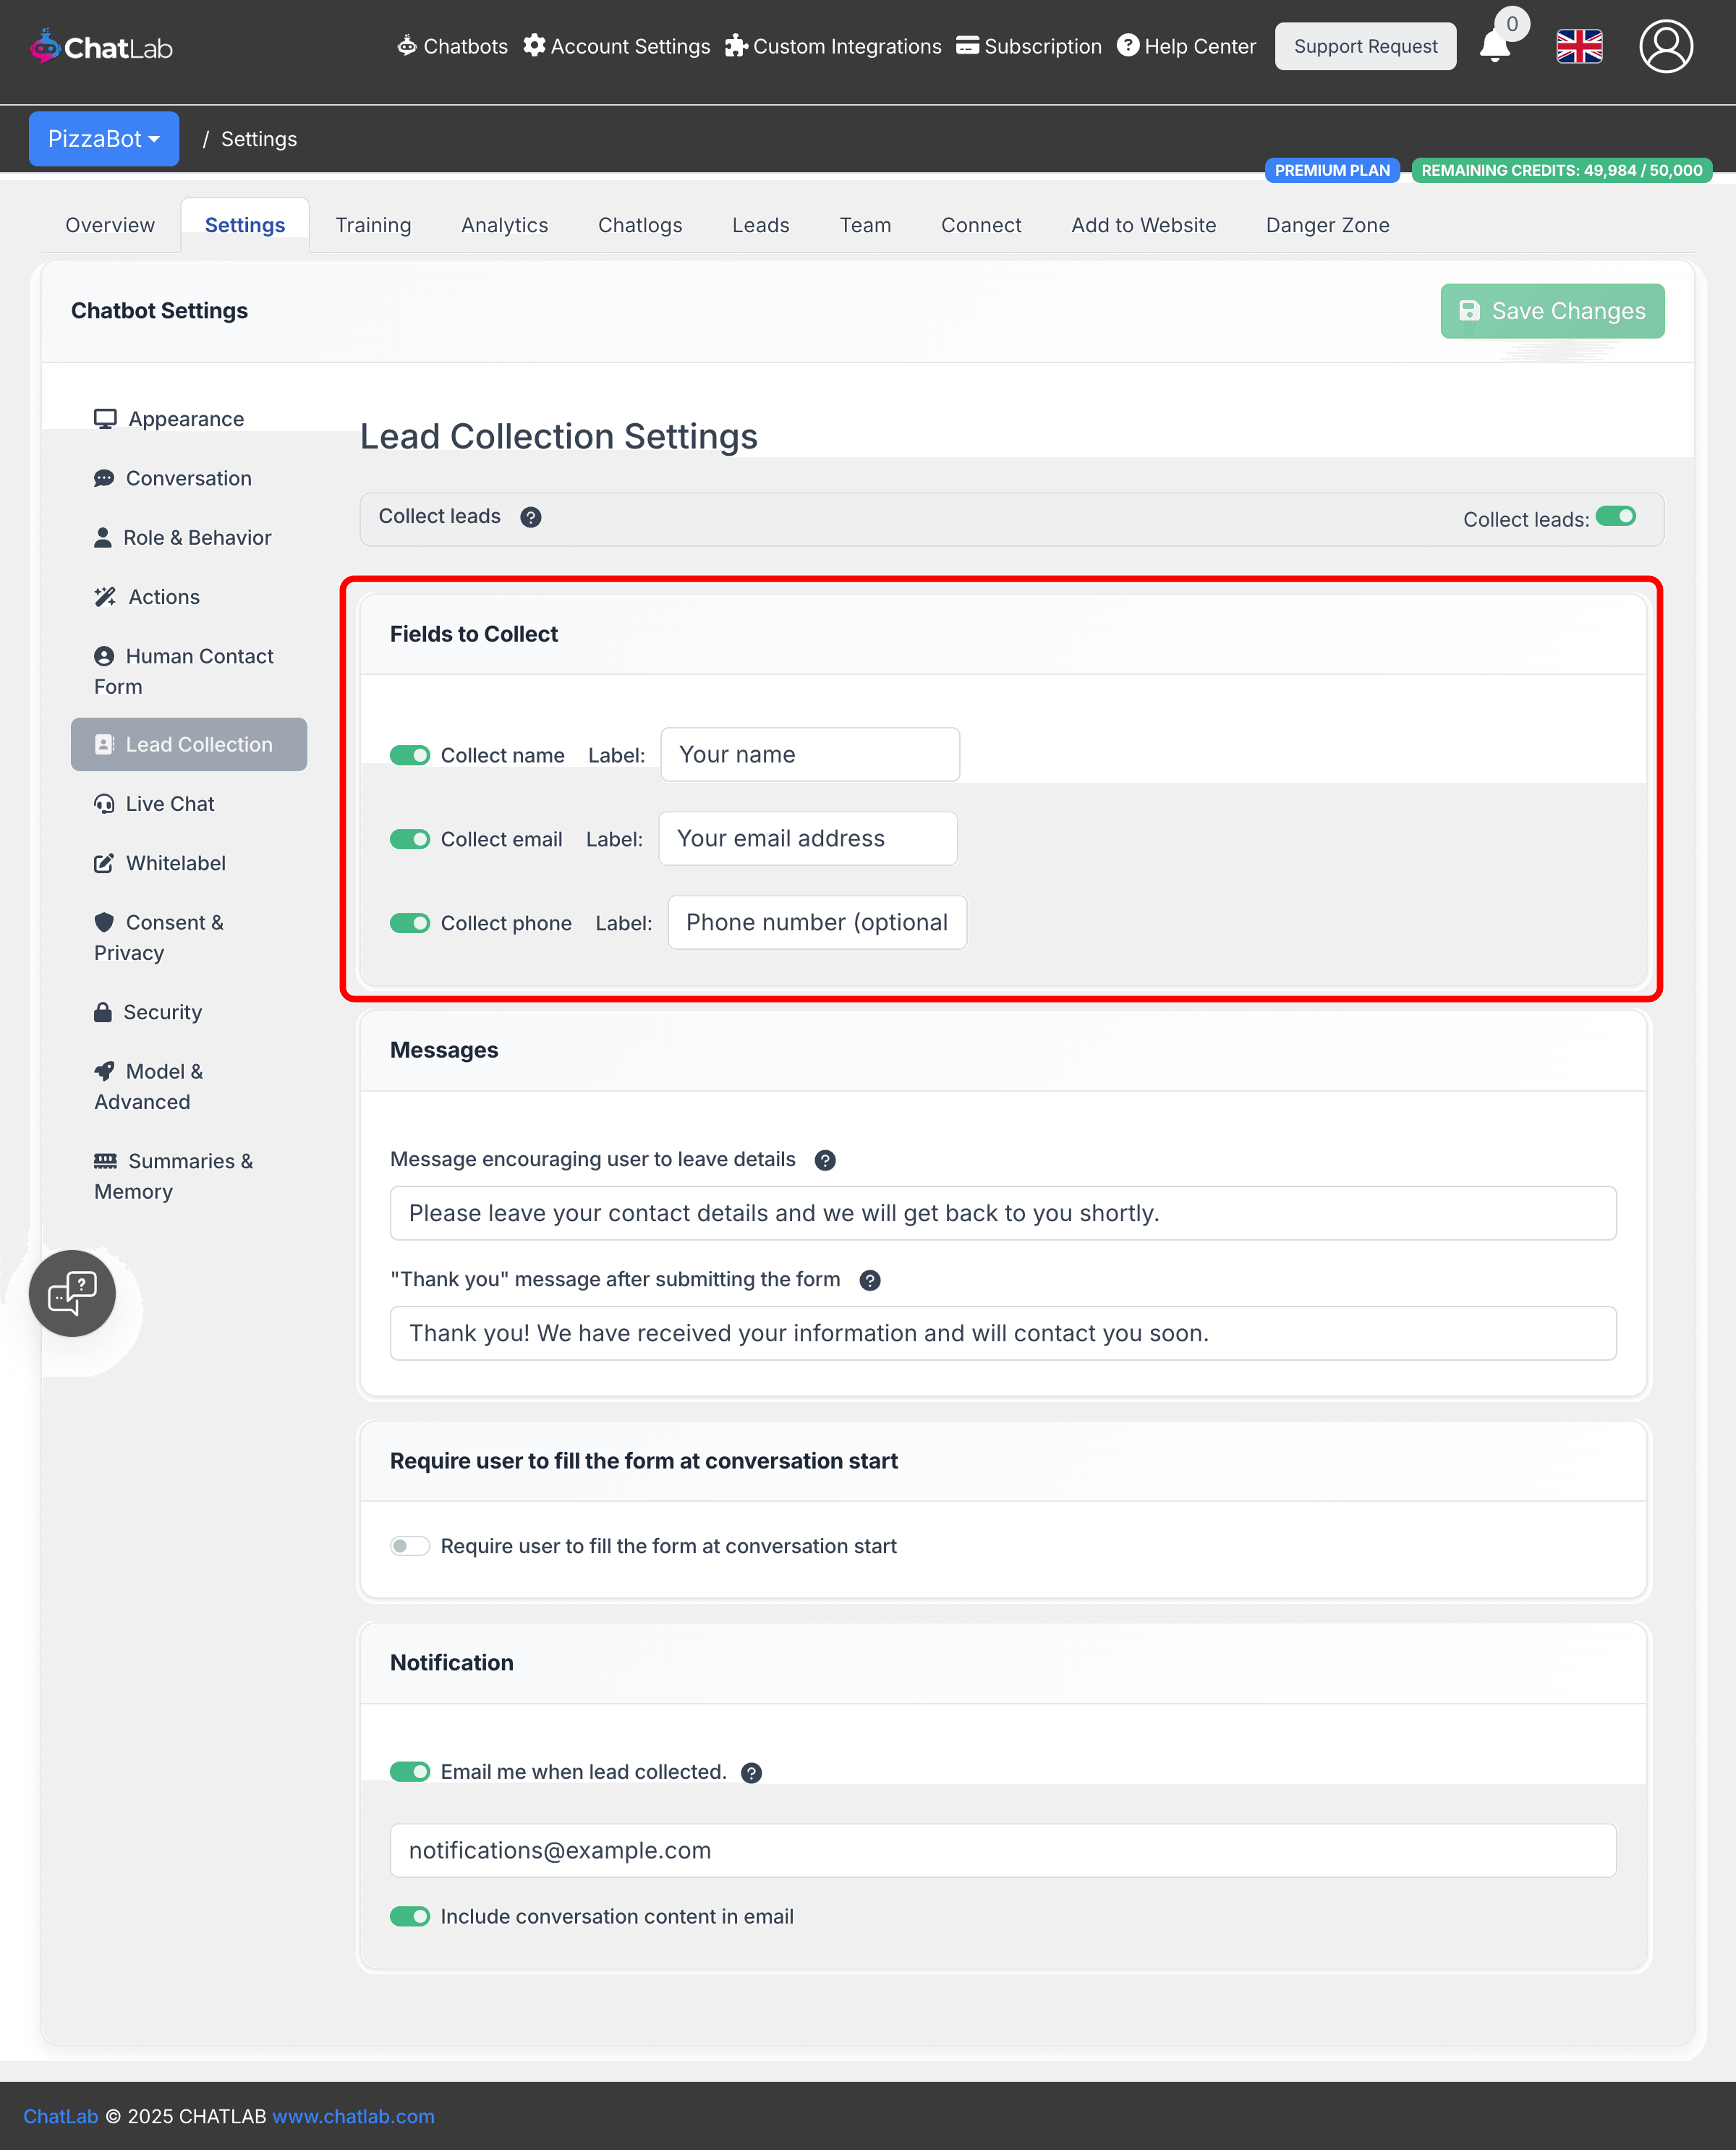
Fields to collect
Choose which contact details to capture by toggling each field on or off:
- Collect name -- visitor's name
- Collect email -- visitor's email address
- Collect phone -- visitor's phone number
Each field has a customizable Label that appears on the form. At least one of email or phone must be enabled.
Messages
- Message encouraging user to leave details -- the text displayed above the lead collection form. Supports markdown for links.
- "Thank you" message after submitting the form -- the confirmation message shown after the visitor submits their details. Supports markdown.
Form trigger
Toggle Require user to fill the form at conversation start to display the lead collection form before the visitor can begin chatting. When enabled, the form appears immediately when the chat opens and must be completed before the conversation can continue.
For more advanced trigger options, see AI-powered lead collection actions below.
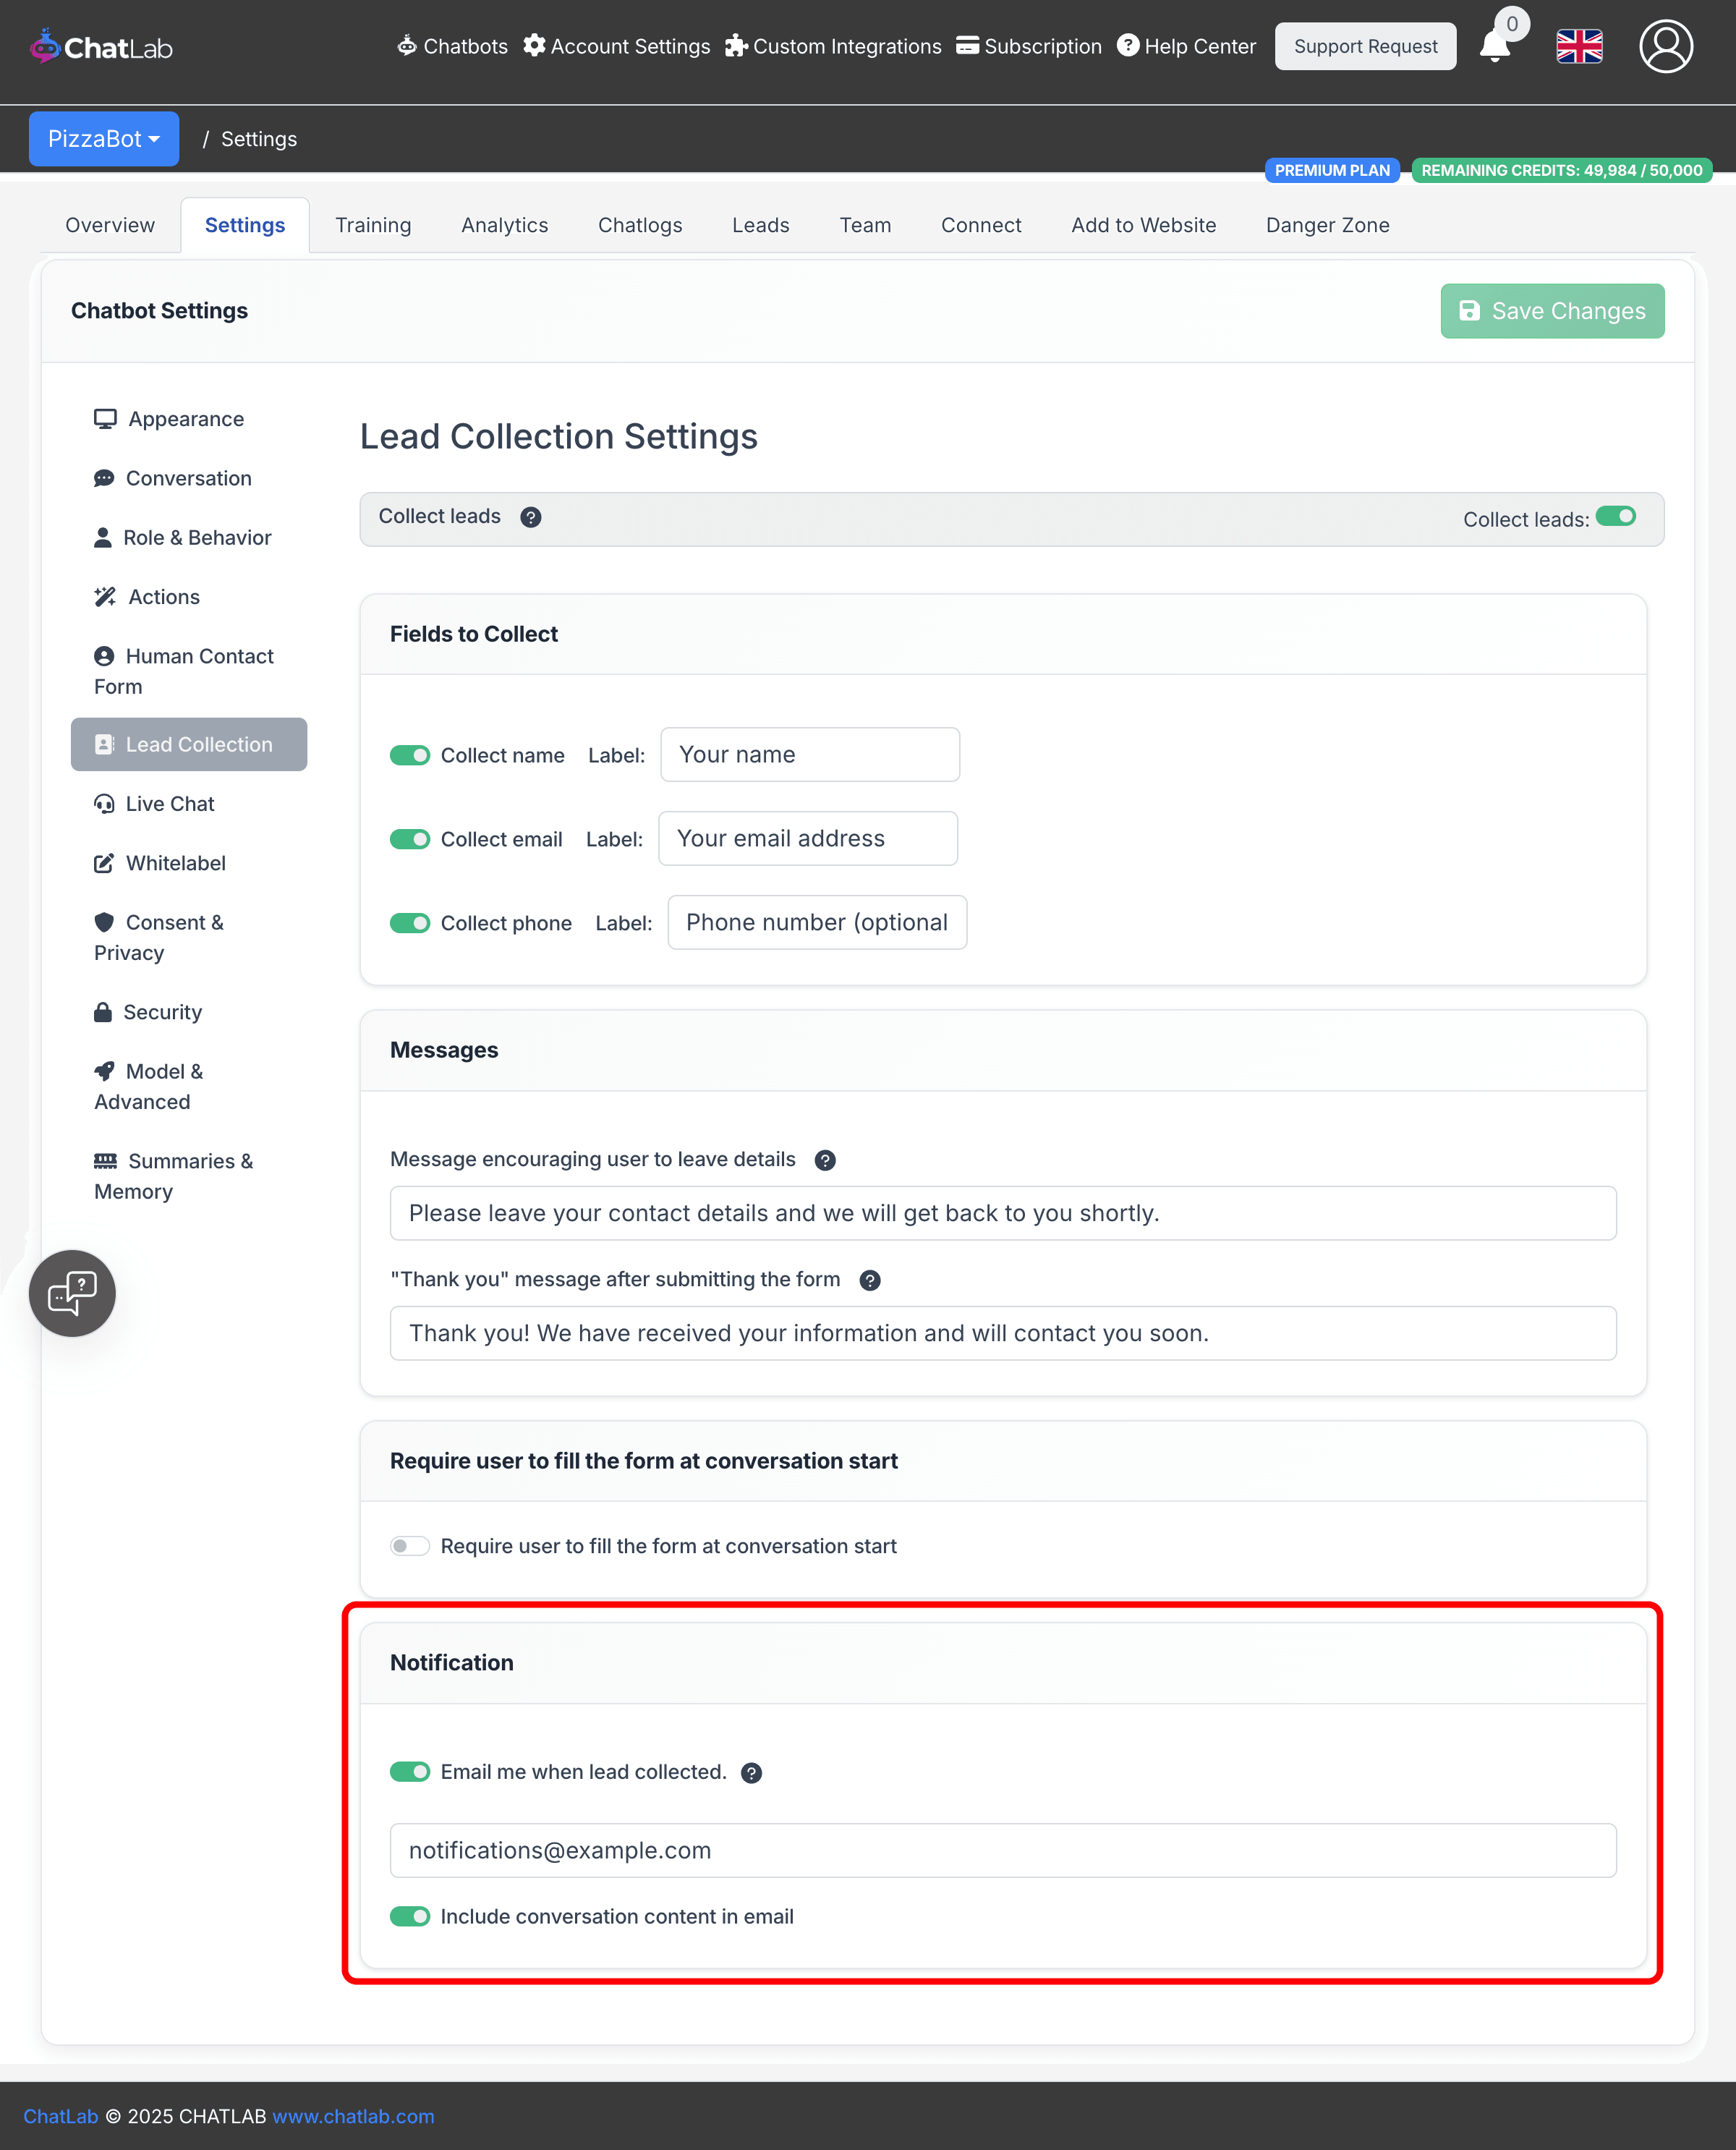
Notification
Enable Email me when lead collected to receive an email each time a visitor submits their contact details.
- Enter one or more notification email addresses (comma-separated)
- Toggle Include conversation content in email to receive the full chat transcript along with the lead details
AI-powered lead collection actions
In addition to requiring the form at conversation start, you can configure AI-powered triggers in Settings > Actions. Filter by Lead collection to see the available options:
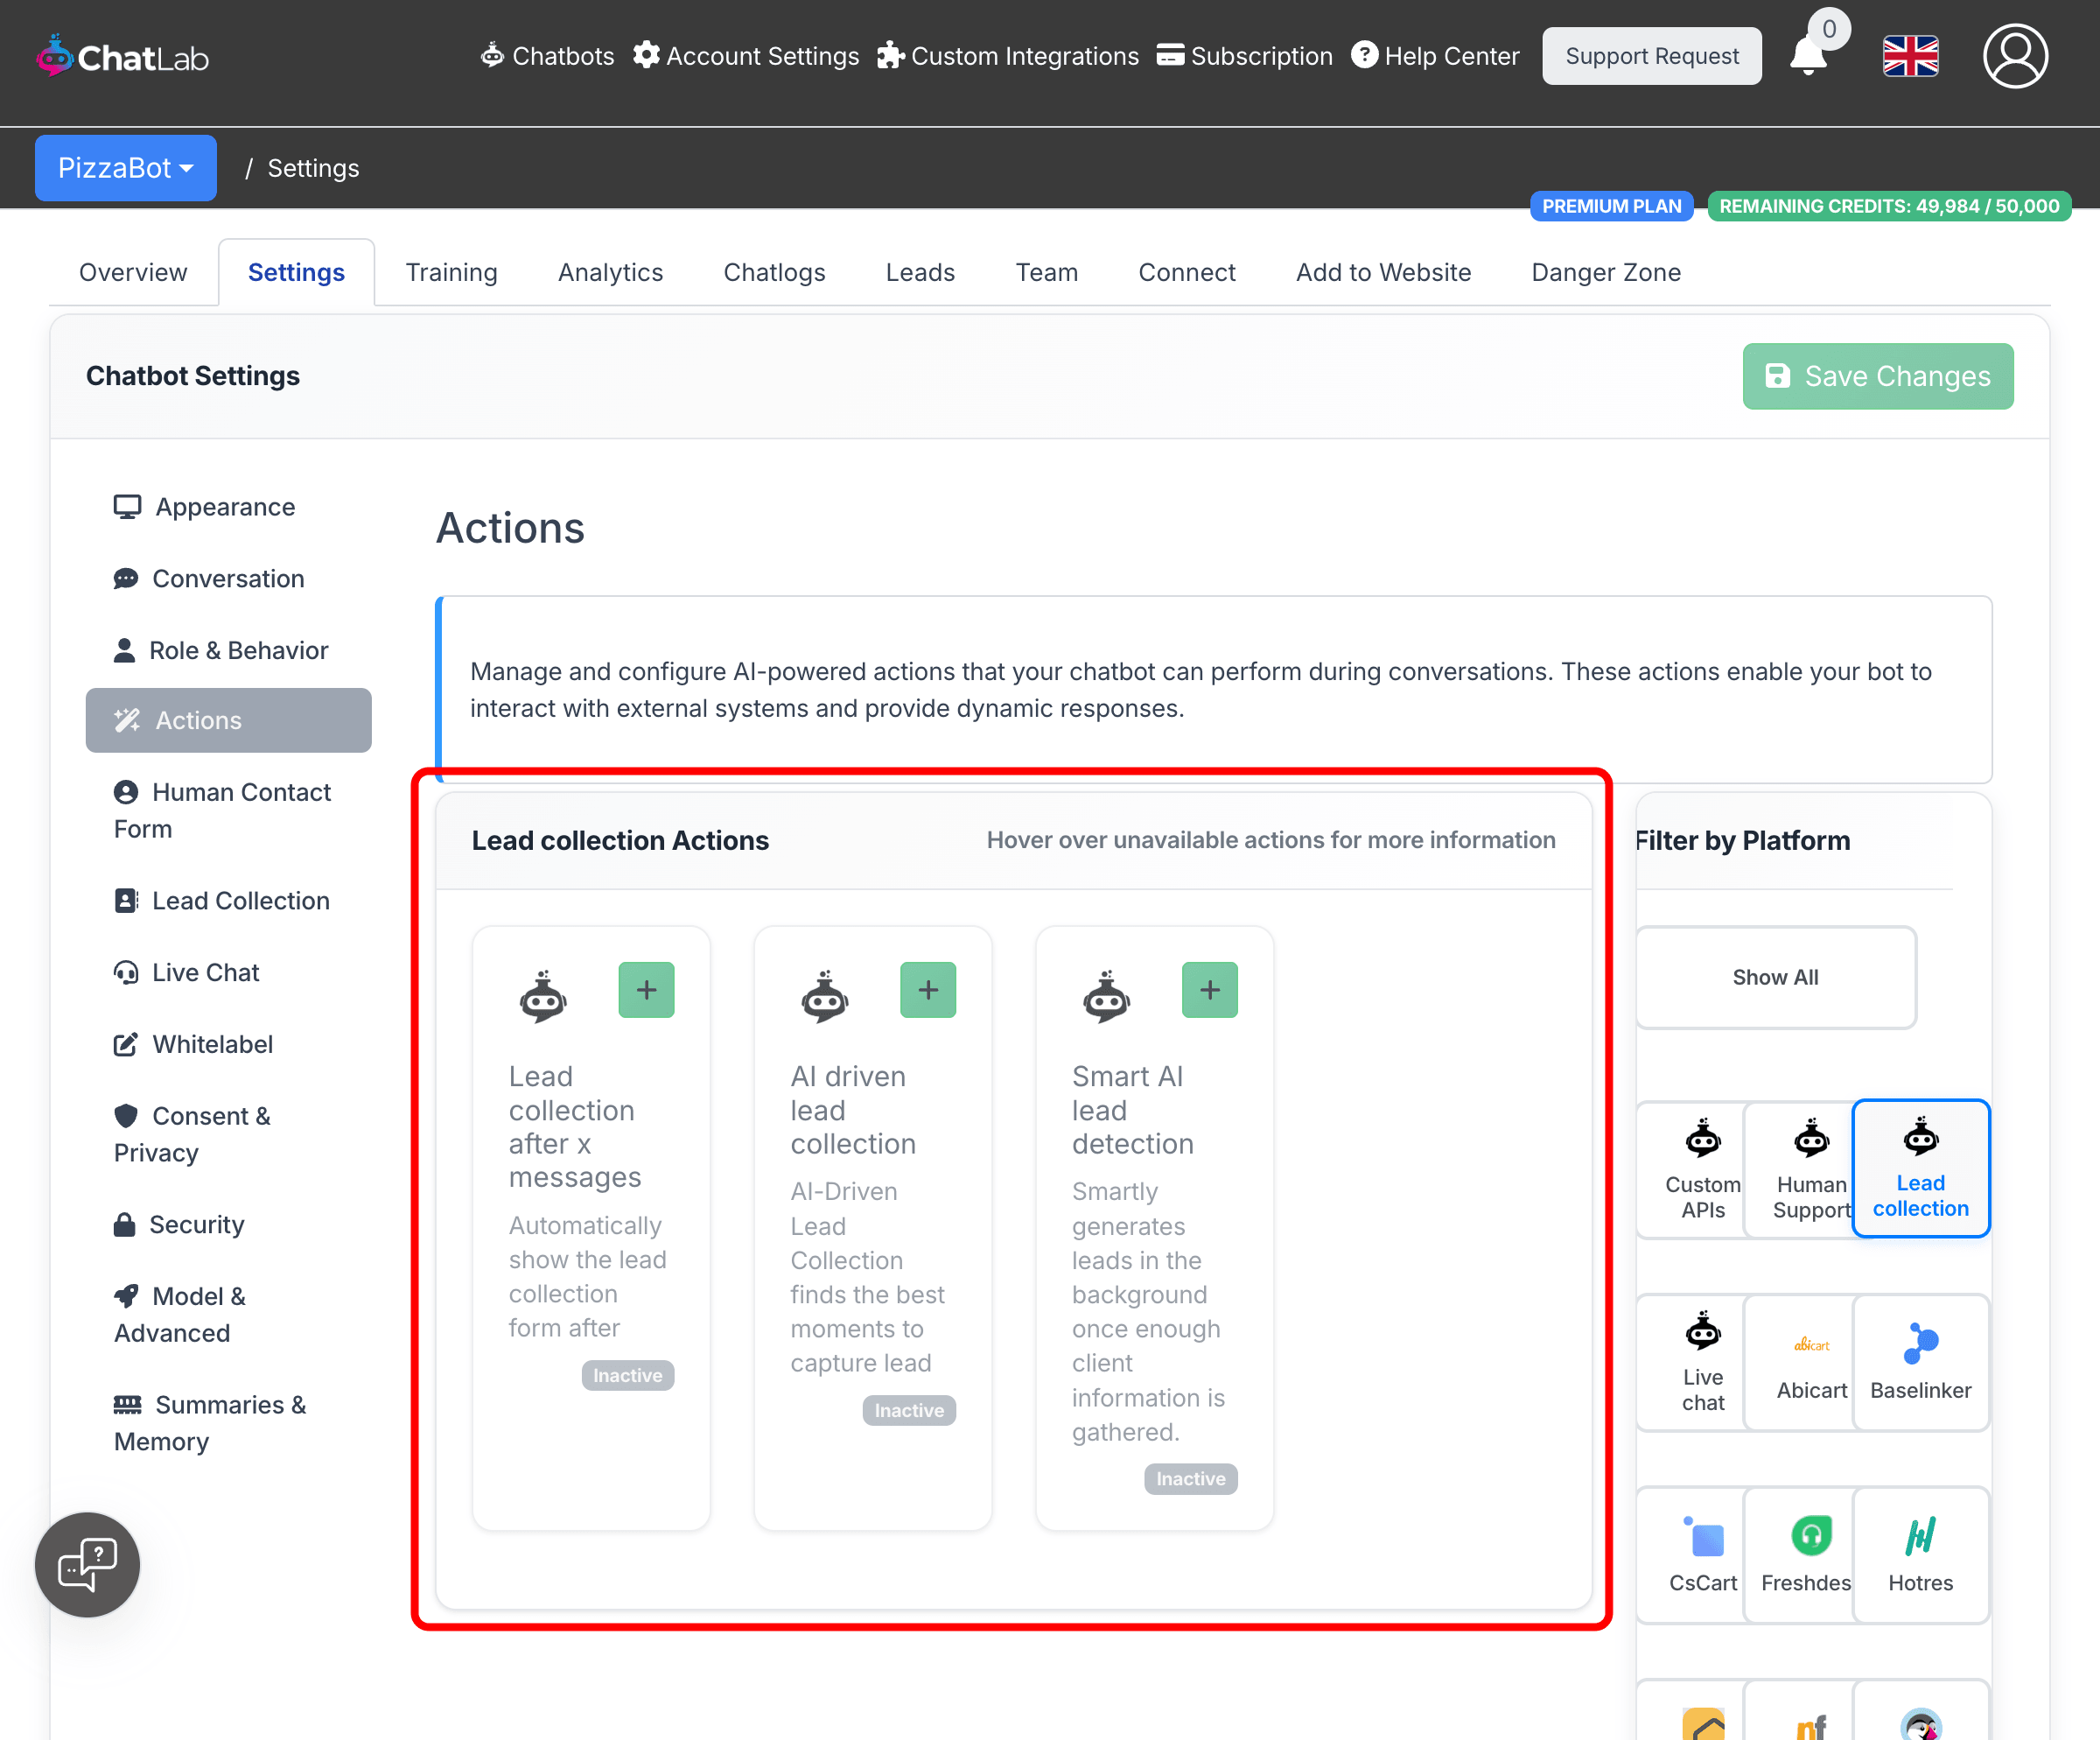
- Lead collection after X messages -- automatically displays the lead collection form after a specified number of messages in the conversation.
- AI driven lead collection -- uses AI to detect the best moment during a conversation to ask for contact details. You can customize the detection prompt with your own instructions.
- Smart AI lead detection -- analyzes conversation text in the background and automatically creates a lead when enough contact information (email, phone) is mentioned naturally in the conversation, without displaying a form.
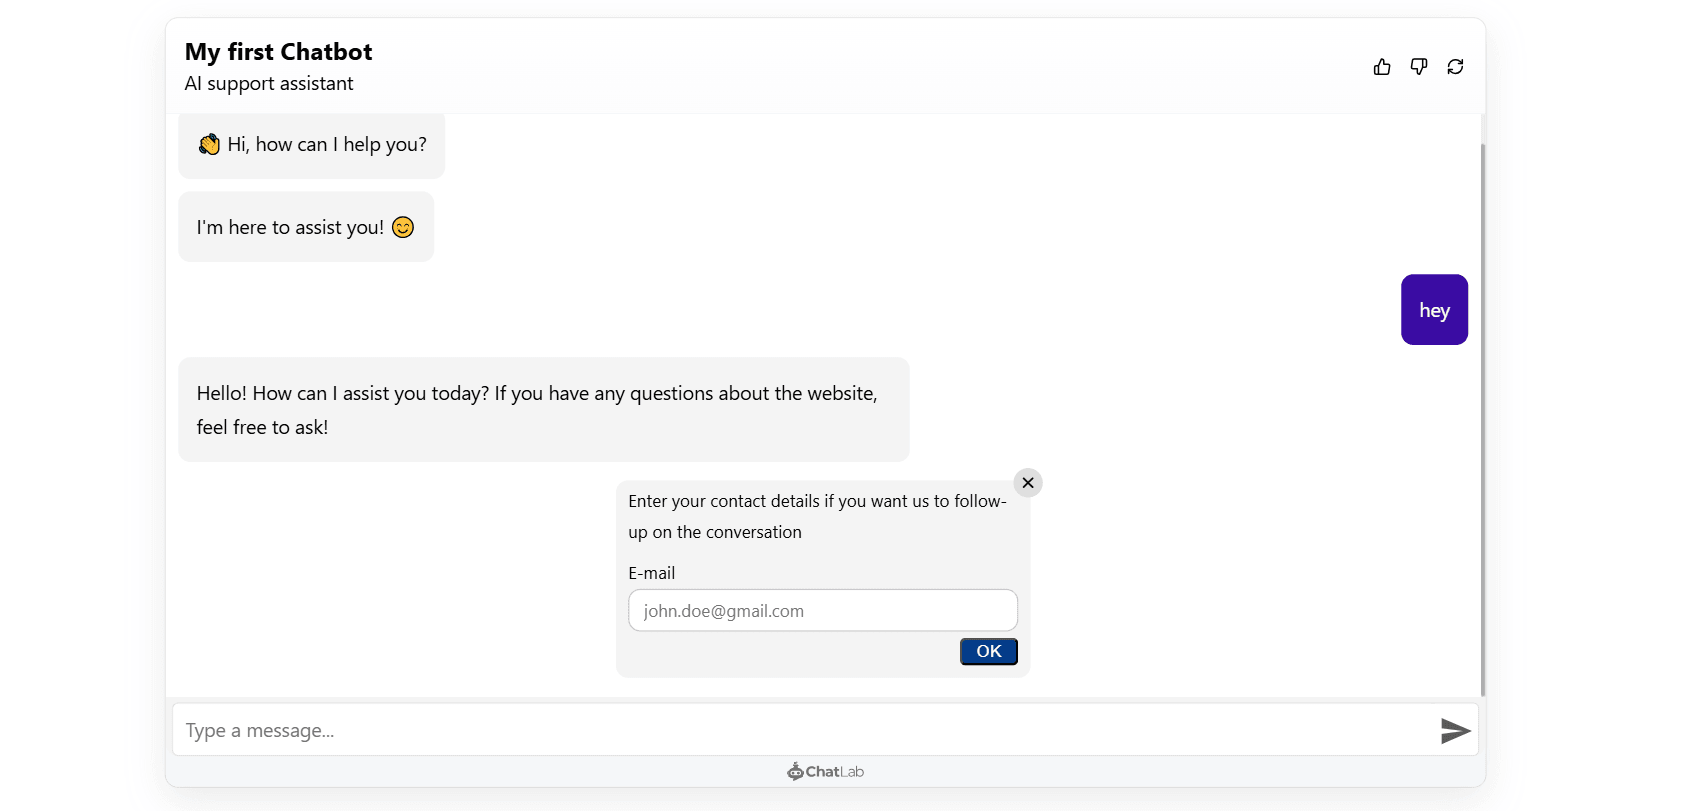
How lead collection looks to visitors
When the lead collection form is triggered, visitors see a form within the chat widget asking for their contact details. They can fill in the fields and click OK to submit.
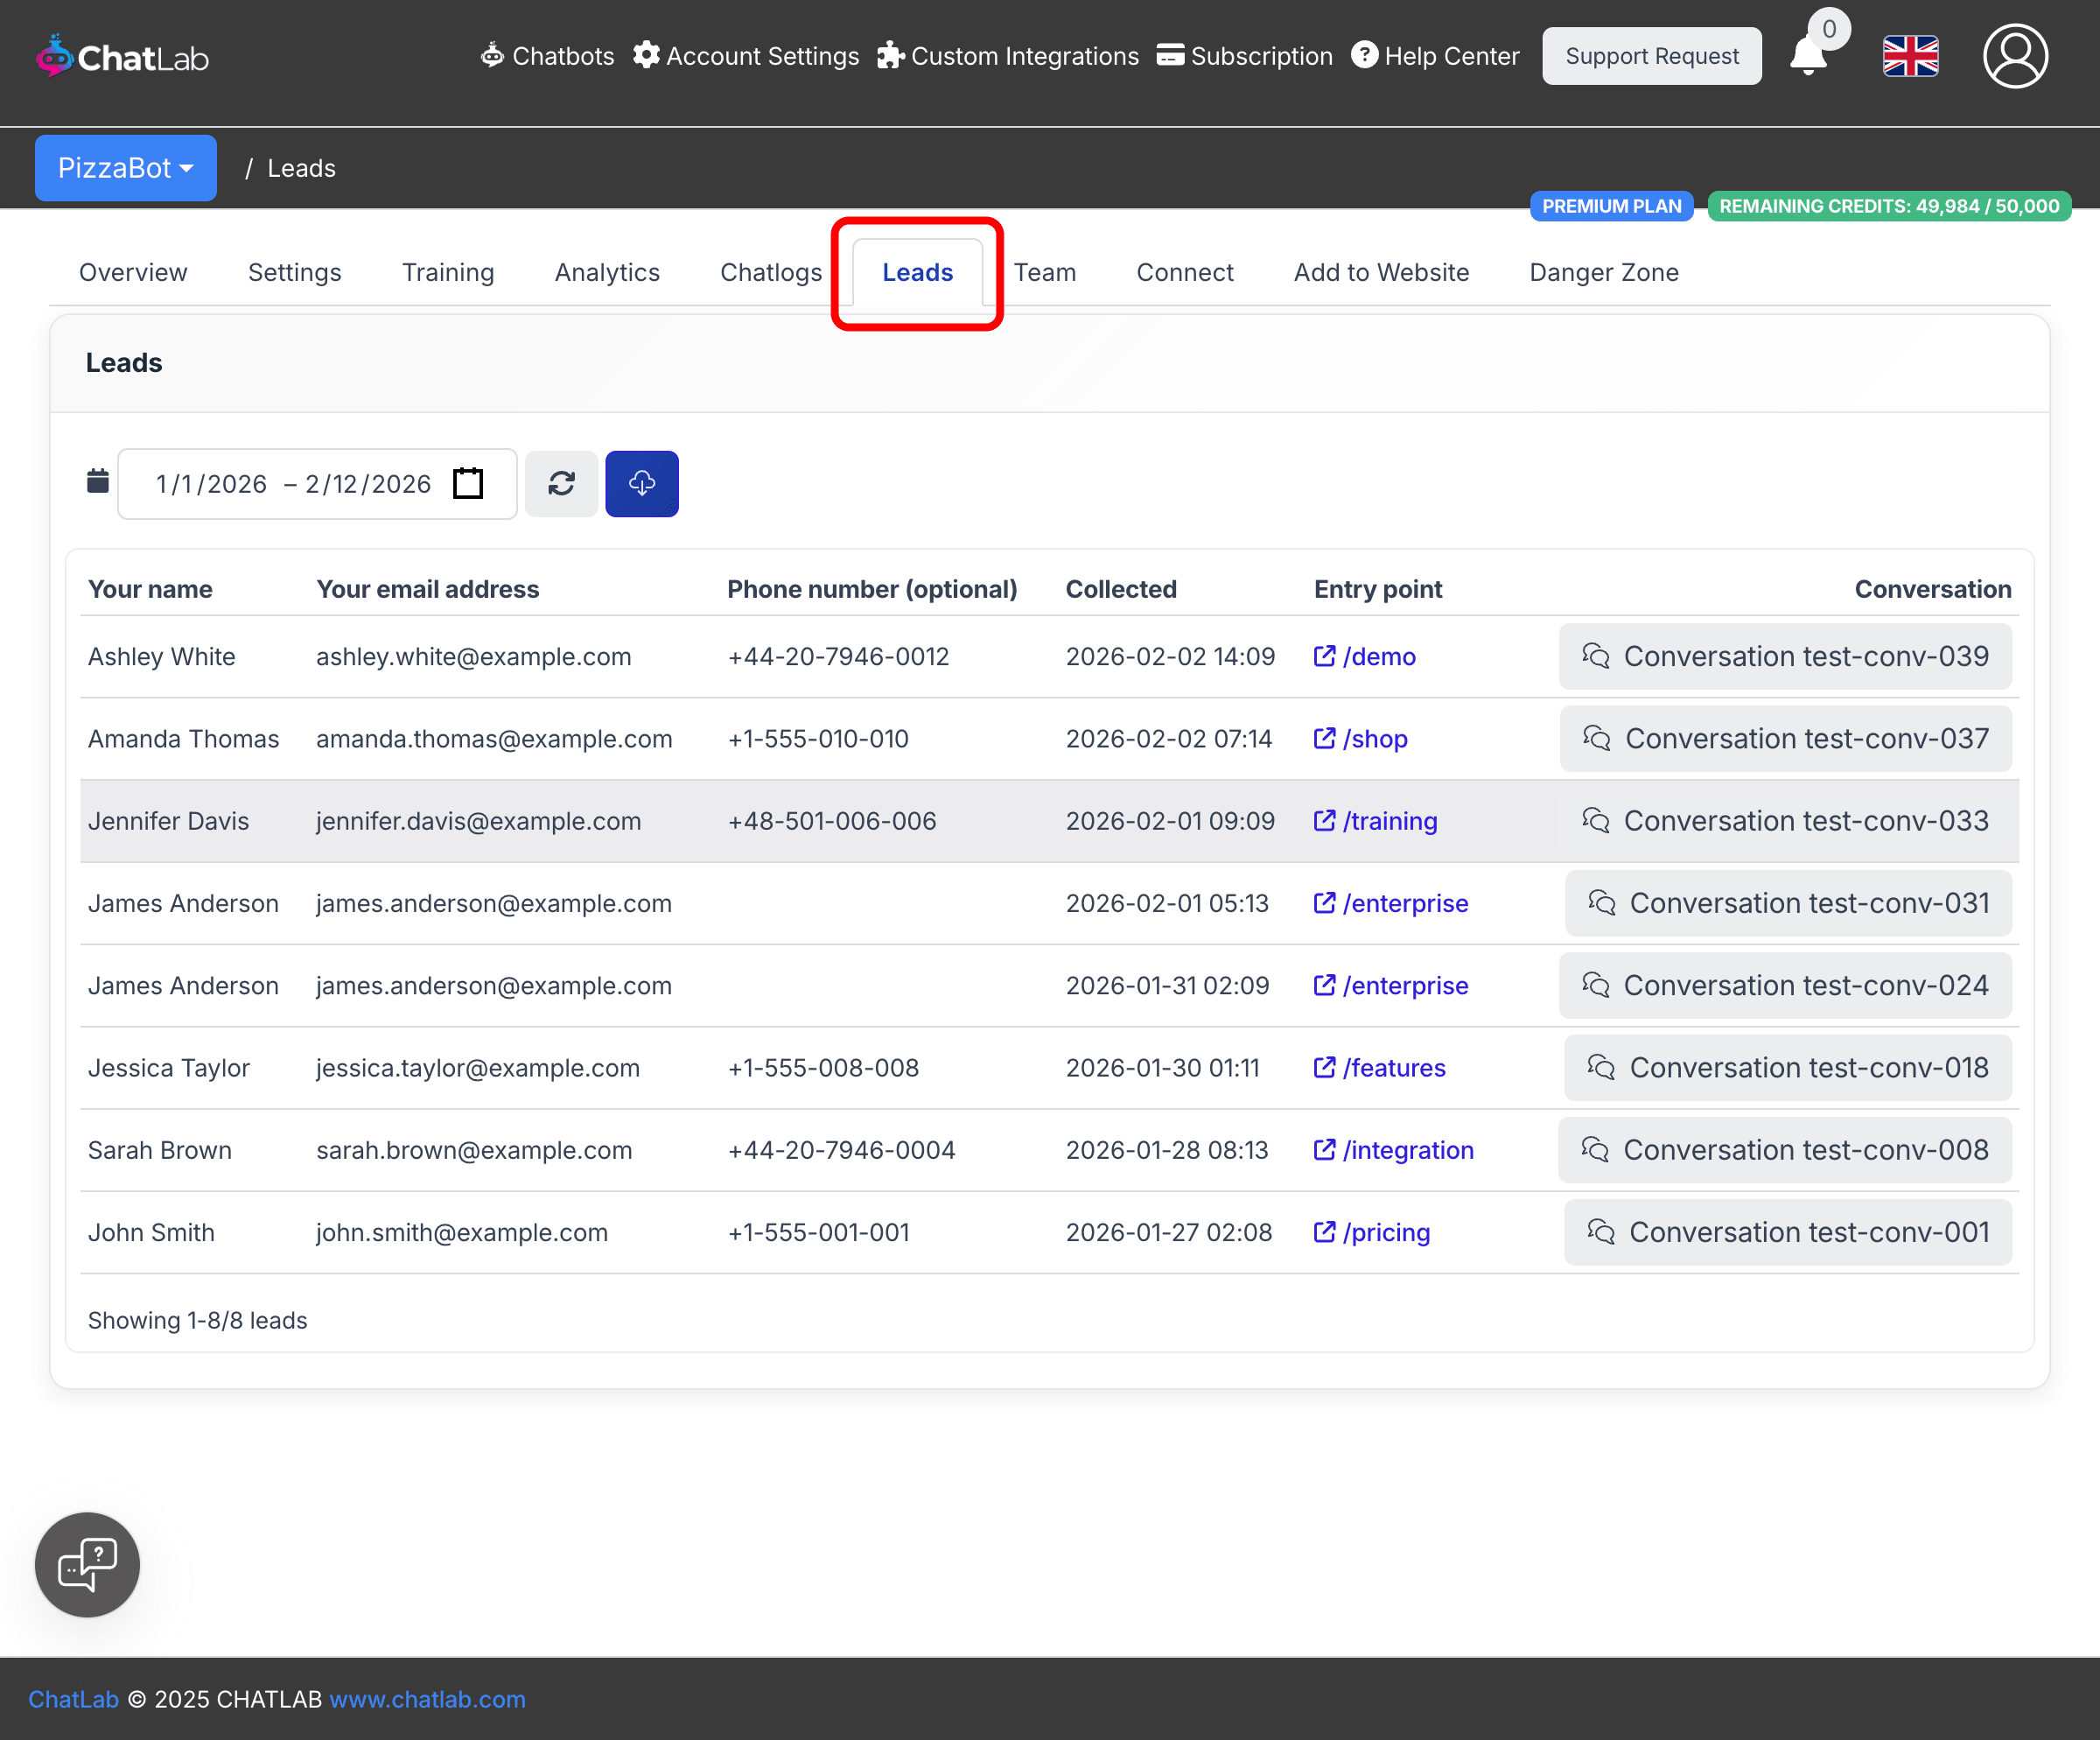
Viewing collected leads
Select your chatbot and click the Leads tab. The leads table shows all collected contact details with the following columns:
- Name, Email, Phone -- the contact details provided by the visitor (column headers match your configured field labels)
- Collected -- date and time the lead was captured
- Entry point -- the page URL or channel where the visitor interacted with the chatbot
- Conversation -- a button to open the full conversation associated with that lead
Use the date range picker to filter leads by time period. Click the download button to export the displayed leads as a CSV file.
Privacy policy consent
You can require visitors to accept a privacy policy before submitting the lead collection form. This is configured separately in Settings > Consent & Privacy -- toggle on Require Privacy Policy consent for lead collection and provide a consent label with a link to your policy.