Live chat lets your website visitors connect with a human operator in real time, directly inside the chat widget. Visitors request a person from the header menu or headset icon, depending on Settings > Appearance > Header Actions. Live Chat is available as a premium feature - an upgrade prompt appears if your plan does not include it.
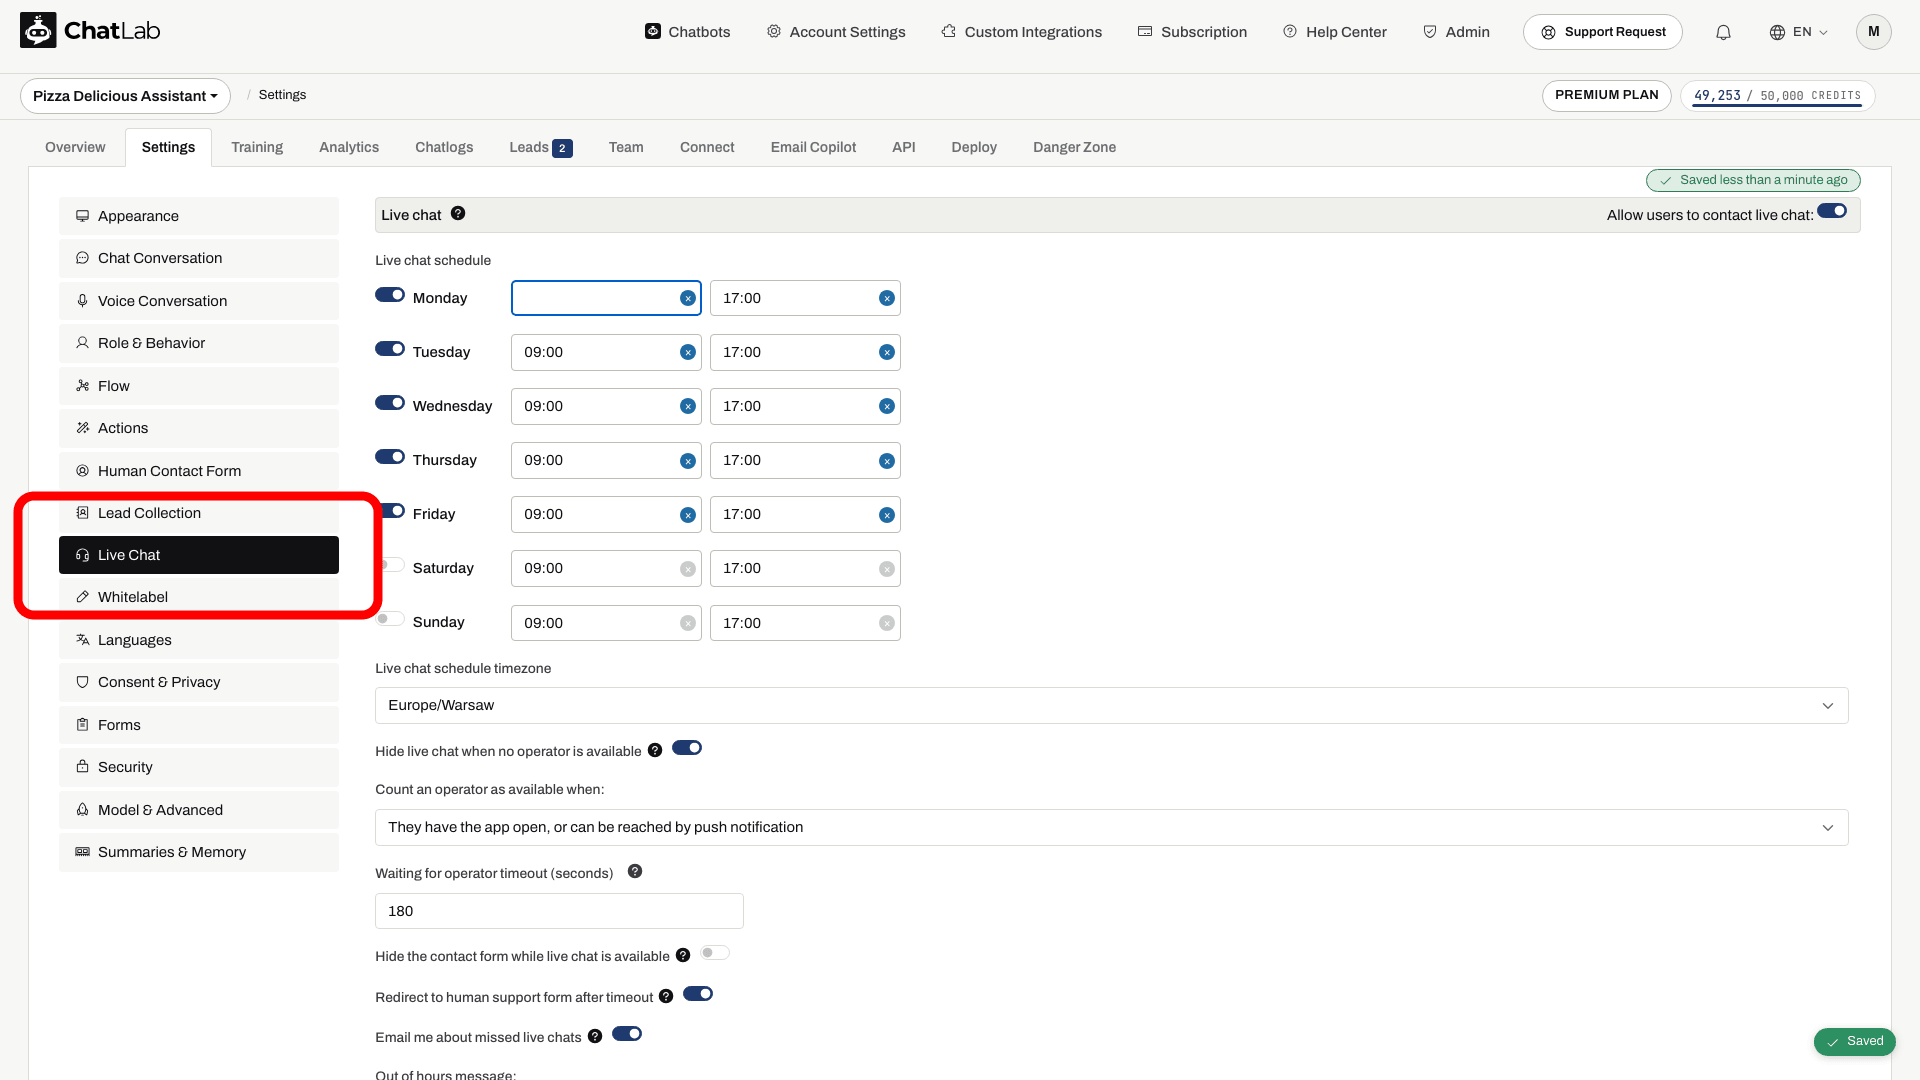
Where to find live chat settings
Select your chatbot, click the Settings tab, then select Live Chat in the left sidebar.
Enable live chat
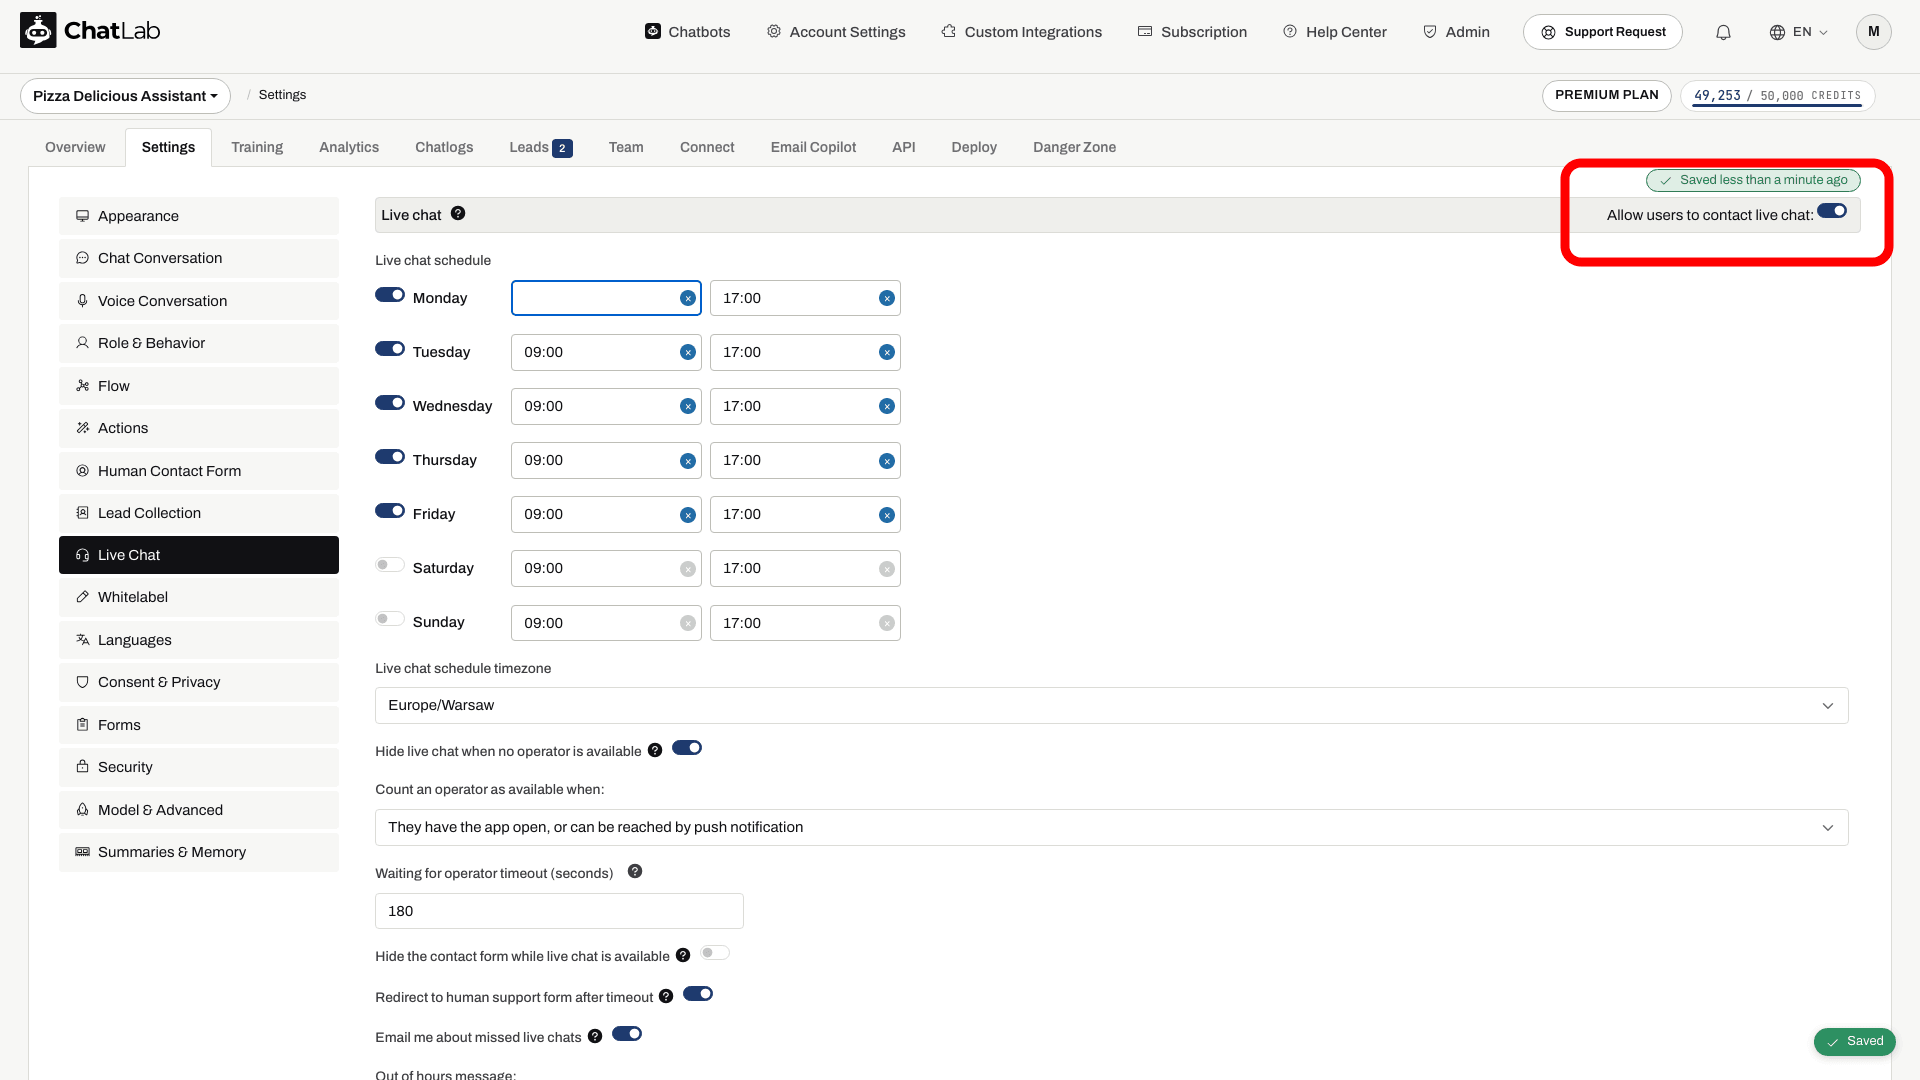
Toggle on Allow users to contact live chat at the top of the page. When enabled, the full configuration panel appears below.
The first time you turn the toggle on, a Live Chat Enabled confirmation dialog appears. Click Close to stay on the Live Chat settings, or click Configure Actions to jump straight to the bot's Actions settings, where you can fine-tune how the AI hands conversations over to a human.
All Live Chat settings save automatically as you change them - there is no separate save button on this page.
Availability schedule
Set which days and hours operators are available to take live chats.
- Day toggles - enable or disable each day of the week individually
- Time range - set the start and end time for each enabled day
- Timezone - select the timezone that your schedule is based on
The schedule controls when live chat can be offered. Operator-presence settings can further restrict availability during those hours. When an unavailable entry is shown, it uses the Out of hours message.
Operator availability
- Hide live chat when no operator is available - require a reachable operator in addition to the schedule.
- Count an operator as available when - choose They have the app open, or can be reached by push notification or They have the app open. Operators who disabled notifications for this bot do not count as available.
- Hide the contact form while live chat is available - offer live chat without the offline form alongside it. The timeout fallback can still show an enabled contact form.
- Email me about missed live chats - notify administrators when a session ends without an operator response.
Configure AI triggered live chat under Settings > Actions, or use Manage live chat actions, if you want the AI to offer a handoff. The action still depends on live chat availability.
Operator timeout
- Waiting for operator timeout (seconds) - how long to wait for an operator to join before timing out (30 - 600 seconds). Default is 180 seconds.
- Redirect to human support form after timeout - when enabled, visitors who time out waiting for an operator are shown the Human Support Contact Form (the Human Support Contact Form must be enabled separately for this to work).
Customizable messages
All text displayed to visitors during the live chat flow can be customized:
Schedule-related messages
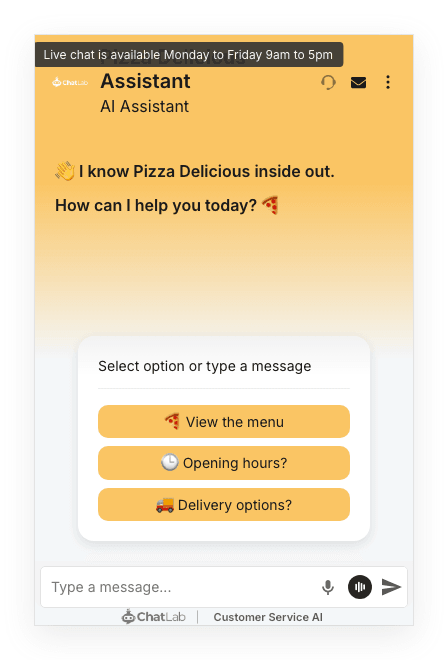
- Out of hours message - shown when visitors hover over the grayed-out live chat icon outside scheduled hours
- Live chat info message - tooltip shown when visitors hover over the active live chat icon during scheduled hours
Session messages
- Live chat start message - displayed when the visitor starts a live chat session
- Live chat end message - displayed when the live chat session ends
- Operator has joined label - shown when an operator joins the conversation
- Operator did not join in time label - shown if no operator joins within the timeout period
- Waiting for operator to join label - shown while the visitor waits for an operator
User identification
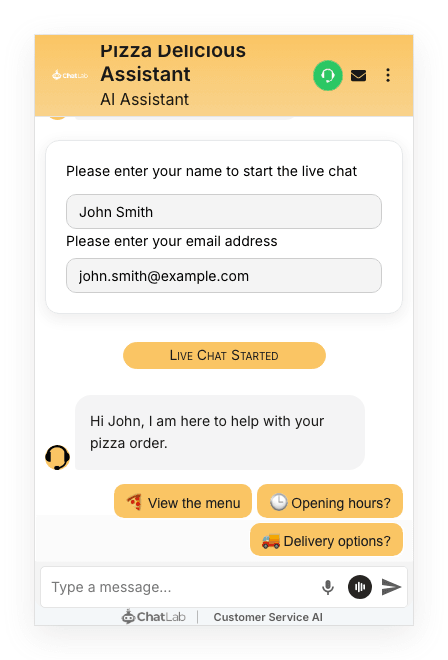
- Live chat name label - prompt asking the visitor for their name before starting
- Live chat email label - prompt asking the visitor for their email before starting
Close confirmation dialog
- Live chat close modal title - confirmation question shown when the visitor or operator ends the chat
- Live chat modal confirm label - text on the confirm button (e.g. "Yes, end chat")
- Live chat modal close label - text on the cancel button (e.g. "Continue chatting")
- Live chat close tooltip text - tooltip on the close/end button while live chat is active
How live chat looks to visitors
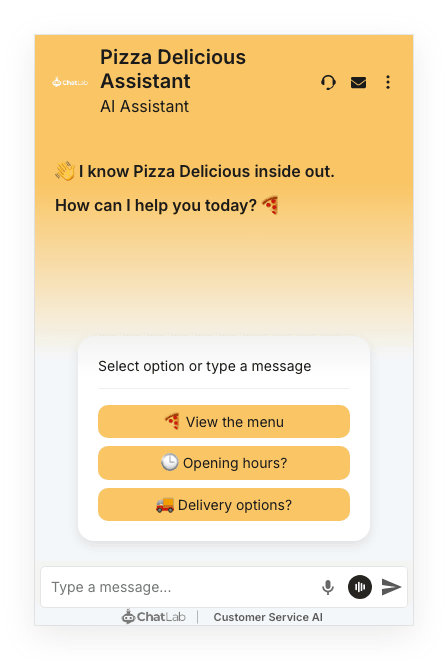
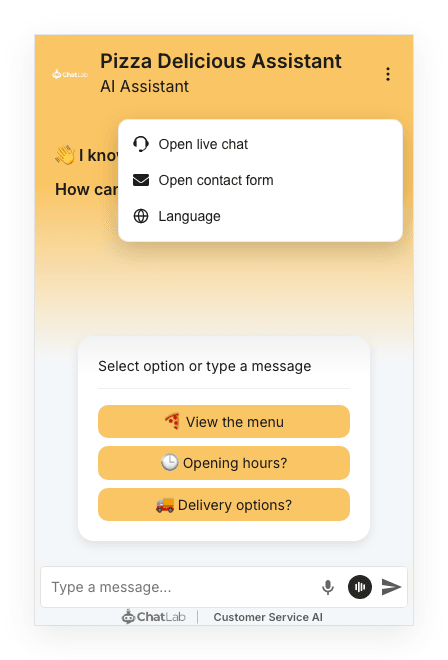
When live chat is enabled, visitors reach it from the chat widget header. Where exactly depends on the Header Actions layout in Settings > Appearance: with Separate icons a headset icon sits in the header next to the other enabled icons, and with Menu (dropdown) live chat becomes an entry in the header menu behind the three-dot icon, alongside the other menu entries such as Reset conversation and the language switcher when those are enabled. New chatbots use the menu; chatbots created before 2 September 2026 keep separate icons.
If the Special Welcome Screen is enabled, the Hide Live Chat option in Settings > Appearance decides whether live chat is reachable before the visitor's first message. See Welcome Screen.
With the menu layout the same actions live behind the three-dot icon:
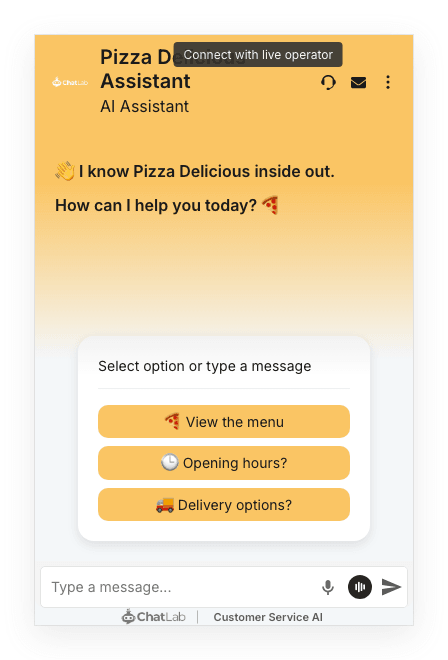
When live chat is available, hovering over the separate icon shows the live chat info message.
When unavailable, a visible separate icon is grayed out and hovering shows the out of hours message. Presence settings can hide the entry instead.
Live chat session flow
- The visitor opens live chat from the header during scheduled hours
- The visitor enters their name and email
- The "Live Chat Started" message appears and the visitor waits for an operator. The name and email they entered are shown in the conversation, so the operator sees who they are talking to without leaving the transcript
- When an operator joins, the "Operator has joined" message appears and real-time messaging begins
- Either party can end the session, which triggers the close confirmation dialog
If no operator joins within the timeout period, the visitor sees the "Operator did not join" message and is optionally redirected to the Human Support Contact Form.
Operator setup
Set your display name and avatar
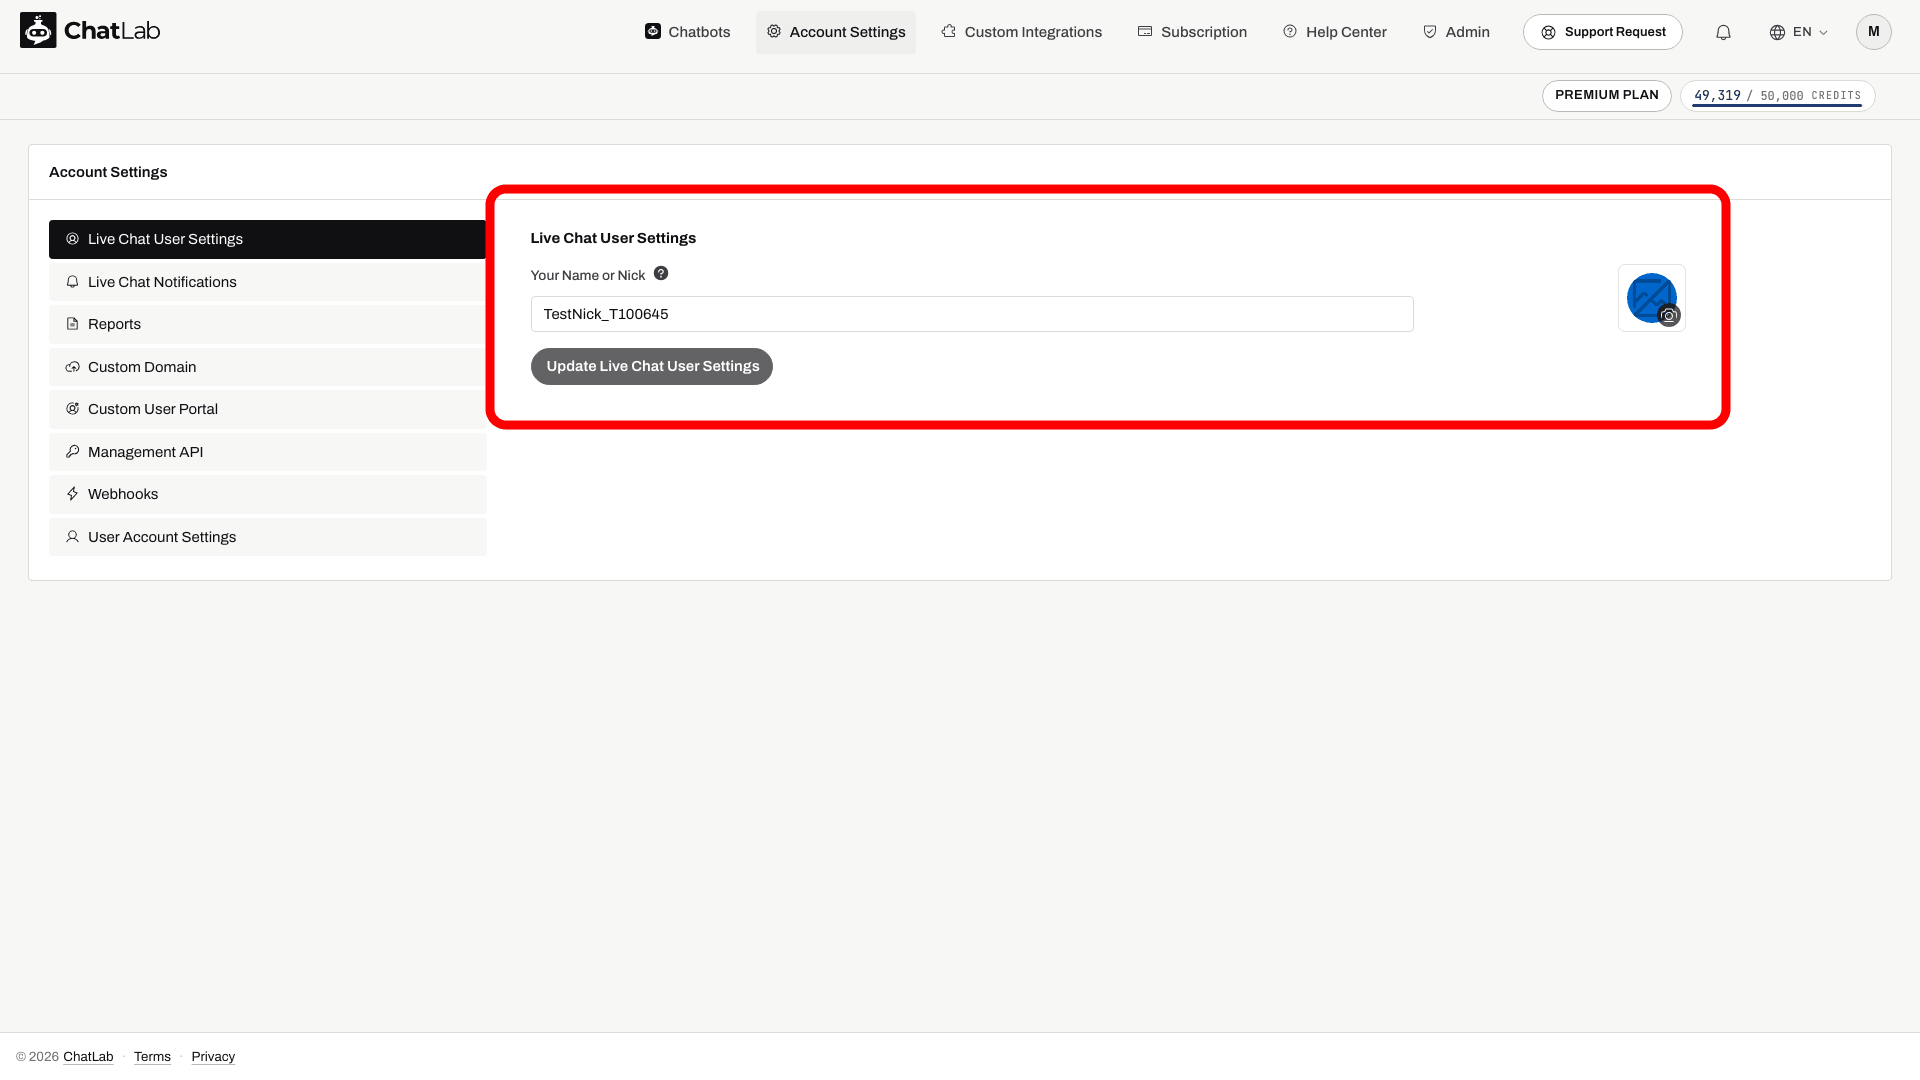
Go to Account Settings > Live Chat User Settings. Enter your name or nickname and optionally upload an avatar. Click Update Live Chat User Settings to save. These are displayed to visitors during live chat conversations and appear in the chatlogs history.
Configure notifications
Go to Account Settings > Live Chat Notifications.
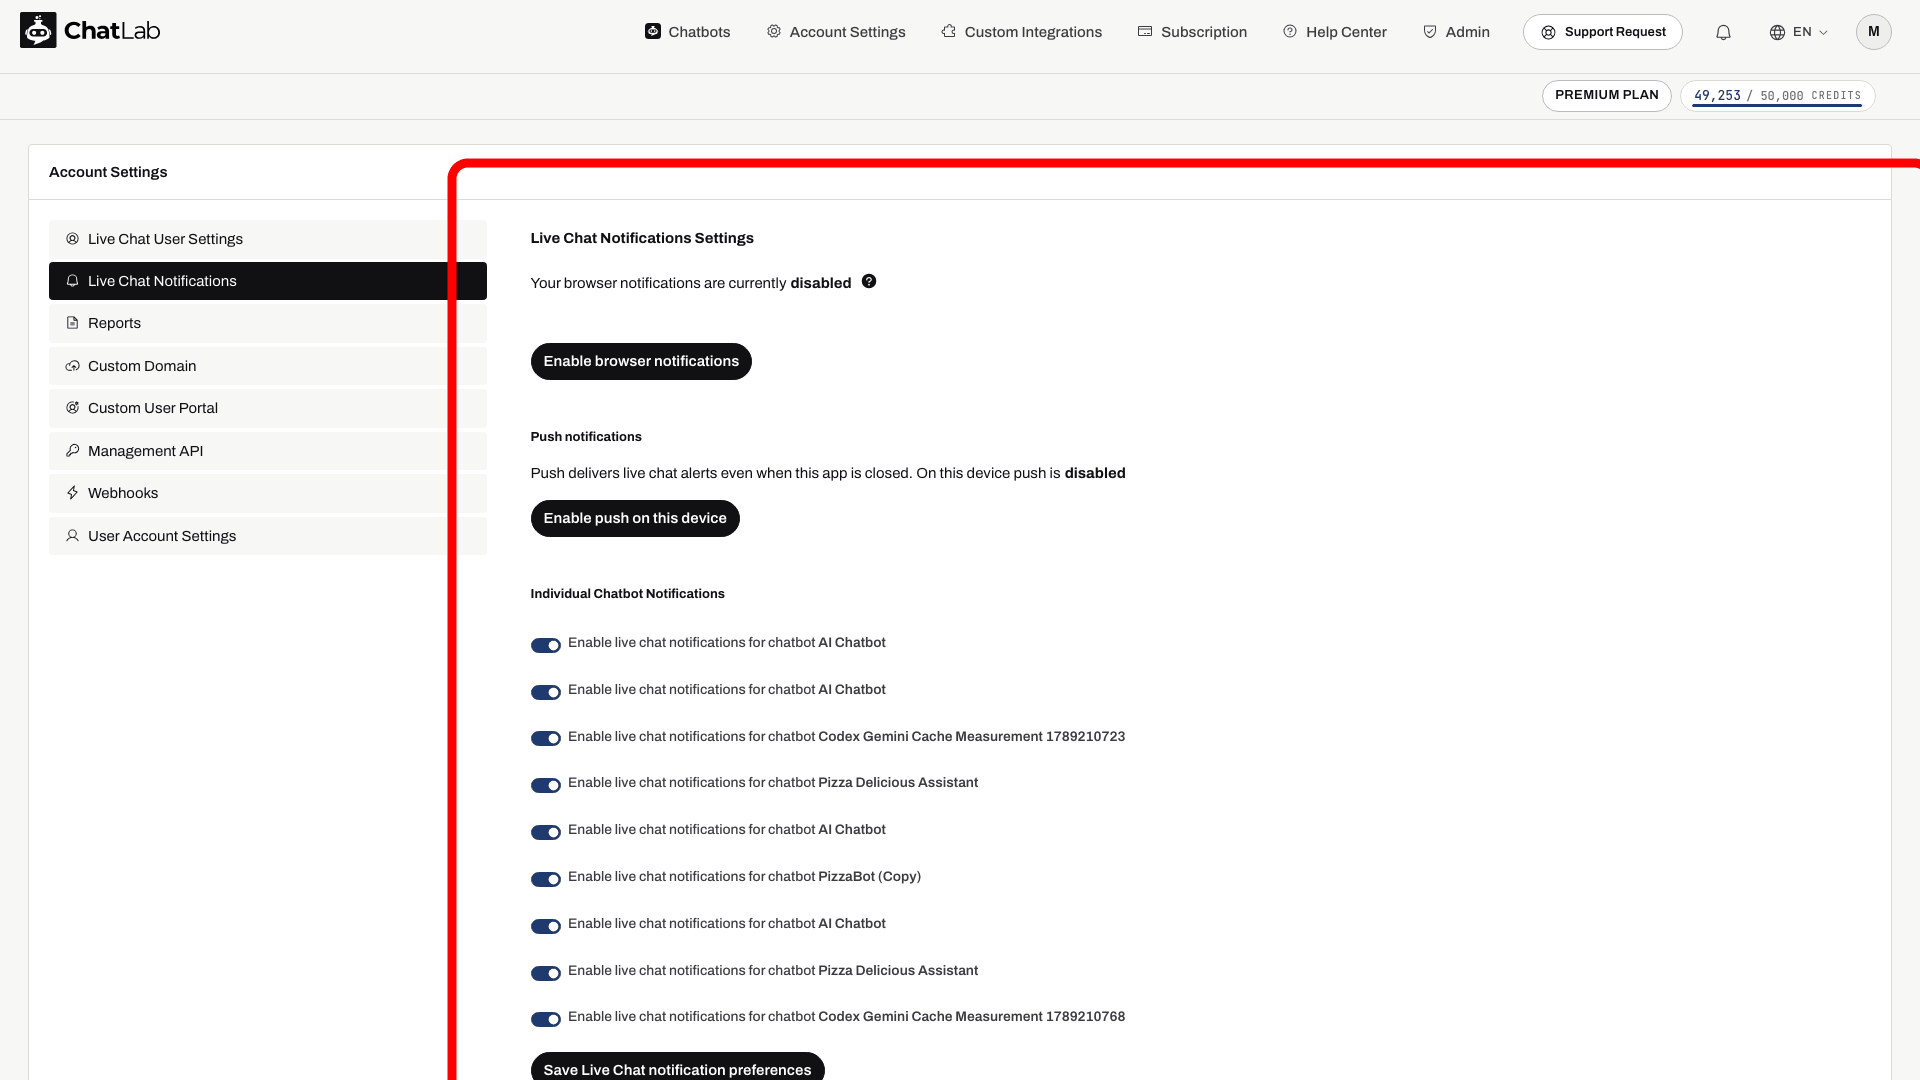
- Browser notifications - click Enable browser notifications to receive desktop alerts with sound when a live chat starts or a new message arrives. If your browser shows notifications as "disabled", click the button to grant permission.
Notification delivery depends on browser and operating-system permissions. For alerts when the app tab is closed, use Push notifications > Enable push on this device on the same page. Registered devices appear under Devices receiving push. Browser notifications alone are not the same as registering for push; see how browser push works.
- Individual Chatbot Notifications - toggle notifications on or off for each chatbot. This is useful if you want to delegate specific bots to certain operators.
Click Save Live Chat notification preferences after making changes.
Multiple operators
To have multiple operators handle live chats, share the chatbot with other team members via the Team tab. When a chatbot is shared with another user, that user automatically receives live chat notifications for it. Each operator can independently manage which chatbot notifications they receive in their own Account Settings. See Live Chat setup with multiple operators for details.
Test the handoff
After settings show Saved, test with a visitor browser and a signed-in operator. Request live chat during the configured hours, send an operator reply, verify it reaches the visitor and end the session. Also check the unavailable state and timeout fallback. See Managing incoming conversations for the operator steps.
Related articles
- Managing incoming Live Chat conversations - how to respond to live chats from the Chatlogs panel
- Live Chat setup with multiple operators - configuring notifications for teams
- Human Support Contact Form - the offline fallback when live chat is unavailable