Conversation Flow lets you design a conversation as a visual graph of stages. Each stage holds its own instructions for the chatbot, and the arrows between stages - called transitions - describe when the conversation should move from one stage to the next. After every visitor message the chatbot checks the current stage's transitions and follows the instructions of the stage the visitor is on.
It shines when a conversation should move through defined phases. A typical example: a greeting phase where the chatbot finds out what the visitor needs, then separate phases for answering questions about your offer, collecting contact details, or handling a complaint. Because the chatbot follows only the instructions of the current stage, it stays on-script through processes like lead qualification, bookings, returns or complaint handling instead of improvising - and it cannot jump ahead or mix phases together.
If your chatbot simply answers free-form questions from its knowledge base, you do not need a flow at all. The scenario you describe in Role & Behavior covers that case, and you can leave Conversation Flow disabled. Add a flow only when you need structured, multi-step behavior.
Where to find Conversation Flow
Select your chatbot and navigate to Settings > Flow.
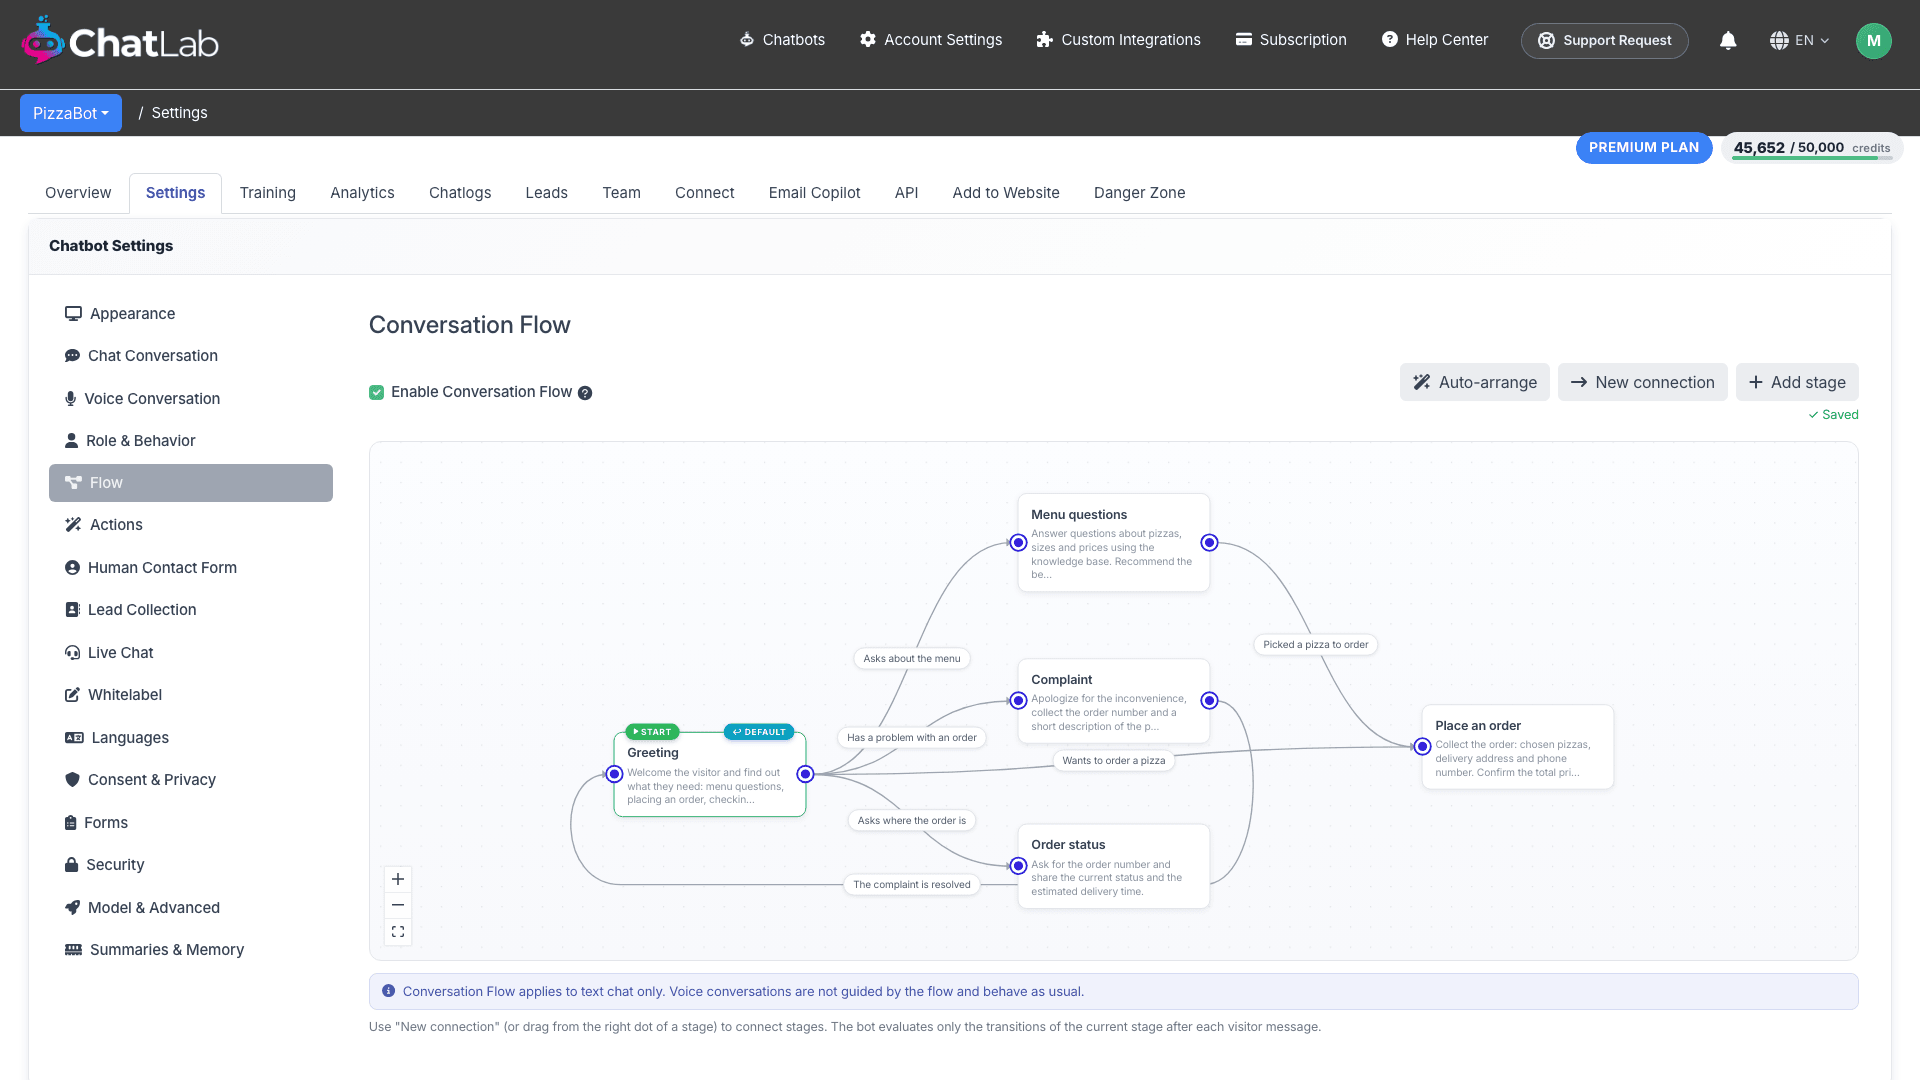
The page shows a node-graph editor: boxes are stages, and the labeled arrows between them are transitions with their conditions. The stage marked START is where every conversation begins. Here is a complete example flow for a pizza restaurant chatbot - the conversation starts at Greeting, then moves to Menu questions, Place an order, Order status or Complaint depending on what the visitor asks, and returns to Greeting once a complaint is resolved:
Enable Conversation Flow
Tick the Enable Conversation Flow checkbox to turn the flow on. While it is off the chatbot behaves exactly as defined in Role & Behavior, and the editor below is greyed out.
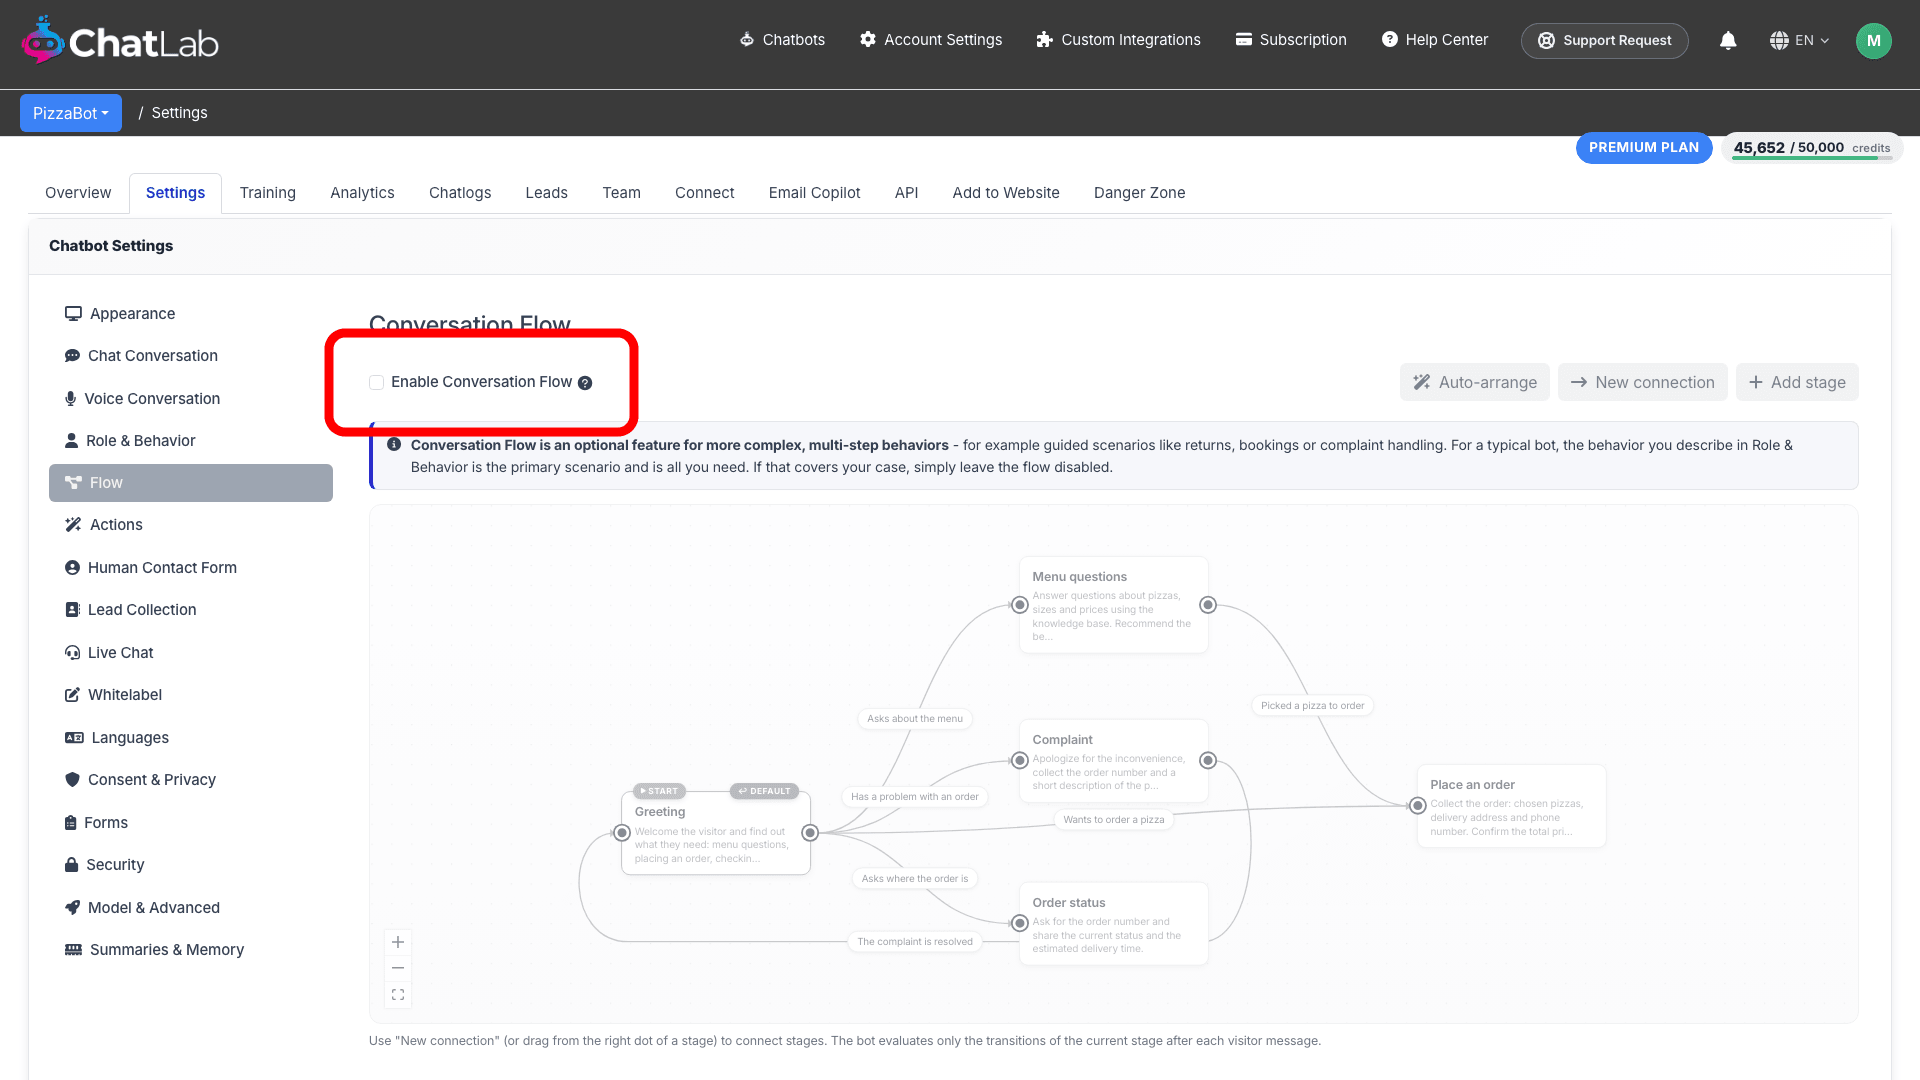
When enabled, the chatbot detects the current stage after every visitor message and follows that stage's instructions.
The first time you open the editor it shows a ready-made sample flow that illustrates how stages and transitions work. Edit it to make it your own, or click Clear sample to start from scratch.
Add a stage
Click Add stage to create a new stage. The new stage appears on the canvas and its editor opens on the right, with the stage name ready to be typed over:
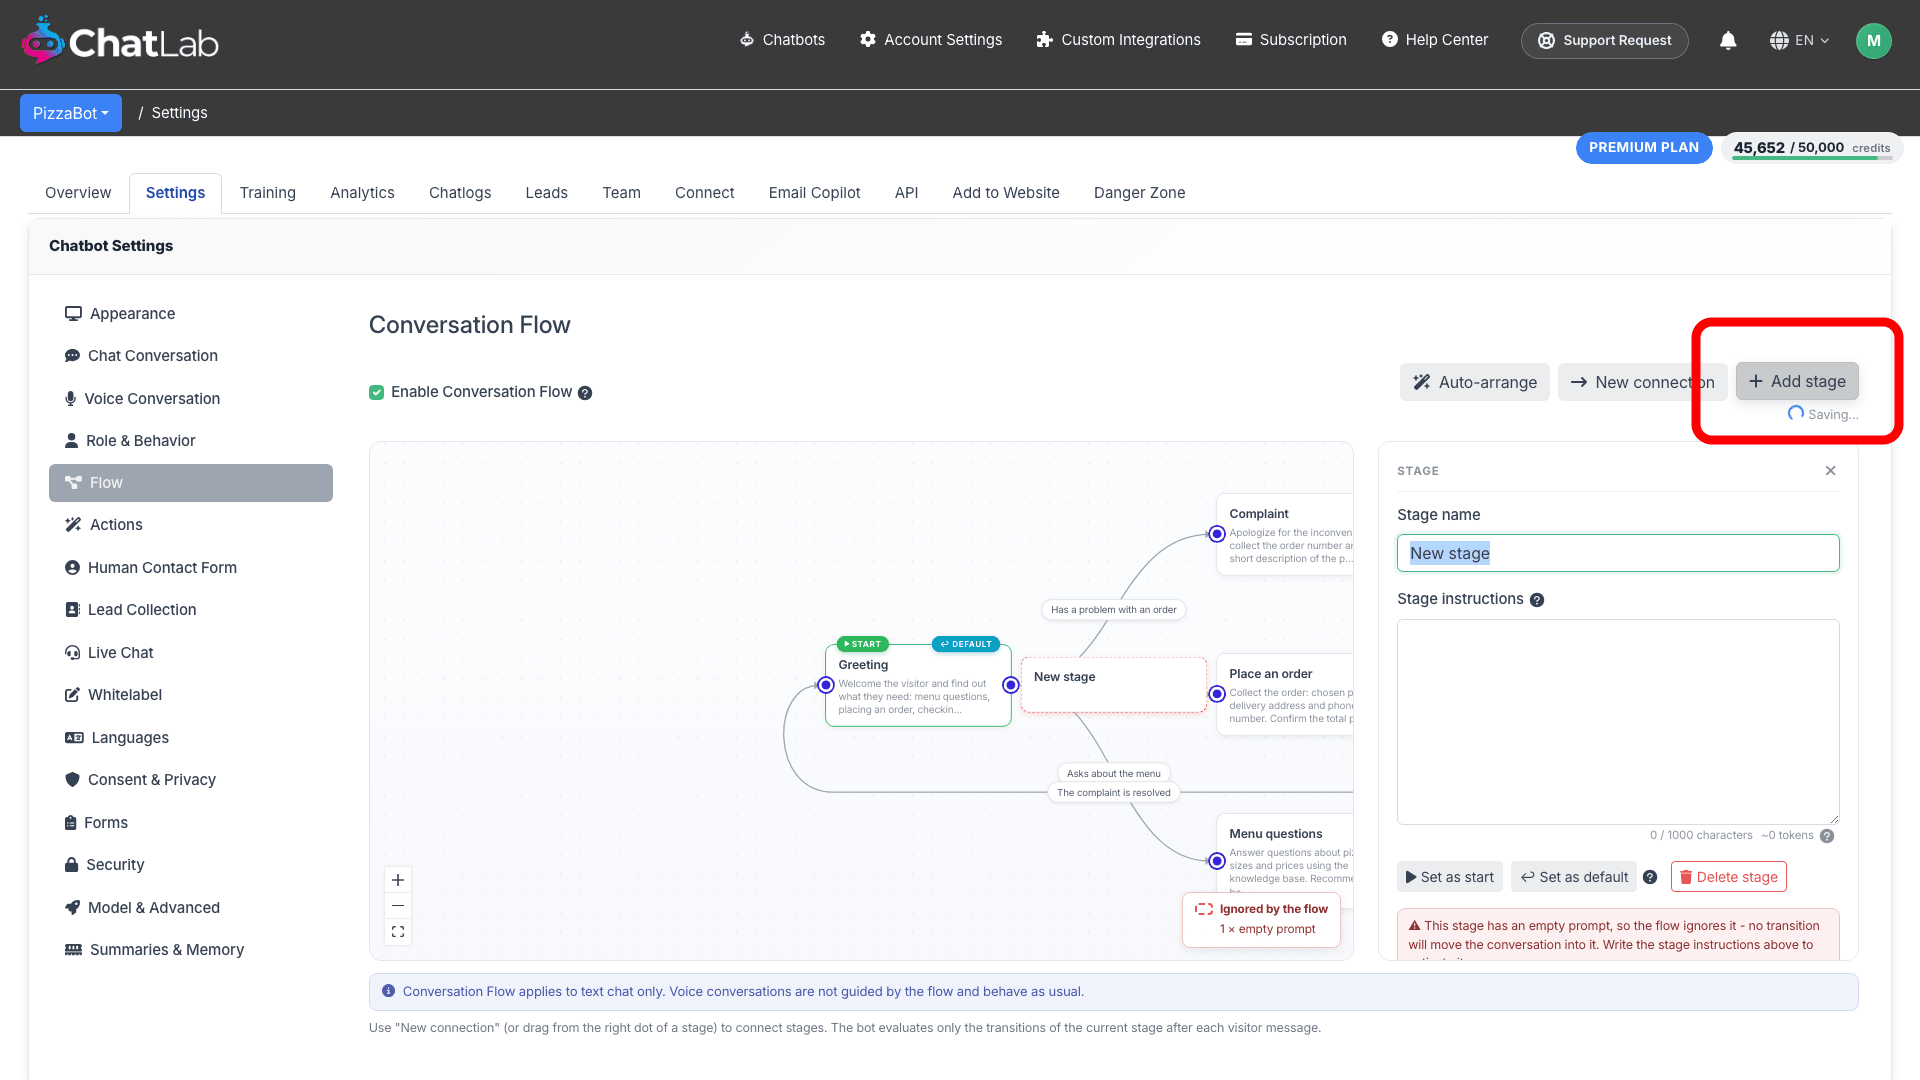
In the stage editor you can set:
- Stage name - a short label for the stage, shown on the node.
- Stage instructions - the guidance the chatbot follows while the conversation is at this stage. These instructions are added to the chatbot prompt only while the visitor is on this stage.
A stage with empty instructions is ignored by the flow - the editor greys it out and marks it "Ignored by the flow", as you can see with the freshly added stage above. Always fill in the instructions for stages you want the chatbot to use.
Start and default stages
- Start - the stage every conversation begins on. Select a stage and click Set as start to change it.
- Default - the stage the conversation returns to after it reaches a stage with no outgoing transitions and the chatbot has acted on its instructions. Select a stage and click Set as default to change it. Initially the start stage is also the default.
Connect stages with transitions
Transitions define when the conversation moves from one stage to another. You can create a transition in two ways:
- Click New connection, then click the source stage followed by the target stage.
- Drag from the dot on the right side of a stage to another stage.
When the transition is created, its editor opens on the right and you enter a Condition - a plain-language description of when the conversation should move along it. In the screenshot below a transition from Greeting to Order status has just been created with the condition "Asks where the order is", which now appears as the label on the arrow:
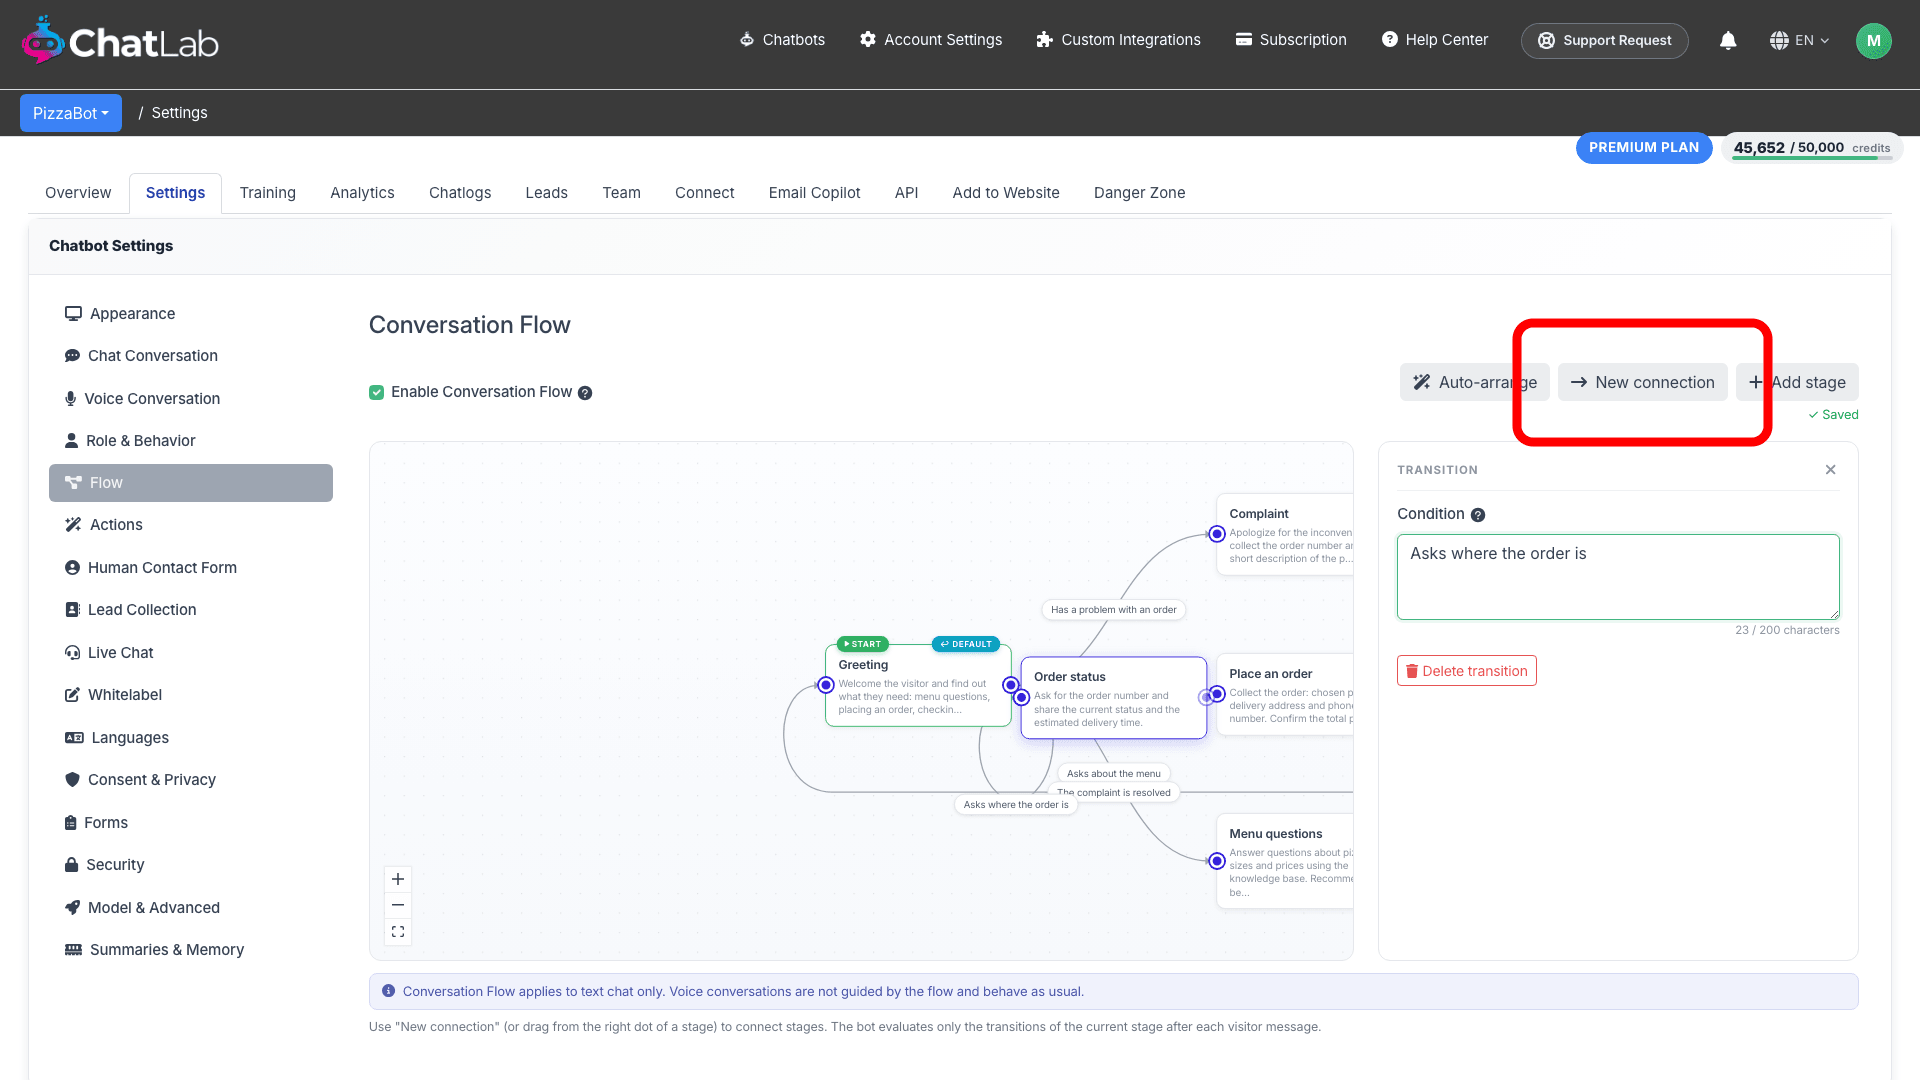
After each visitor message the chatbot evaluates only the transitions of the current stage and moves on when one of their conditions is met. A stage can have up to 4 outgoing transitions.
Islands and unreachable stages
Every conversation begins on the Start stage. For the chatbot to ever reach a stage, there must be a path of transitions leading to it from the Start stage. A stage that has no such path is an "island" - the chatbot can never enter it. The editor greys these stages out and warns that "This stage cannot be reached from the Start stage". Connect the stage into the flow to activate it.
A stage with an empty prompt is skipped by the flow - the chatbot never moves the conversation into it. Because of this, any stage that can only be reached through an empty-prompt stage is also unreachable until you fill in the instructions.
After building a flow, check that there are no greyed-out islands and no empty stages, so that every stage is reachable from Start.
Limits
Keep these limits in mind when designing a flow:
- A flow can have up to 15 stages.
- A stage name can be up to 60 characters.
- Each stage's instructions can be up to 1000 characters at the default 8k chat context size. If you raise the bot's chat context size to 16k or 32k (Settings > Model & Advanced), the per-stage limit increases to 6000 characters.
- Each stage can have up to 4 outgoing transitions.
- Each transition condition can be up to 200 characters.
Arrange and zoom the graph
- Auto-arrange - automatically lays out the stages left to right for a tidy graph.
- Zoom controls - use the plus, minus and fit-to-view buttons in the corner of the editor to zoom in and out or fit the whole graph to the screen.
Saving
Changes are saved automatically - a "Saved" confirmation appears under the toolbar. If a transition is still missing its condition, or a stage is missing a name, the editor shows a short message instead and saves once the issue is fixed.
Text chat only
Conversation Flow applies to text chat only. Voice conversations are not guided by the flow and behave as usual.