You don't need a native integration to train a capable chatbot for your online store. With website scraping alone - configured properly - ChatLab can answer detailed questions about your products, shipping, returns and policies.
This guide shows the recommended setup: two separate trainings (informational pages and your product database) and the two levels of filtering that keep each one clean.
Integration vs. scraping - what each gives you
- Scraping (no integration) - a static snapshot of your pages. Great for product descriptions, specifications, FAQs, shipping and return policies, and general store information. It does not know live stock or order status.
- Integration - queries your live store in real time: product search in your current catalog, up-to-date pricing and availability, and order status lookups.
The best results come from combining both. If you can't enable an integration, a well-configured scrape is a strong baseline.
If your store later connects a supported e-commerce integration (WooCommerce, Shopify, PrestaShop and others), its live catalog appears separately under Training > E-commerce catalog, on the Products and Categories tabs. That catalog is synced from the integration - it is not the same as the scraped pages described here, which remain a static snapshot.
Where to find the filtering settings
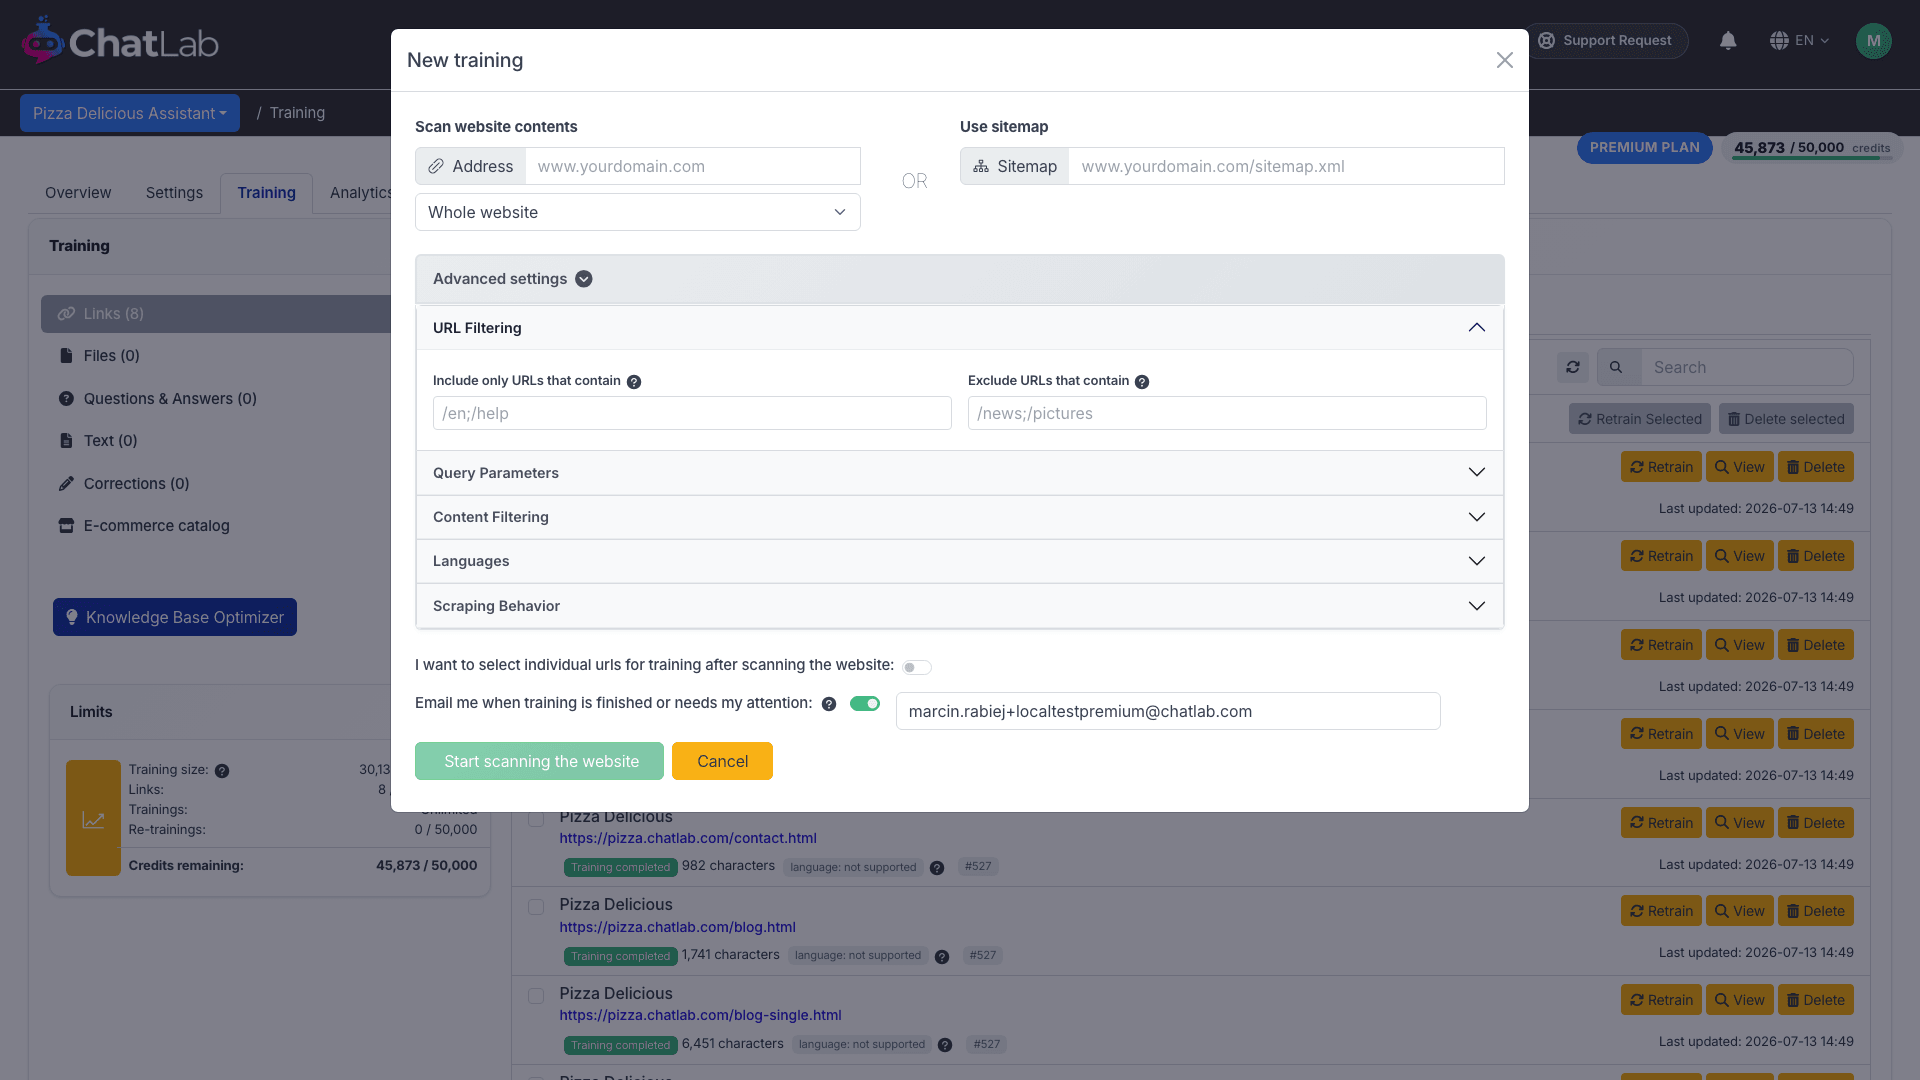
Navigate to Training > Links, click Add New Training: Website, then expand Advanced settings. Inside you'll find the accordions used throughout this guide: URL Filtering (Include only URLs that contain / Exclude URLs that contain), Query Parameters, Content Filtering and Scraping Behavior.
The two levels of filtering (this is the key concept)
ChatLab gives you two independent levels of control in a website training's advanced settings. They are easy to confuse, so keep them separate in your mind:
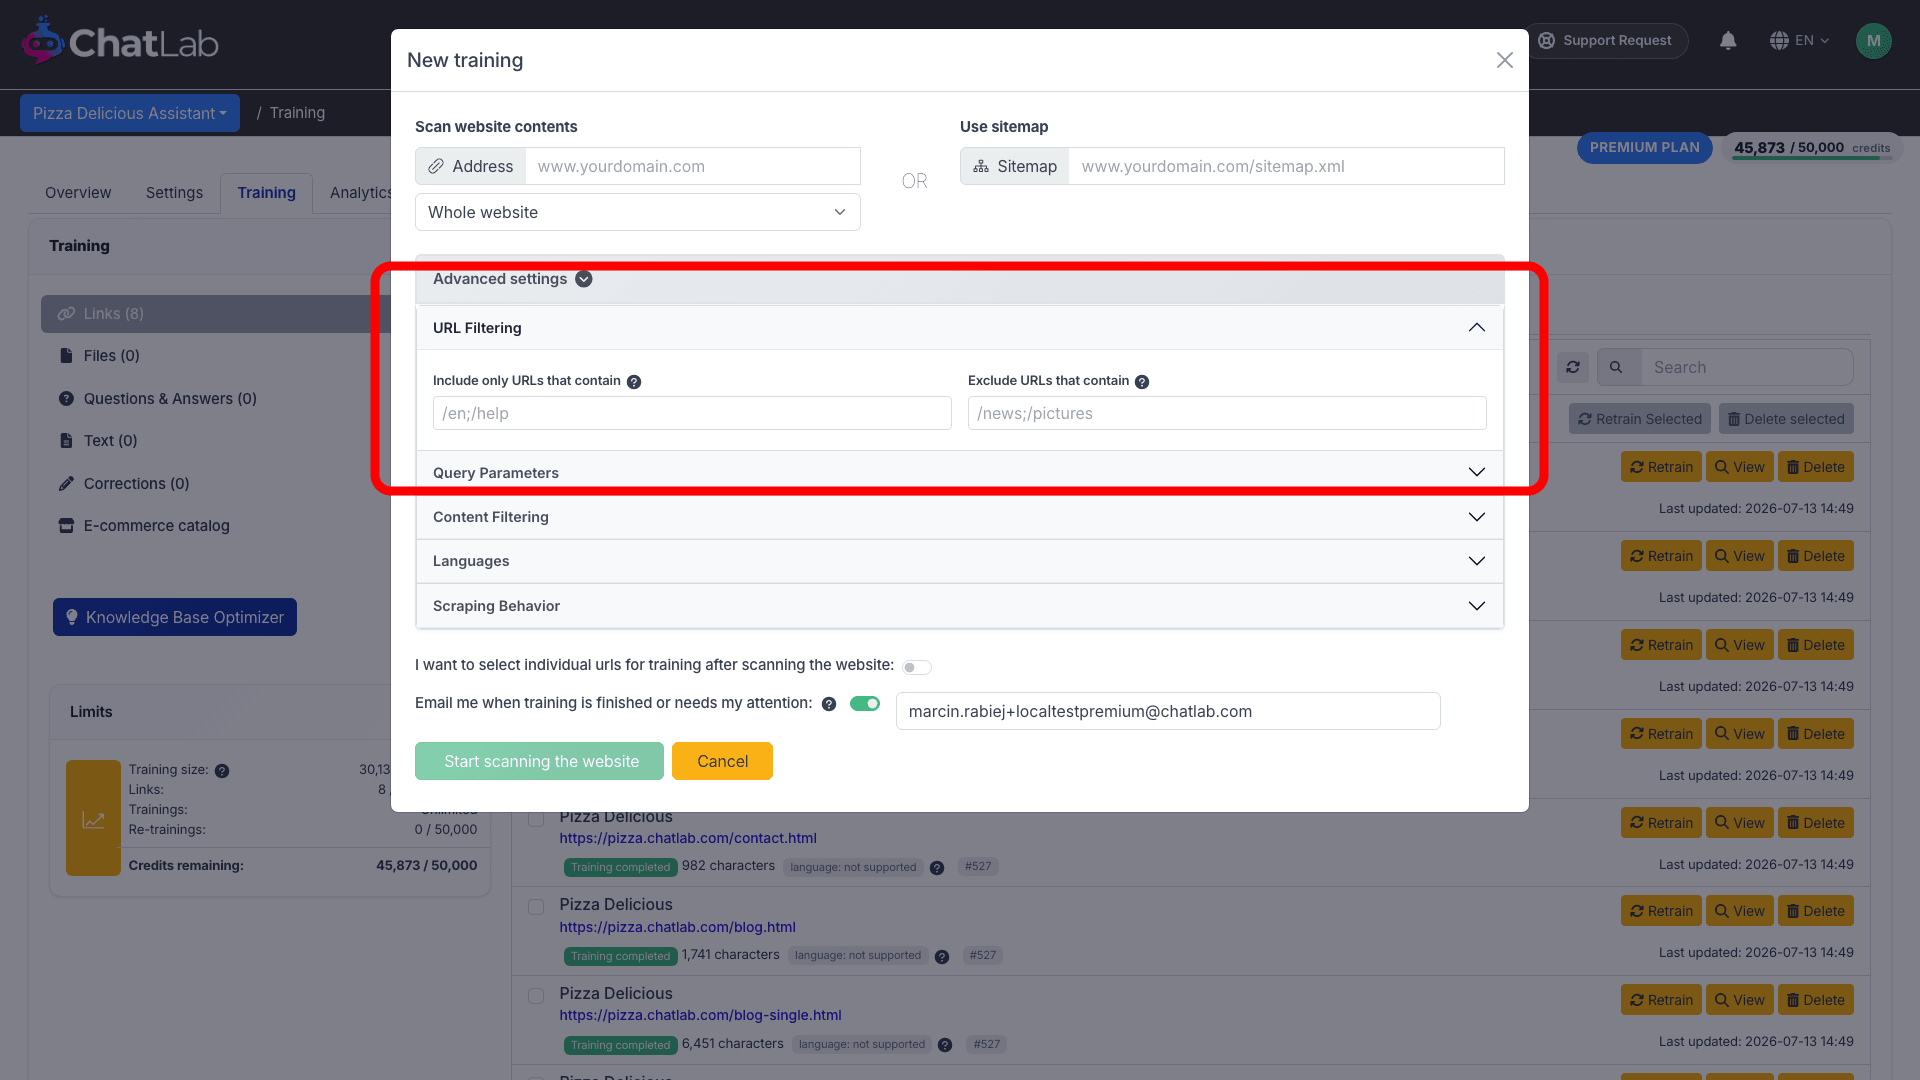
- URL filtering - which pages enter training. Decides which addresses the
crawler keeps. Set with Include only URLs that contain and Exclude URLs that
contain (URL substrings, semicolon-separated, e.g.
/product;/produkt). - Element filtering - which parts of each kept page become content. Applied
after URL filtering, only to the pages that passed it. Set with Include element
IDs and Exclude element IDs (CSS selectors:
#idfor IDs,.classnamefor classes, semicolon-separated, e.g..product-description;#tab-description).
Think of it as a funnel: URL filtering picks the pages, then element filtering trims each page down to the valuable content.
Keep less, but more valuable content
RAG chatbots work best when each trained chunk is focused. On a product page, the product's own description is valuable - the surrounding menus, footers, "related products" and upsell blocks are noise that dilutes retrieval and burns training characters. Train on the product content only.
Set up two separate trainings
Splitting your store into two website sources keeps each one clean and easy to tune. Each training uses its own URL filtering (level 1) and element filtering (level 2).
1. Informational pages
Goal: keep the pages that explain your business (About, Contact, Shipping, Delivery, Returns, Warranty, Payment, Privacy, FAQ).
- Level 1 - URL filtering: in Exclude URLs that contain, list your product and
category patterns, e.g.
/product;/products;/shop;/category;/collections. This keeps product pages out of this training. - Level 2 - element filtering: usually light here. Optionally use Exclude element
IDs to drop the global header/footer, e.g.
header;footer;#navigation. - Prefer training from your sitemap for predictable coverage.
2. Product database
Goal: one focused training over product pages, carrying only each product's own content.
- Level 1 - URL filtering: in Include only URLs that contain, list only your
product patterns, e.g.
/product;/products. Everything else is skipped. - Level 2 - element filtering: this is where you keep only the product content. Use Include element IDs to capture the product information block, and/or Exclude element IDs to drop store chrome (header, footer, navigation, related products, upsells, sidebars). See the per-platform selectors below.
Per-platform element IDs (level 2 - starting points)
These are values for the Include element IDs and Exclude element IDs fields (level 2). They are CSS selectors, semicolon-separated. Selectors vary by theme - verify against your own store and adjust. The pattern is always the same: include the product information block, exclude global chrome and cross-sell blocks.
WooCommerce
- Include element IDs:
.summary.entry-summary;.woocommerce-product-details__short-description;#tab-description - Exclude element IDs:
header;footer;.related.products;.up-sells;.cross-sells;#secondary
Shopify
- Include element IDs:
.product__info;.product-single__description;.rte - Exclude element IDs:
header;footer;.announcement-bar;.product-recommendations
PrestaShop
- Include element IDs:
.product-information;.product-description;#description - Exclude element IDs:
#header;#footer;#_desktop_top_menu;.block-categories;.featured-products;#search_filters
Magento / Adobe Commerce
- Include element IDs:
.product-info-main;.product.attribute.description;#description - Exclude element IDs:
.page-header;.page-footer;.nav-sections;.block.related;.block.upsell;.sidebar
Shoper
- Include element IDs:
.productfull;.productfull__description;#product-description - Exclude element IDs:
.header;.footer;.navbar;.mainmenu;.product-suggested;.basket
CS-Cart
- Include element IDs:
.ty-product-block;.ty-product-feature;.ty-wysiwyg-content - Exclude element IDs:
.ty-header;.ty-footer;.ty-menu;.ty-product-block__advanced-list;.ty-mainbox-title
IdoSell / IAI
- Include element IDs:
#projector_longDescription;.product_description;#detail_atributes - Exclude element IDs:
#header;#footer;#menu;.suggestedProducts;.breadcrumb
OpenCart
- Include element IDs:
#tab-description;#product .description;.product-description - Exclude element IDs:
#header;#footer;#menu;#column-left;#column-right;.related
BigCommerce
- Include element IDs:
.productView-description;.productView-details;#tab-description - Exclude element IDs:
.header;.footer;.navPages;.productCarousel;.sidebar
Shopware
- Include element IDs:
.product-detail-name;.product-detail-description;.product-detail-description-text - Exclude element IDs:
.header-main;.footer-main;.nav-main;.product-detail-cross-selling;.cms-element-product-slider
Wix Stores
- Include element IDs:
[data-hook="description"];[data-hook="product-description"];[data-hook="info-section"] - Exclude element IDs:
header;footer;[data-hook="header"];[data-hook="related-products"]
Other platforms (osCommerce, Abicart, Selly, RedCart, AtomStore, and more)
The same principle applies: open a product page, find the container holding the product name, description and attributes, put that in Include element IDs, and put the global header, footer, navigation menus, sidebars and "you may also like" blocks in Exclude element IDs.
Tips
- Choose an AI model suited to e-commerce reasoning in the bot's settings.
- Re-train periodically so descriptions stay current (scraping is a snapshot).
- Keep informational and product trainings separate so you can tune the URL and element filters of each without affecting the other.